Category: Stencil

  • With Fall in the Air lets Make a Sunflower Round

    With Fall in the Air lets Make a Sunflower Round

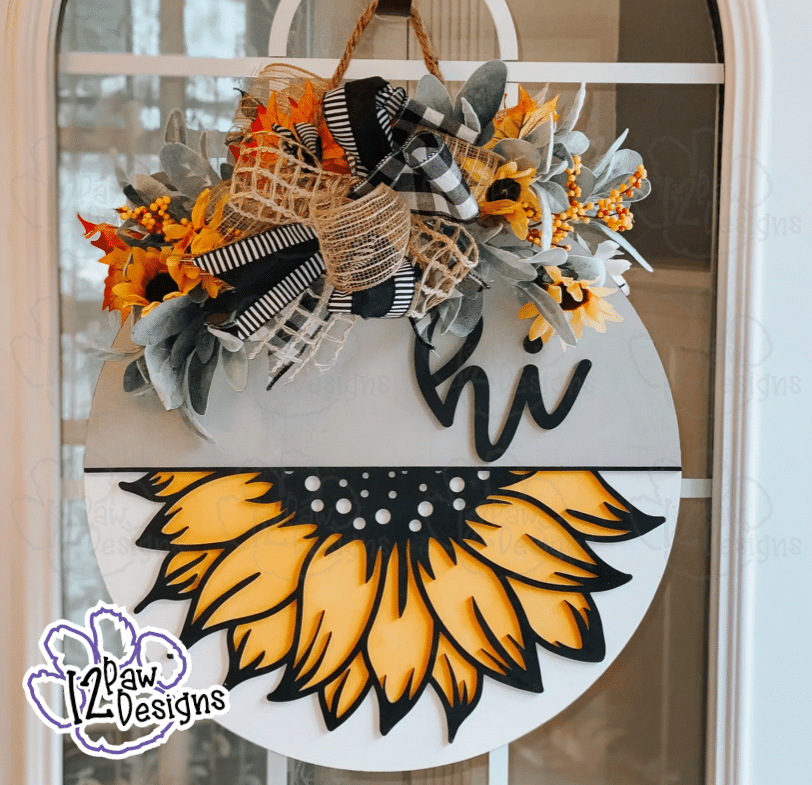
    Sunflower Round, Sunflower, Sunflower Svg, Cricut Silhouette Glowforge, Svg/Dxf/Png/Eps, Digital Download, Cut File

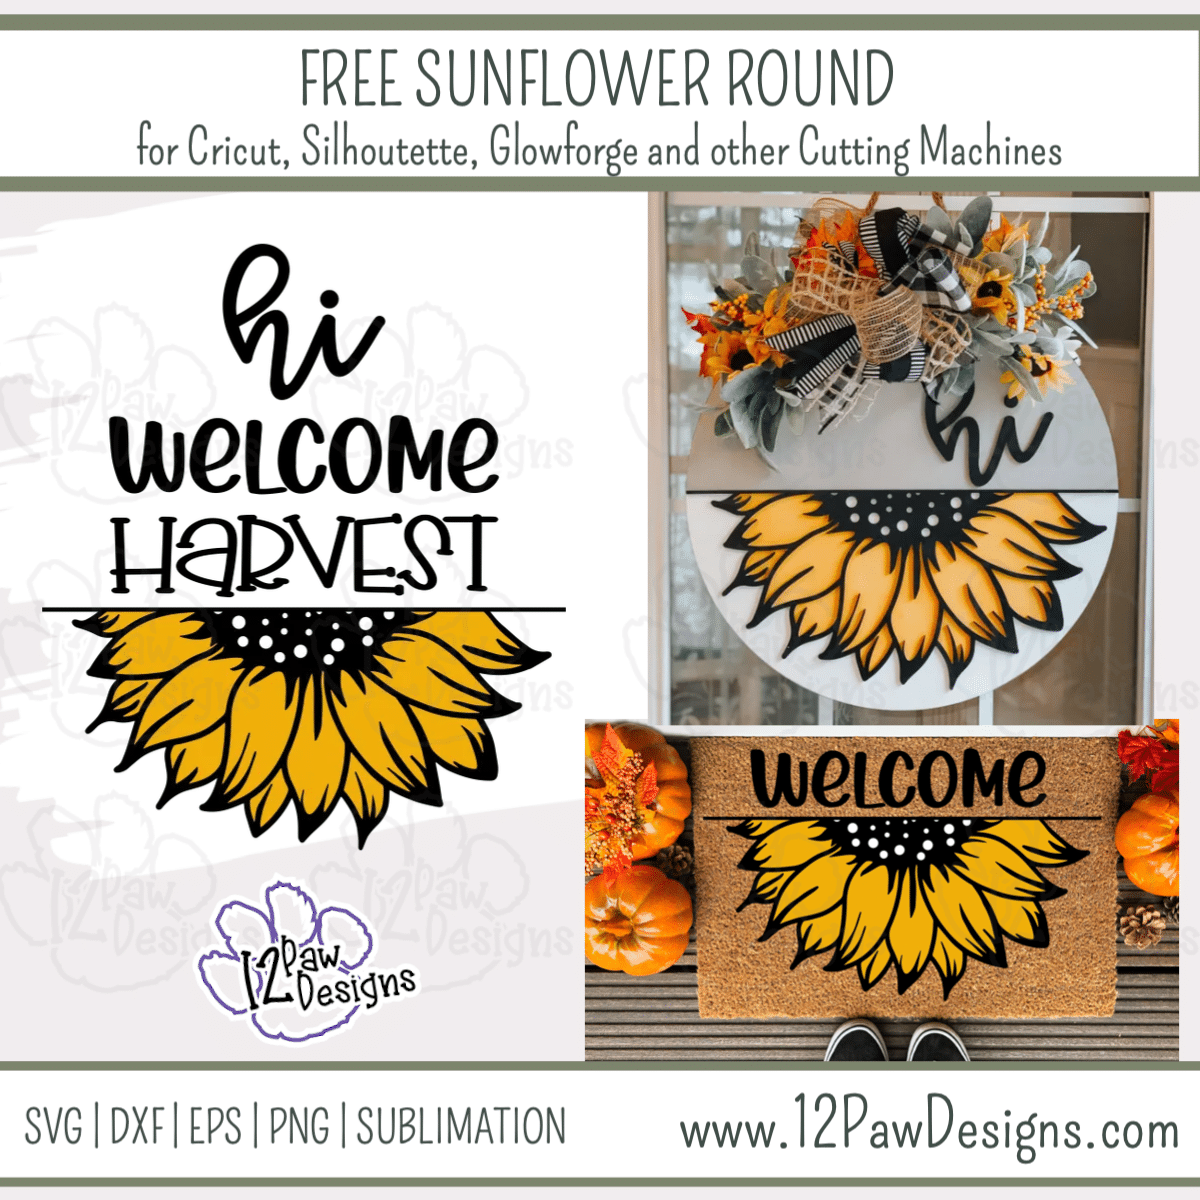
    Fall is in the air so I design a pretty Sunflower Round. The Sunflower SVG has three different words you can use. You can also leave the words off and just use the Sunflower.

    I made my round with a mix of paint and a wood overlay of the Sunflower outline. However, this can be done with all paint using a stencil or vinyl for the words and sunflower. This is such a versatile project. This would be pretty on a door mat, sign, tote bag, etc. So many options.

    This weeks FREE Sunflower SVG/cut file can be found in the Freebie Library. File number is 51 (remember the password is always in the bottom of your weekly email from me). I have also created a video tutorial along with some quick directions below on how I made this beautiful Sunflower Round. I can’t wait to see your projects!!

    Introducing my Facebook Craft Group!!!

    I am so excited to let you know that I started a Facebook Craft Group. The goal of the group is to welcome ALL crafters. I craft in different mediums, styles and type. Wood, vinyl, paint, sublimation, tumblers, etc. No matter what you do this group is for you. Come and join us!!! Click the link! Crafty Paws for All Cricut Silhouette Glowforge Sublimation and More

    Sunflower Round Supply List

    • Cutting Machine and software
    • Sunflower Round (click on the link)
    • Masking Vinyl (like oramask or starmask or mylar
    • Prepped MDF board – I cut the sunflower outline overlay on the Glowforge. However, vinyl works too!!!
    • Stain or paint of Choice – I painted the round grey and white. The sunflower I used black and then yellow for sunflower
    • Sand paper or sanding block – to prep your round
    • 18″ Round or round to your size
    • Painters tape
    • Brushes and Make-up sponges – get my from the Dollar Tree
    • Ribbon and floral to finish your round
    • Staple gun
    • Weeding tools, scissors, cutting knife, transfer tape, etc

    Video Tutorial – Sunflower Round

    Here are the steps I took to make the Round

    Step 1 – Prep your board by sanding it. Find your board center and then use painters tape to mark your line. I then painted the one half grey. I had to mix paint for my grey. I didn’t have anything light enough. I used a heat gun to speed of drying. Once the grey is dry, tape that side off and use white to do the bottom half.

    Step 2 – While everything is drying(if needed). Open the SVG file in your cutting software (note: if you have the free version of Silhouette studio you will need the DFX files). Size the sign according to the board you will be working with. Use your masking vinyl or mylar to cut out the sunflower petals. Then cut your sunflower outline in either wood or vinyl.

    Step 3 – Once your stencil or mylar is cut do your weeding. Remember you are weeding the parts you will be painting. Mylar is great for making reusable stencils. If you are using vinyl for your sunflower outline weed that now and use transfer tape on the vinyl.

    Step 4 – Lay your stencil or mylar on your round. Since I was using a wood over lay I used it to help me line everything up. If used vinyl you can do the same thing, however, use a piece of parchment paper. Remove the backing to the vinyl and then lay it on the parchment so it doesn’t stick. Line everything up and apply the stencil mask or mylar. Note: you can paint outside your lines, I know…it’s ok on this one to go outside the lines. The vinyl or wood will cover it.

    Step 5 – Now paint the sunflower leaves. I used a make up sponge. TIP: Light paint and light handed goes a long way. If you put too much paint on the sponge or are too heavy handed you will cause bleeding. I went over my leaves a couple of times. It did not take any extra time and it dries faster this way.

    Step 6 – I set my round to the side and painted my Sunflower outline and Hi black.

    Step 6 – I then applied the wood to the top of the round. If things don’t line totally back up?? It’s ok. You can always touch up with a little paint. Nobody will notice. I had to “touch” up a few spots myself.

    Step 7 – Now to make a bow and add your floral. I used 4 kinds of ribbon for the bow. I cut 2 strips of each about 15″ long. You can watch the video for this portion. I also had a piece of floral wire read to tie off the bow. You could also use a zip tie. So take each piece of ribbon and fold two thirds of it into a loop. Leave a third hanging. Pinch where the loop meets. Then do the same with the next piece of ribbon. Do this until all 8 pieces are looped and pinched in your hand. It should look like a ribbon bouquet at this point. Now take your wire or zip tie and tie it off where you have it pinched. Now fluff. I pulled the tails out to the side and fluff the loops. NOTE: If you dont want to do a pow you could use a larger sunflower in its place and fill in the florals more.

    Next take your florals and your staple gun and apply to the round. I used ¼” staples. You are probable wondering why staples vs glue, that is due to heat. I have had florals fall off and I am not a light handed gluer either. I have a North facing door so the heat can get crazy. You could do the glue and then add the staples. If just makes sure that if you are selling your round you dont have to worry about fall off. Once I had my florals I added the bow.

    Step 8 – Look how pretty!!!! Enjoy!

    How to get your FREE Files

    To get your FREE file please go to my Freebie Library, sign in (don’t worry if you are not a member yet, sign up and the password will be emailed to you!!! Also, remember I include it in the bottom of the weekly email too! 😉 ) and download Number 51 – Sunflower Round. The downloaded file will have multiple file options SVG, PNG, DXF (If you have the free version of Silhouette Studio you will need this file) and EPS. 

    I really hope you enjoyed the sunflower round. Remember a ? Pinterest pin would be so appreciated! I can’t wait to see what you create. Please share with me. You can come back here and add a comment or add one to Facebook too!
    Sunflower Round, Sunflower, Sunflower Svg, Cricut Silhouette Glowforge, Svg/Dxf/Png/Eps, Digital Download, Cut File
    Sunflower Round, Sunflower, Sunflower Svg

    Also, please check out my shop. I am always adding new designs.
    https://12pawdesigns.com/shop/

    If you have any questions or run into an issue please let me know!!!

    Lorri?
    Lorri@12PawDesigns.com

    Let’s Conntect!

    Want to connect more with 12 Paw Designs???:
    • Website: https://12pawdesigns.com
    • FB Page: https://www.facebook.com/12pawdesigns/
    • FB Group: https://www.facebook.com/groups/809334459761115/ – Crafty Paws for All Cricut Silhouette Glowforge Sublimation and More
    • Instagram: https://www.instagram.com/12pawdesigns/
    • Pinterest: https://www.pinterest.com/12PawDesigns

    DO NOT resell any of the files as digital download or any other form.
    DO NOT claim the files as your own.
    DO NOT modify and resell the files in any form.
  • The Football Shirt BLEACHing Report!

    The Football Shirt BLEACHing Report!

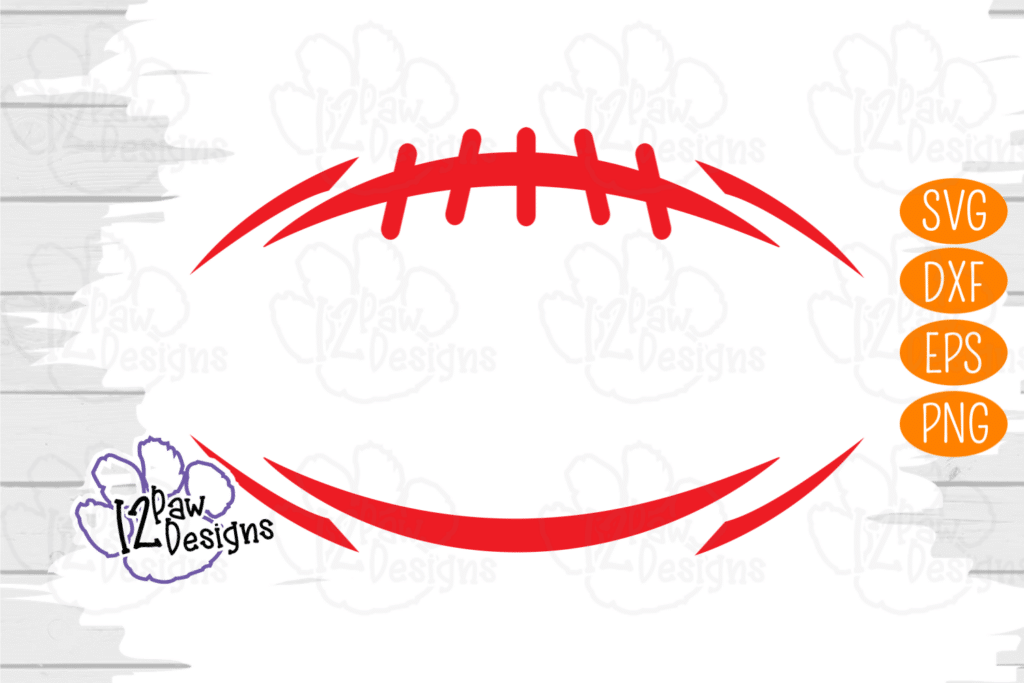
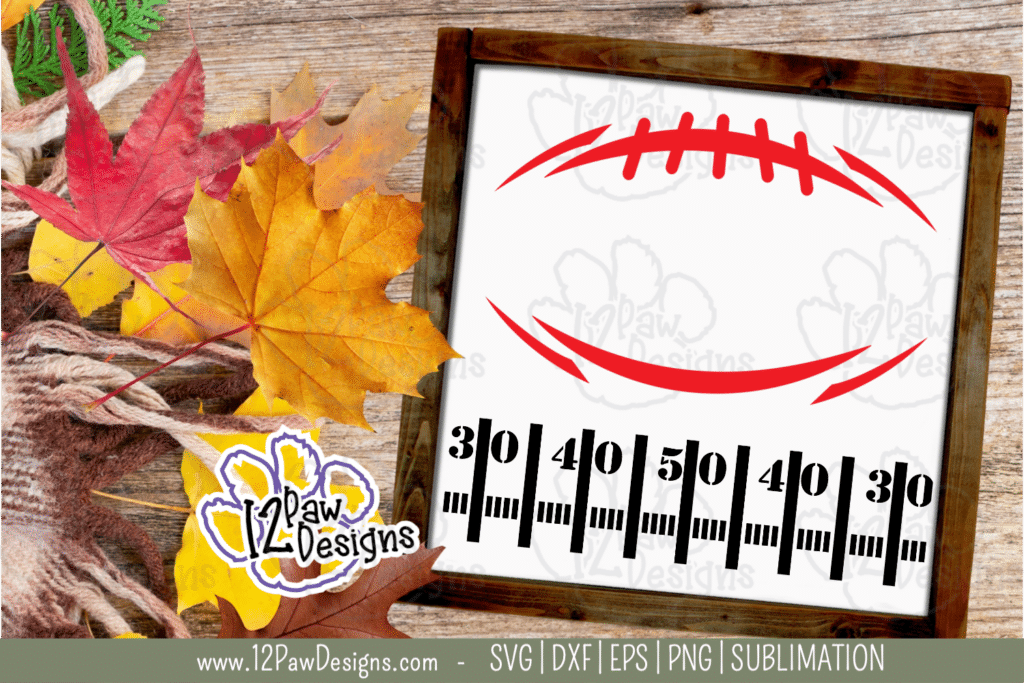
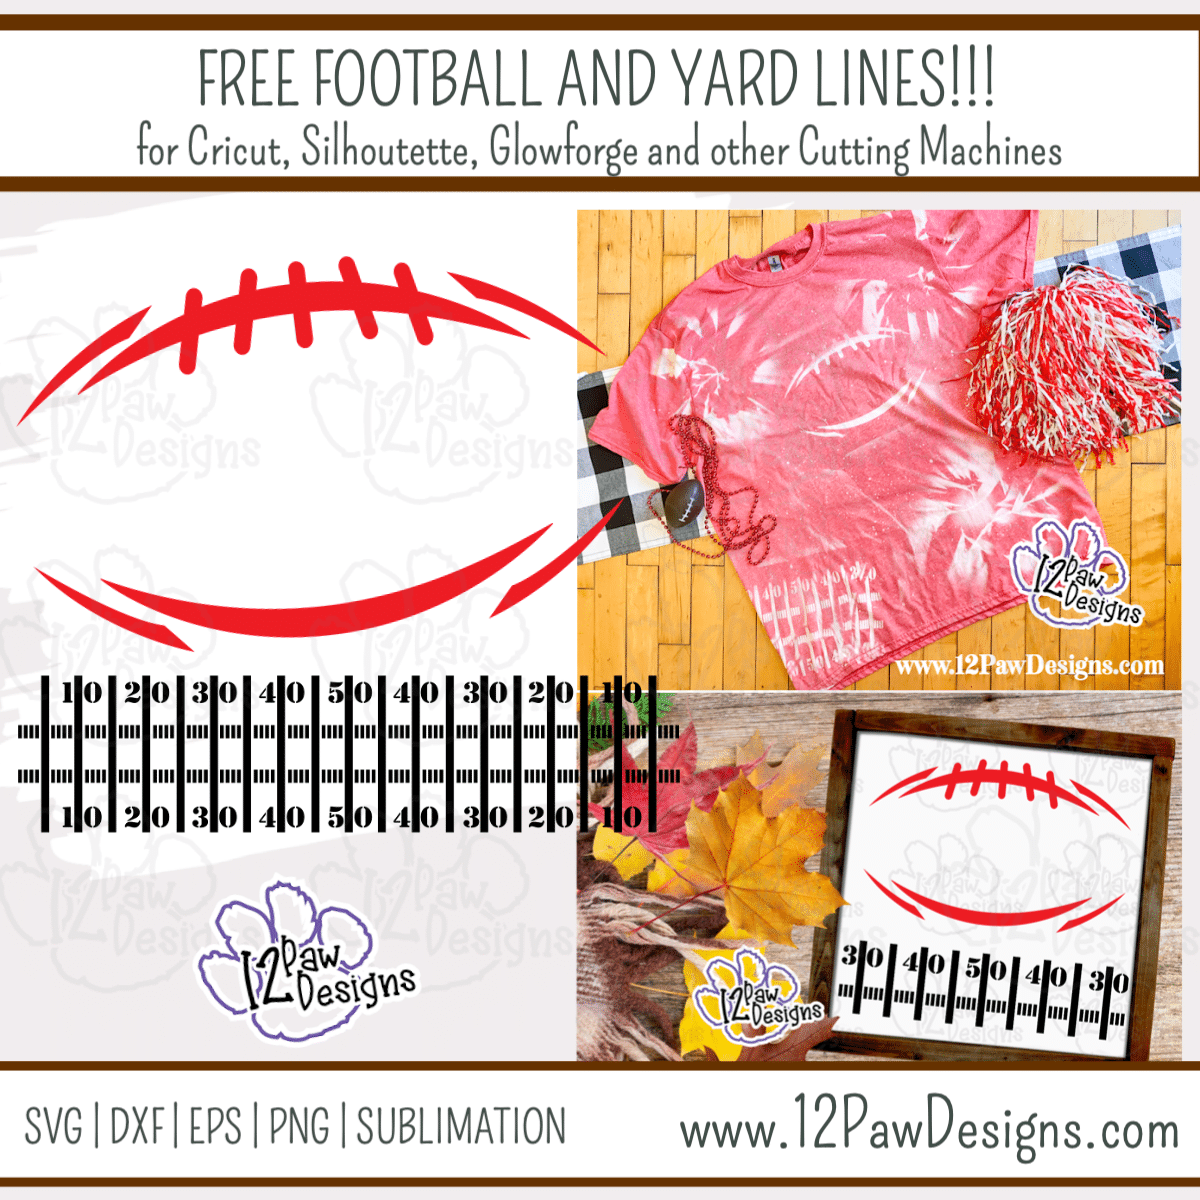
    Football Outline, Football, Yard Lines, Cricut Silhouette Glowforge, Svg/Dxf/Png/Eps, Digital Download, Cut File

    Football season is upon us so time to make a fun Bleached Football Shirt. The FREE files, yes there are 2, this week are a Football Outline and Yard Lines! The outline could be used as the full football or just the top laces. The yard lines can be broken down and used for smaller projects!!

    This weeks FREE Football Outline and Yard Lines can be found in the Freebie Library. File numbers are 47 and 48. I have also created a video tutorial along with some directions on how I made my shirt and some pointers! Remember to please share what you created! Check me out on Facebook and Instagram and remember a pintrest pin is always appreciated!!

    Football Shirt Supply List

    • Cutting Machine or Glowforge and software
    • Football Outline and Yard Lines (click on the link)
    • Shirt – I used a Gildan 50/50 Heather Soft blend
    • Stencil Material – You can use Acrylic, Vinyl or Mylar (I used a 5ml Mylar – It is re-usable
    • Bleach
    • Peroxide – to neutralize
    • Something to go between the shirt layers while bleaching – cardboard, tote lid or garbage bag
    • Spray bottle for the bleach
    • Spray Adhesive – only needed for the mylar

    Video Tutorial – Bleach Football Shirt

    Here are the steps I took to make my bleach shirt

    Football Outline, Football, Yard Line, Cricut Silhouette Glowforge, Svg/Dxf/Png/Eps, Digital Download, Cut File
    12PD Football and Yard lines

    Step 1 – Load the free cutting file into your favorite cutting software. I used Mylar for my stencil. This material is re-usable. You will have to check for cut setting for your machine type. I could have also cut out of acrylic on the Glowforge if I was make a lot of shirts. If you plan on that please let me know. I can do something like that for you. Using vinyl is an option, remember it is single use.

    Step 2 – Cut your material. Then weed the spots where you want the bleach to go.

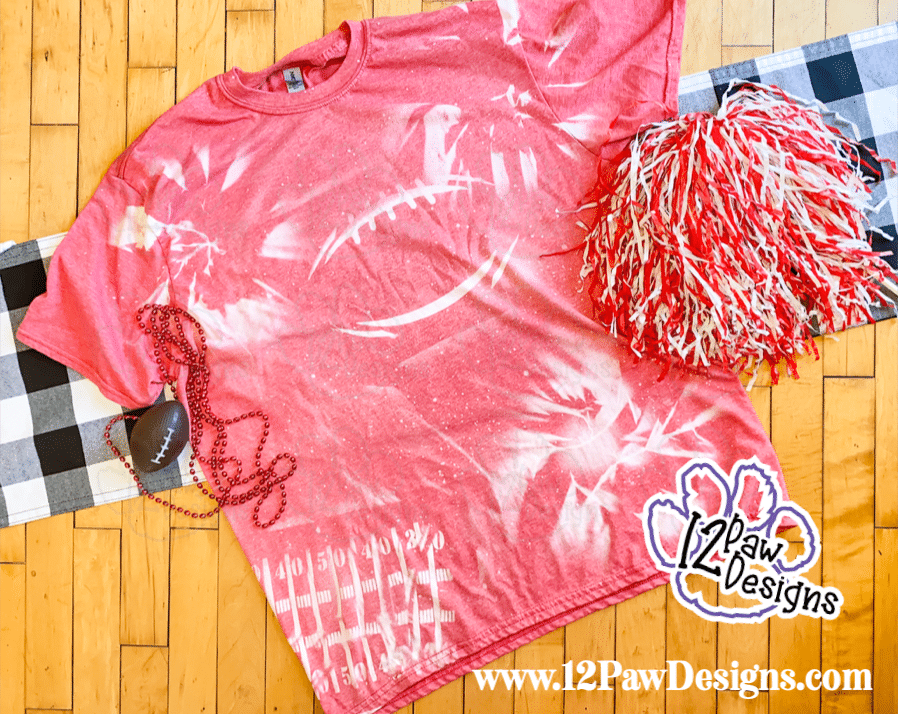
    Step 3 – It was a beautiful sunny day here in Wisconsin when I did my shirt so the bleach process did not take long. I put a garbage bag between the shirt layers. Then laid the shirt on the lawn. I then took my mylar and spray adhesive and applied it to the back of my stencil. Then I laid the stencils down on the shirt where I wanted them

    Step 4 – Lets Bleach!!! Then I took my spritz bottle, I did you full bleach since my shirt was a blend. Now, spray bottles do matter. I bleached before and my spritzer nozzle was not the best. I find I like the fine misters. You can reuse the Dawn power wash bottles too! They work great. I then sprayed my shirt. If you watch in the video you will see it went fairly quickly!!! Once I had the football and yard lines the way I wanted them I pulled the stencils and sprayed the rest of the shirt. I also removed the spritzer out of the bottle and sprinkled the bleach on the shirt for an extra effect and style

    Step 5 – Once your shirt is at the bleach level you want, take it and put it in a cold water peroxide bath. It does not take much. This neutralizes the bleaching process. Once that is done toss in the wash and dry!

    Step 6 – You could add a saying like Game Day or something. I kept my more neutral. Wear and enjoy!!!

    How to get your FREE Football and Yard Lines File

    To get your FREE file please go to my Freebie Library, sign in (don’t worry if you are not a member yet, sign up and the password will be emailed to you!!! Also, remember I include it in the bottom of the weekly email too! 😉 ) and download Number 47 – Footbal Outline and 48 Yard Lines. The downloaded file will have multiple file options SVG, PNG, DXF (If you have the free version of Silhouette Studio you will need this file) and EPS. 

    I hope you enjoy the FREE files. Thank you again for stopping by and being part of my dream and 12 Paw Designs! Have an absolutely amazing day!!!

    Remember to PIN IT!!! ?

    Football Outline, Football, Football SVG, Cricut Silhouette Glowforge, Svg/Dxf/Png/Eps, Digital Download, Cut File
    Football Outline, Football, Football SVG, Cricut Silhouette Glowforge, Svg/Dxf/Png/Eps, Digital Download, Cut File
    Football yardline, Yard Line SVG, Yard Line, Cricut Silhouette Glowforge, Svg/Dxf/Png/Eps, Digital Download, Cut File
    Yardlines SVG
    Football Outline, Football, Yard Line, Cricut Silhouette Glowforge, Svg/Dxf/Png/Eps, Digital Download, Cut File
    12PD Football and Yard lines

    Also, please check out my shop. I am always adding new designs.
    https://12pawdesigns.com/shop/

    If you have any questions or run into an issue please let me know!!!

    Lorri?
    Lorri@12PawDesigns.com

    Let’s Conntect!

    Want to connect more with 12 Paw Designs???:
    • Website: https://12pawdesigns.com
    • FB Page: https://www.facebook.com/12pawdesigns/
    • Instagram: https://www.instagram.com/12pawdesigns/
    • Pinterest: https://www.pinterest.com/12PawDesigns

    DO NOT resell any of the files as digital download or any other form.
    DO NOT claim the files as your own.
    DO NOT modify and resell the files in any form.

  • Welcome Summer Sign Gives Your Porch A Citrus Burst!

    Welcome Summer Sign Gives Your Porch A Citrus Burst!

    Part 2 – This is the reverse side to Hello Spring!

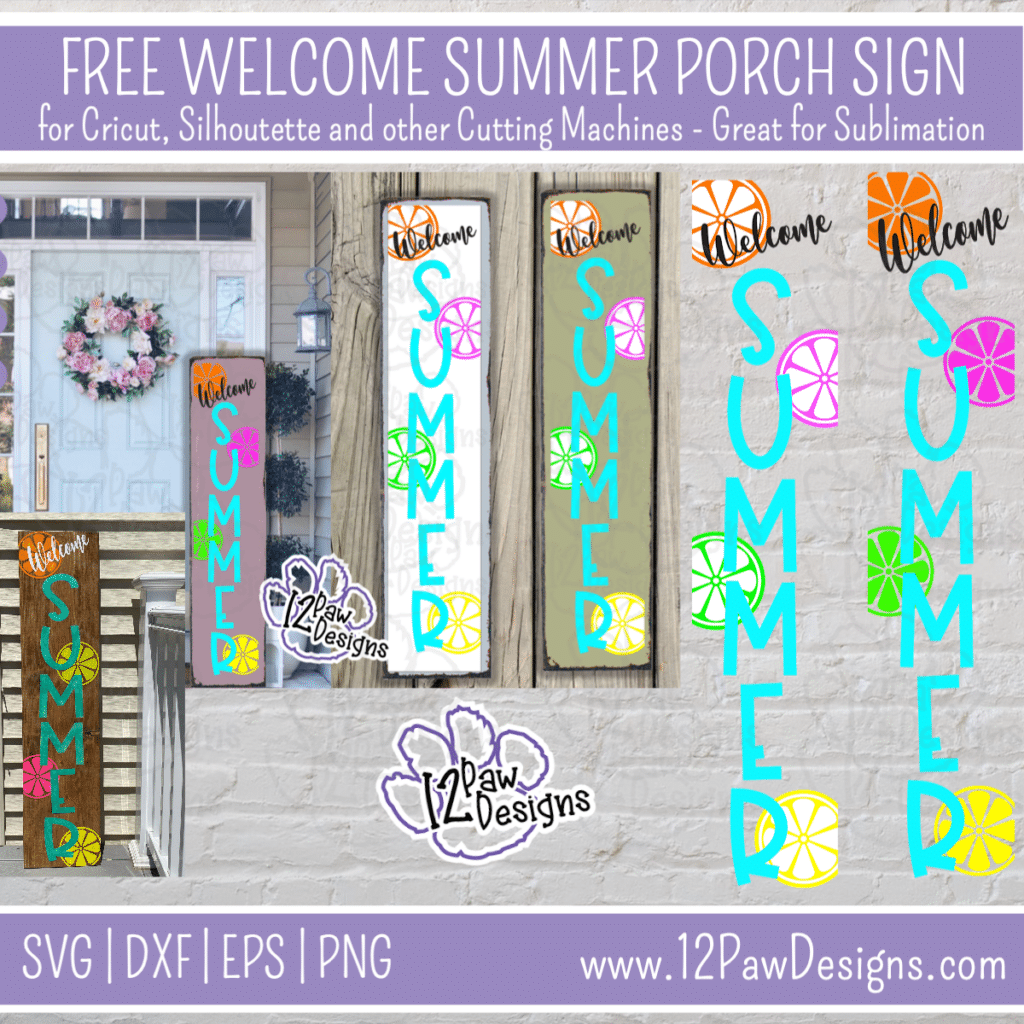
    Welcome Summer Sign, Summer Porch Sign, Porch Sign, Cricut Silhouette, Svg/Dxf/Png/Eps/Sublimation, Digital Download, Cut File

    Welcome Summer Sign Gives Your Porch A Citrus Burst! This is part 2 of the reversible porch sign we did earlier. If you missed it i have it linked above for you.

    Welcome Summer\Hello Spring is made with a stained common\pine board. Then I used masking vinyl and painted this side. You could also paint this side of your board white or any color of your choosing!! The file is setup for 12″ x 60″. However, size it to the size you need. I ended up with 12″x48″ Have fun with the colors!

    This weeks FREE Summer Porch Sign SVG/Cut files can be found in the Freebie Library. File number is 38. I have also created a video tutorial along with some quick directions below on how I made this FUN Welcome Summer Sign. I would love to see the color choices you used!

    Welcome Summer Sign Supply List

    • Cutting Machine and software
    • Welcome Summer (click on the link)
    • Masking Vinyl – I use Starmask from 143vinyl.com
    • Pine\Common Board – Mine was 12″x48″ – I used the reverse side from Hello spring
    • Stain color of Choice – only needed if you are going to stain or if you have not done Hello Spring
    • Sand paper or sanding block
    • Staining rag
    • Paint color of choice
    • Make-up sponges – get my from the Dollar Tree
    • Spray sealer – Seal after you are done painting
    • Weeding tools, scissors, cutting knife, transfer tape, etc

    Video Tutorial – Let’s make a Summer Porch Sign!

    Here are the steps I took to make the Welcome Summer Sign

    Step 1 – Prep your board. If you are doing the reverse you should be set to go. However, if you decided you wanted paint vs stain you would do that now.

    Step 2 – While everything is drying(if needed). Open the SVG file in your cutting software (note: if you have the free version of Silhouette studio you will need the DFX files). Size the sign according to the board you will be working with. Use your masking vinyl to cut out your design.

    Step 3 – Once your stencil is cut weed your vinyl. Remember you ware weeding the parts you will be painting.

    Step 4 – Arrange your pieces on your board. Remember that Summer will be down a little more more since Welcome goes at the top. You can make and apply as may citrus slices as you like!

    Step 5 – Now to stencil paint your board. Since I stained my board I need white under the everything. So I did to coats of white and then stenciled my citrus slices in my colors. I found I needed to coats of that as well. Pull your stencils mask and clean up your slices.

    Step 6 – Now apply Summer and welcome to the sign and repeat the paint process. Again, i needed white under summer. I used a color shifting paint for Summer. That took 4 coats before i felt I had good coverage. Once you have your last layer applied pull your stencil vinyl. Clean up any edges you might have.

    Step 6 – Once your sign is completely dry spay it was a clear sealer of choice.

    Step 7 – If you so desired you could add strips around the sign to give it an extra touch.

    How to get your FREE Files

    To get your FREE file please go to my Freebie Library, sign in (don’t worry if you are not a member yet, sign up and the password will be emailed to you!!! Also, remember I include it in the bottom of the weekly email too! 😉 ) and download Number 30 – Hello Spring Parch sign. The downloaded file will have multiple file options SVG, PNG, DXF (If you have the free version of Silhouette Studio you will need this file) and EPS. 

    I really hope you enjoy part 2 or our reverse spring/summer porch sign. Remember a ? Pinterest pin would be so appreciated! I can’t wait to see what you create. Please share with me. You can come back here and add a comment or add one to Facebook too!

    Welcome Summer Sign, Summer Porch Sign, Porch Sign, Cricut Silhouette, Svg/Dxf/Png/Eps/Sublimation, Digital Download, Cut File
    12PD Welcome Summer Citrus

    Also, please check out my shop. I am always adding new designs. You might also find ready made tumblers or some other goodies in there in the future!!!
    https://12pawdesigns.com/shop/

    If you have any questions or run into an issue please let me know!!!

    Lorri?
    Lorri@12PawDesigns.com

    Let’s Conntect!

    Want to connect more with 12 Paw Designs???:
    • Website: https://12pawdesigns.com
    • FB Page: https://www.facebook.com/12pawdesigns/
    • Instagram: https://www.instagram.com/12pawdesigns/
    • Pinterest: https://www.pinterest.com/12PawDesigns

    DO NOT resell any of the files as digital download or any other form.
    DO NOT claim the files as your own.
    DO NOT modify and resell the files in any form.
  • Time to Shake Your Bunny Tail!

    Time to Shake Your Bunny Tail!

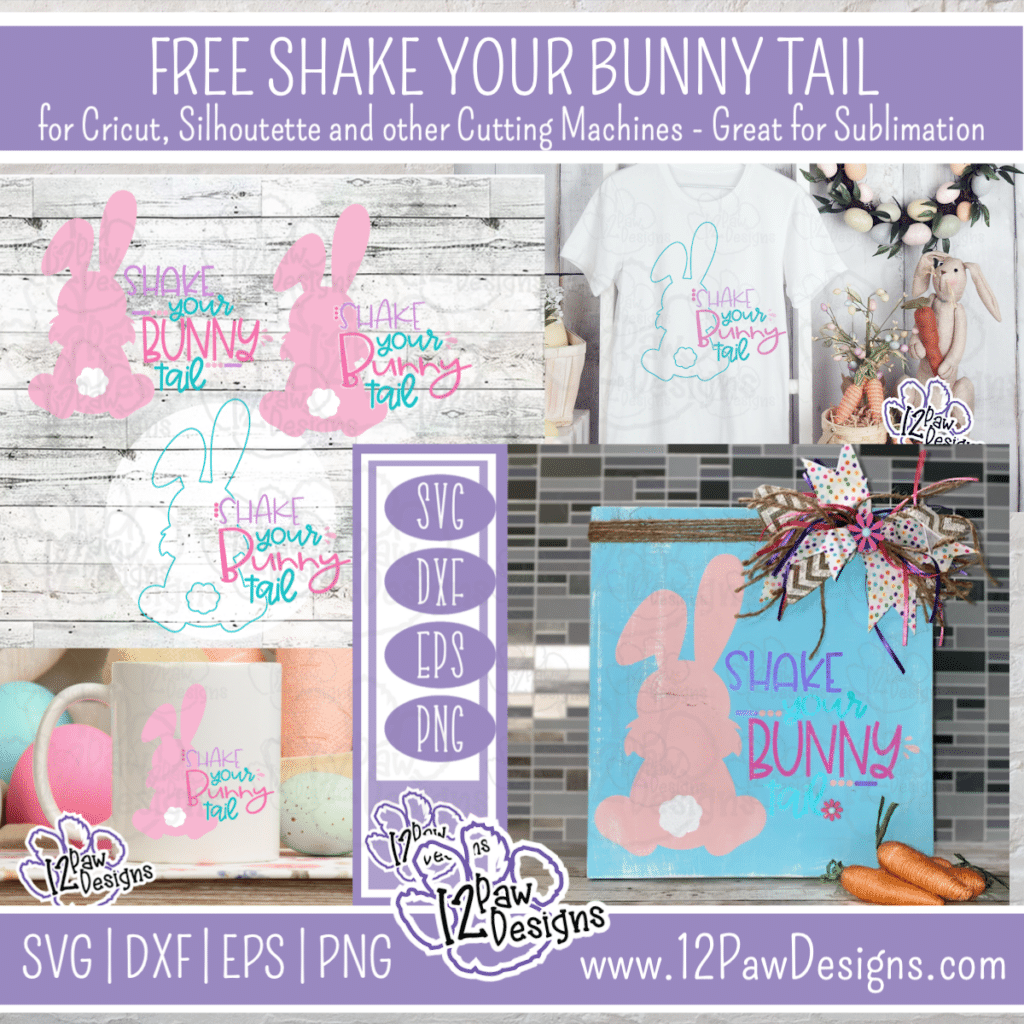
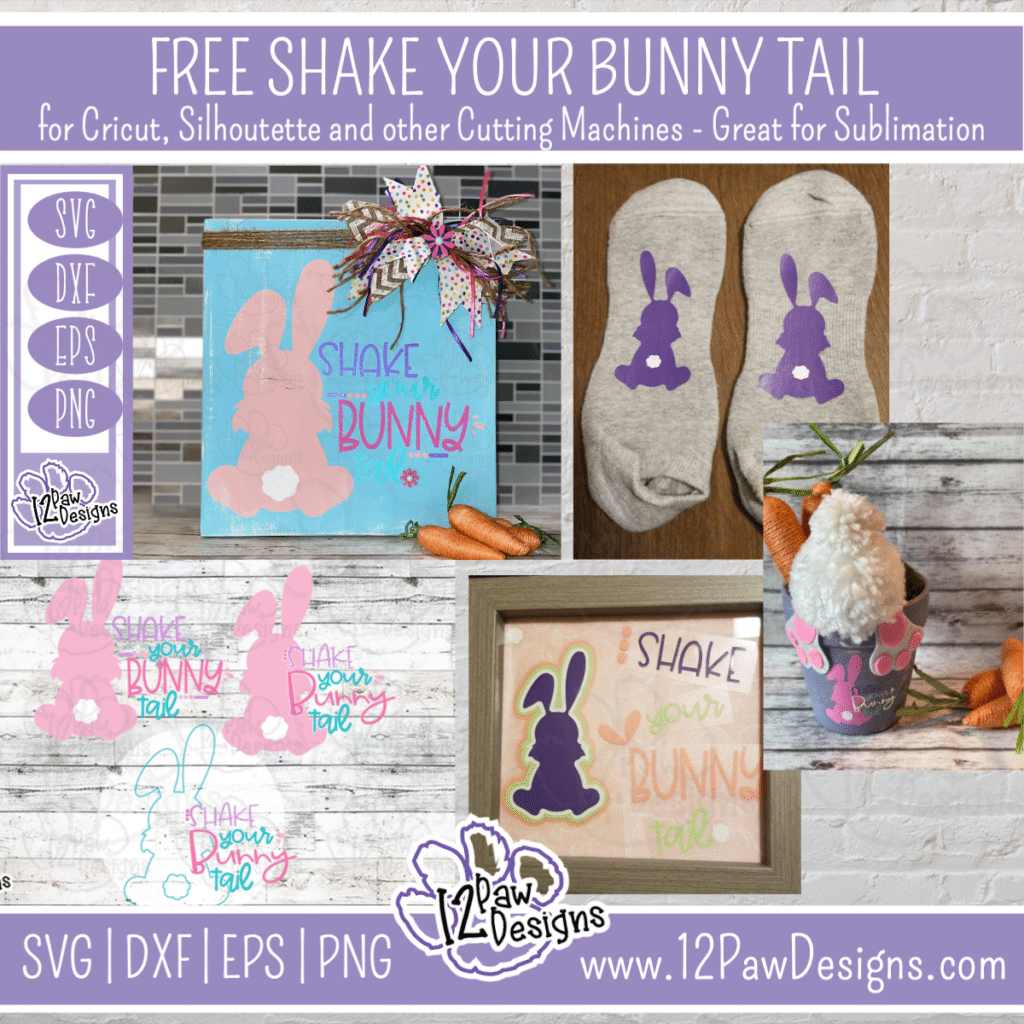
    Shake your bunny Tail SVG- Shake your bunny Tail Cut File - Cricut Silhouette - svg/dxf/png/eps - Digital Download
    Shake your bunny Tail SVG- Shake your bunny Tail Cut File – Cricut Silhouette – svg/dxf/png/eps – Digital Download

    I am so excited you are here!!! That you are participating in the 123 Alumni Showcase!!! I hope you are enjoying the showcase so far and that you are excited to learn how to design your own SVG\Cut files. Today I am sharing with you Shake Your Bunny Tail! There are 3 files for you to choose from. All with little twists to it. The project will be a cute sign where we will stencil the image on. I would also love to give a shout out to two other previous alumni that played with these files and came out with some other cute ideas!!! Angie Champagne made the cute little bunny in the in the pail1 Then Leslie Neuner made 2 projects. One is the cute sign and the other is the socks!! How cute are they!! Thank you so much ladies for help me! You did an amazing job!!!

    I can not say enough about the 123-SVG Class. It is so amazing. Michelle does an amazing job building your skills with our amazing step by step process and the the projects really are so much fun. You use the skills you learned and make fun trendy projects. I also want to mention the 123 Community. Fellow students cheering everyone one, the coaches in the course that are the to help and assist and then after the course there is an amazing alumni group that keep in contact and are there for questions and to help! I am also excited to be a coach for this round of class too!! I love helping other learn and grow their skills. Watching everyone progress is so amazing!!! Are you ready for change???

    Here are some other ideas!

    Shake your bunny Tail SVG- Shake your bunny Tail Cut File - Cricut Silhouette - svg/dxf/png/eps - Digital Download
    Shake your bunny Tail SVG- Shake your bunny Tail Cut File – Cricut Silhouette – svg/dxf/png/eps – Digital Download

    Supply List

    • Cutting Machine and software
    • Shake your Bunny Tail File (click on the link)
    • Vinyl– I used Starmask by starcraft, however, oramask 813 works well too! I also used a small piece of HTV white glitter for the tail
    • Weeding tools, scissors, cutting knife, and transfer tape
    • Wood board – mine was a scrap piece of 12×12
    • Sand paper, paint brush, sponges and glue gun (to glue the bow on)
    • Mini Heat Iron – I used the Cricut mini press and a teflon sheet
    • Paint – I used a mix of chalk and acrylic. Use what you have on hand. I even mixed some because it was either too dark or too light. Have fun with it. I used Blue, pink, white, purple and a dark pink
    • Items to finish it off sign – I used jute, ribbon and a really cute daisy button

    Now, lets get on to the fun part…making our sign! Check out the video tutorial for the step by step process. Below I have typed of the steps for you too!!!

    Shake your Bunny Tail – Video Tutorial


    Step 1 Sand your board. It will help with the stencil process
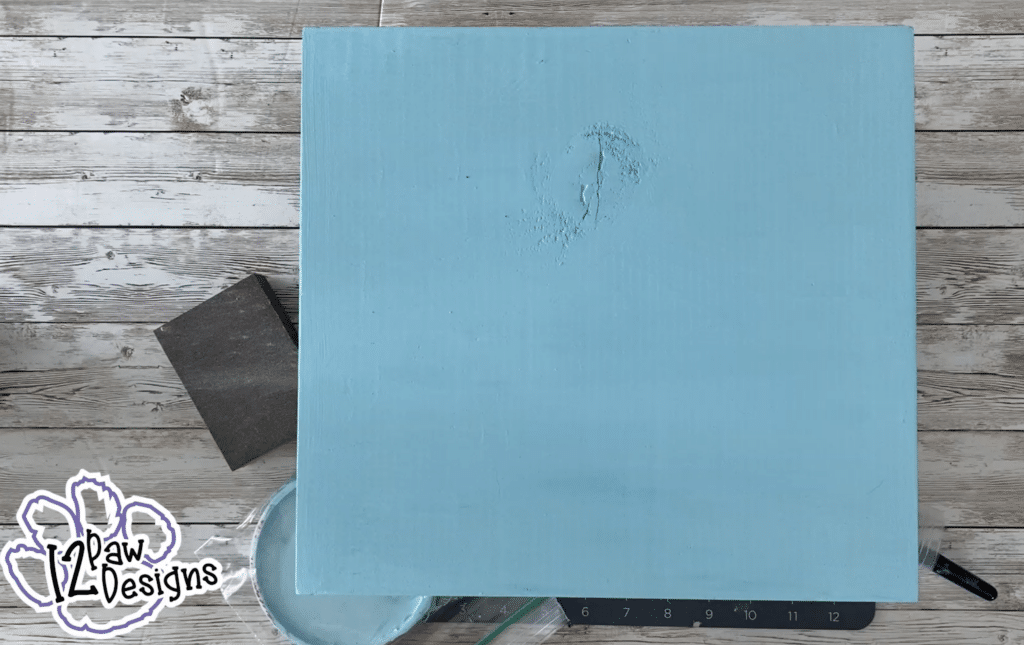
    Step 2 Paint your board the color you like. I mixed my paint I used white and a blueish teal color. I also did 2 coats.

    Shake your bunny
    Shake your bunny


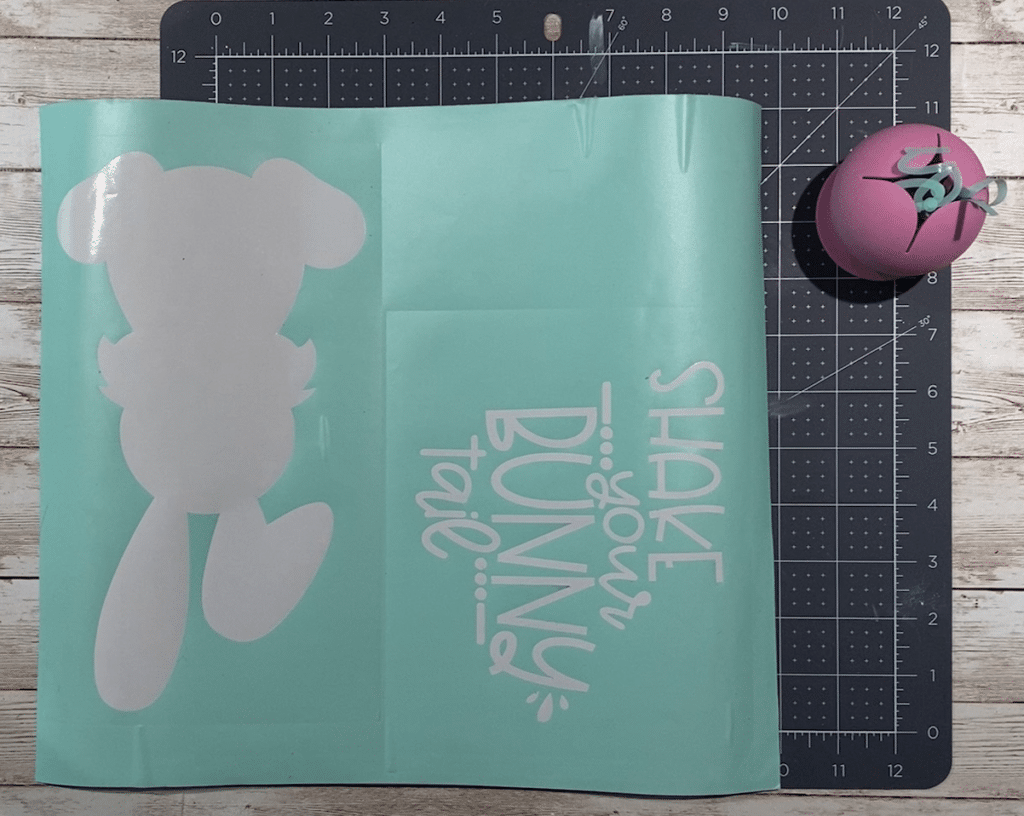
    Step 3 While my paint was drying I cut my stencil material. I cut 2 pieces. One piece was the bunny and then the second piece I cut the words out. I also put a weeding box around my items to make sure i had enough room around them.

    Shake your bunny - Weeding Box
    Shake your bunny – Weeding Box


    Step 4 Next weed your stencil vinyl. REMEMBER…this is a stencil so we are take the parts out we want paint. So the bunny comes out and the letter of the words come out.

    Shake your bunny - Weed your Stencil
    Shake your bunny – Weed your Stencil


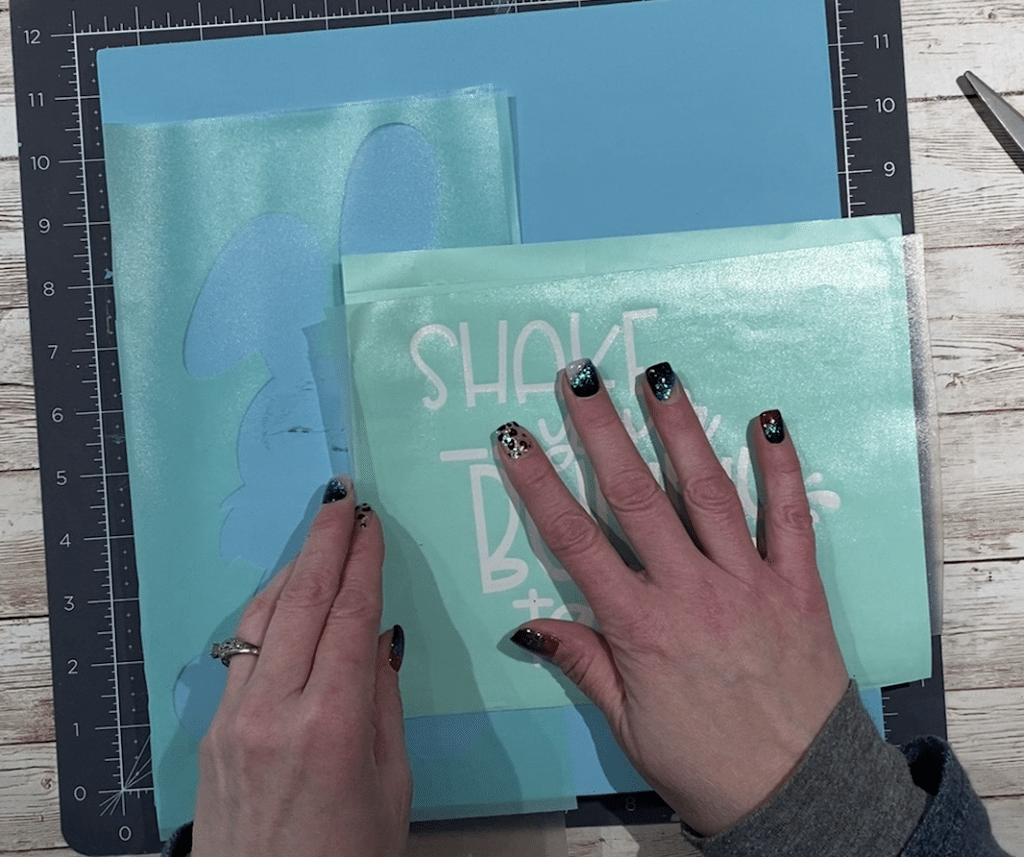
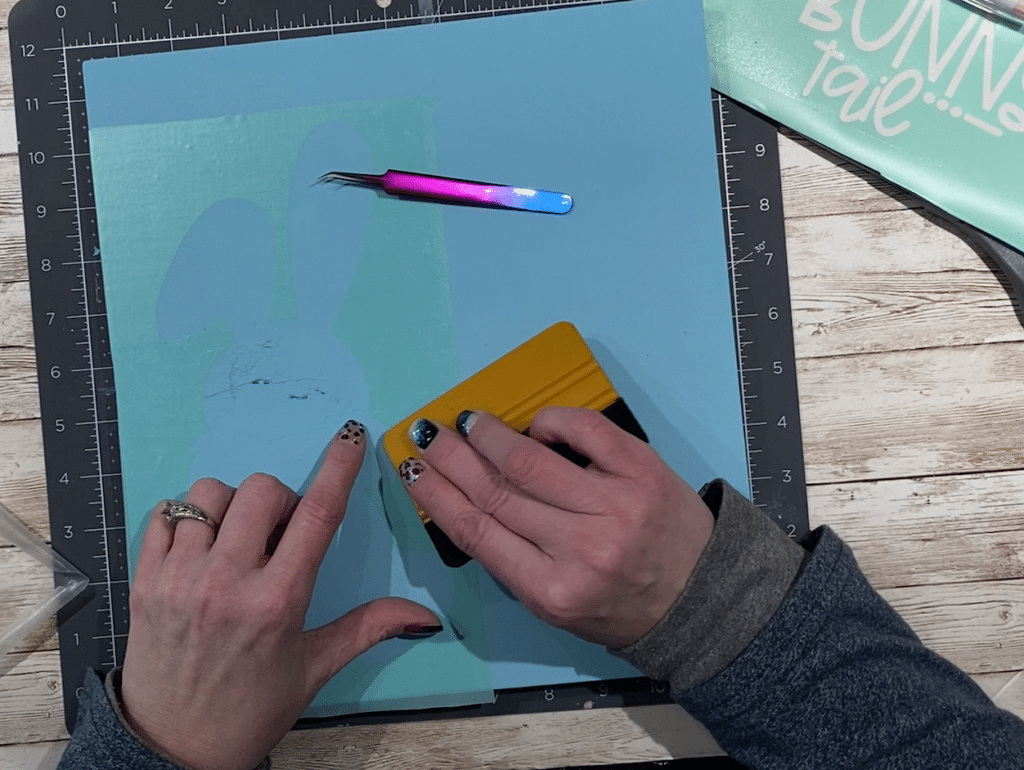
    Step 5 Now to apply the stencil to the board. Use your transfer tape. Some times your transfer tape can be a little to sticky so i will stick it to my cloths one to help take some of the stick off. Lay your transfer tape on the bunny and remove the backing. Now apply the bunny to the board. Use your words to make sure you are spacing properly. I also moved down everything down to the bottom of the board due to my finishing items. Once you have the bunny on the board make sure you press the stencil down really good and then remove your transfer tape.

    Shake your bunny tail - Apply Stencil Material and space
    Shake your bunny tail – Apply Stencil Material and space
    Shake your bunny - Apply Stencil Material
    Shake your bunny tail – Apply Stencil Material


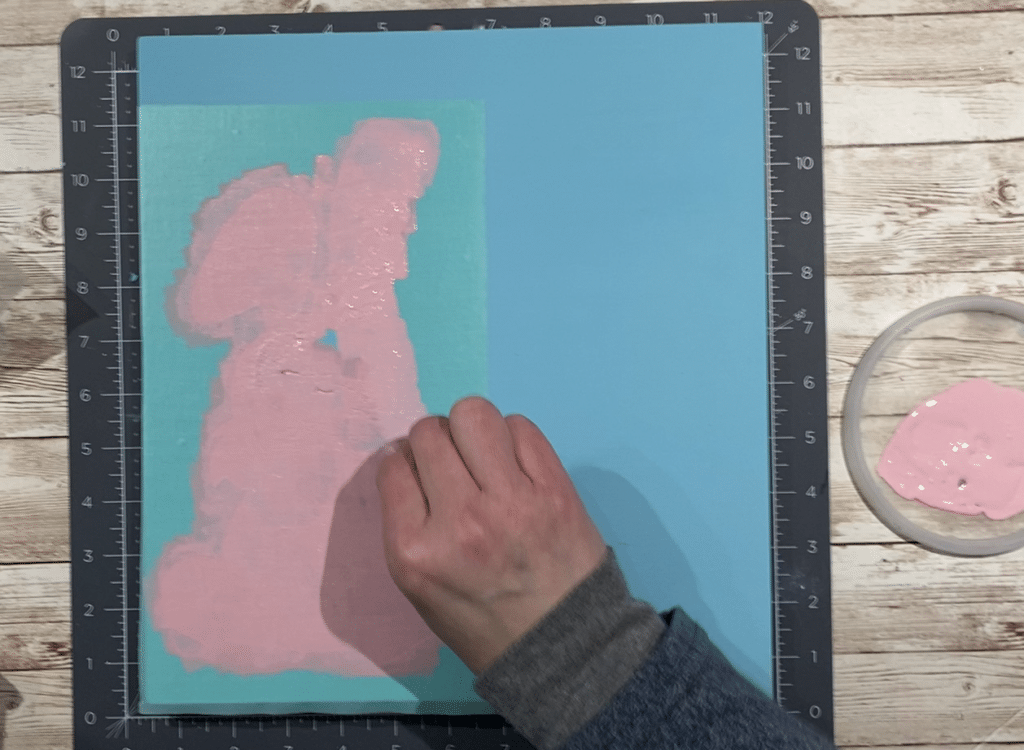
    Step 6 Now again, press down your stencil material. Get those edges really good!!!! Now let’s paint the bunny. I like to use make up sponges from the Dollar Tree. I can control the paint well. I mixed my pink because I didn’t have the exact color. Once the bunny is painted pull your stencil off.

    Shake your bunny - Paint Bunny
    Shake your bunny tail – Paint Bunny

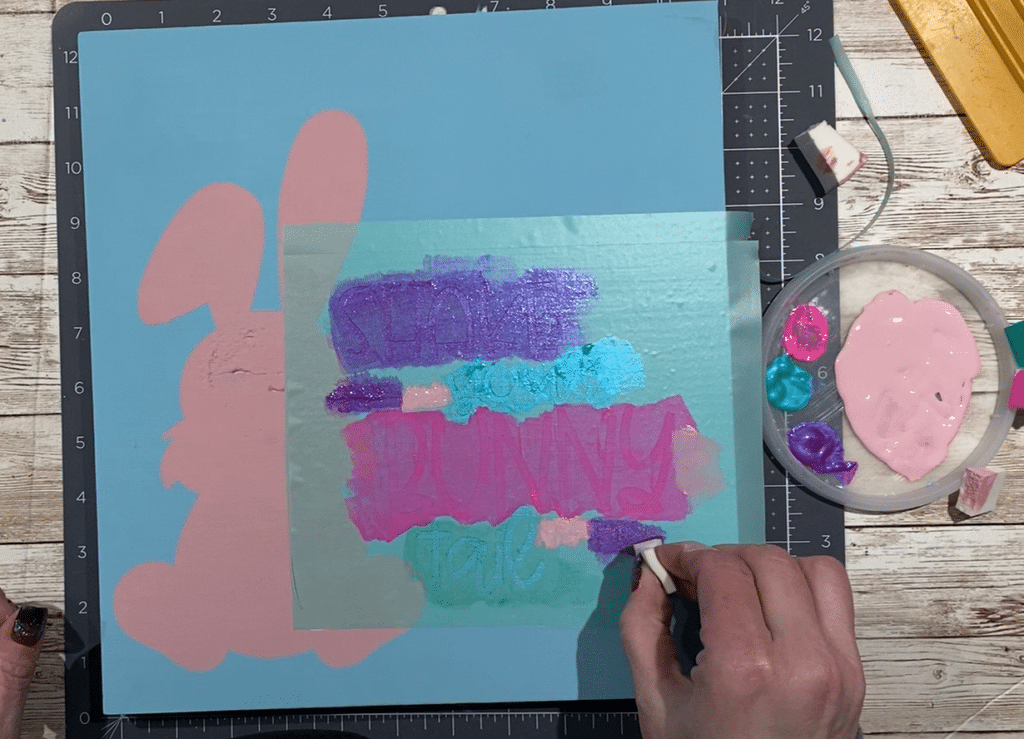
    Step 7 Let your bunny dry. A heat gun or hair dryer will help with this if you are in a hurry. Next apply your words the same way you did the bunny. Again, make sure you have all your edges pressed down really good.
    Step 8 Paint your words. Again I used my sponges and painted them. The acrylic paint needed a couple of passes vs the chalk paint. Once you have everything painted pull your vinyl off.

    Shake your bunny - Paint Words
    Shake your bunny tail- Paint Words

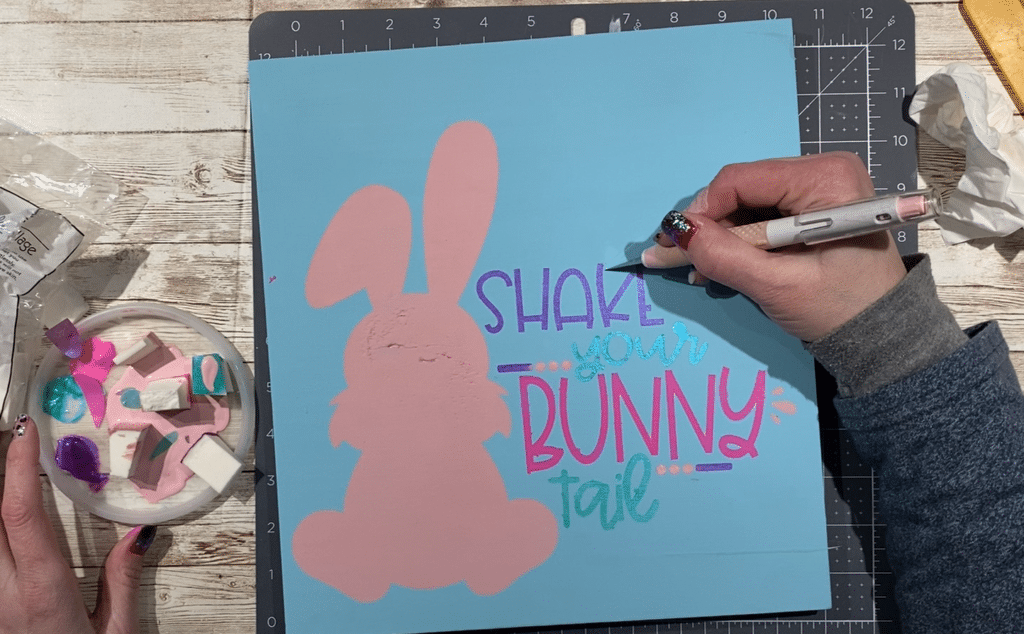
    Step 9 If you had any leaks you can fix with a small paint brush.

    Shake your bunny - Remove Stencil and clean up
    Shake your bunny tail – Remove Stencil and clean up


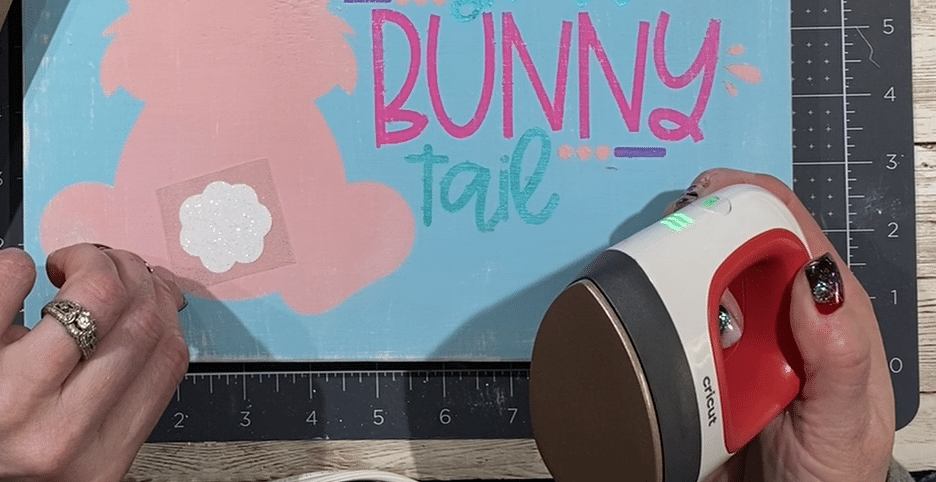
    Step 10 Now we need to apply the bunny tail. I cut mine out of Heat Transfer Vinyl Glitter. Then used my Cricut Mini Heat press to apply. Be careful to not apply too much heat.

    Shake your bunny - Iron on tail
    Shake your bunny tail – Iron on HTV Glitter tail


    Step 11 Then finish your board. I used jute and wrapped it many times around the top.
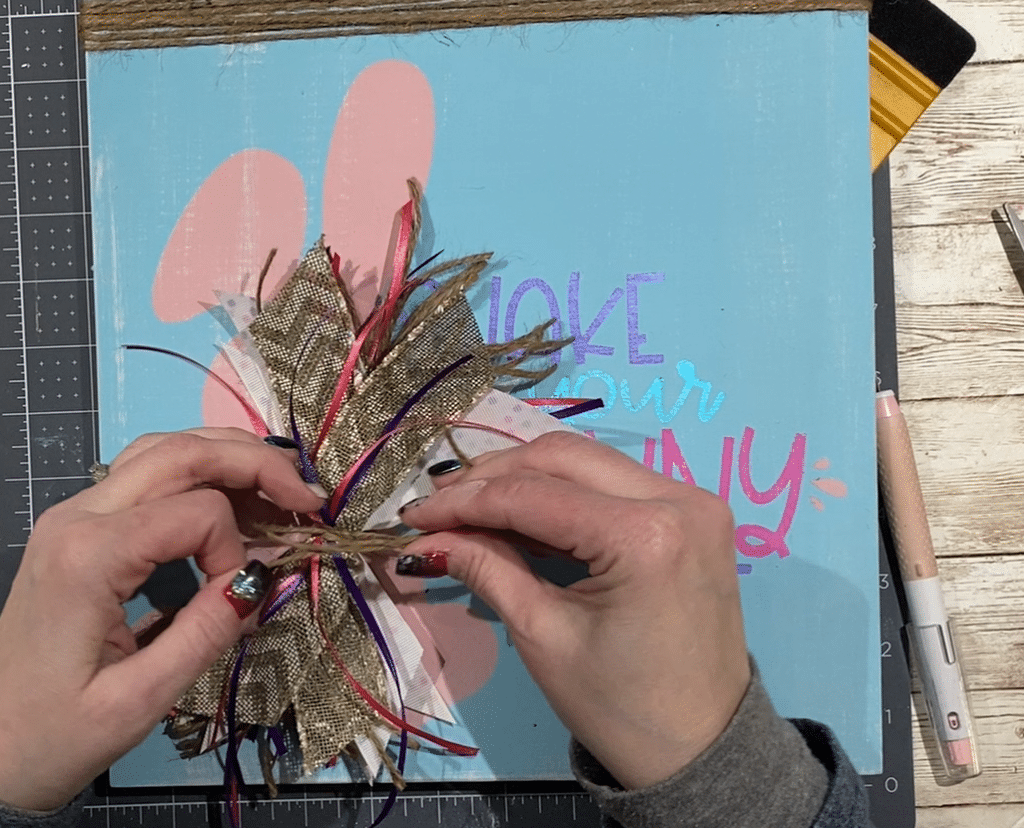
    Step 12 Next i made a mess bow(directions in the video) and glued that to the top. I then glued on a cute flower button to the center and then an extra one to the board.

    Shake your bunny - Messy Bow
    Shake your bunny tail – Messy Bow


    Step 13 Most importantly HAVE FUN! MAKE IT YOURS. Then come back and share!!! I love to see it.

    To get your FREE file please go to my Freebie Library, sign in (don’t worry if you are not a member yet, sign up and the password will be emailed to you!!!) and download Number 21 Shake your Bunny Tail. This download file will have multiple file options SVG, PNG, DXF (If you have the free version of Silhouette Studio you will need this file) and EPS. 

    Want to learn more???

    I hope you enjoy the FREE Shake your Bunny Tail Tutorial and files and that you are enjoying the 123 Alumni Showcase! The journey and truly been amazing!!! If you want to learn more about the class i took please check out the link here. If you have any questions at all please feel free to reach out and ask! I am here to help!

    https://my-designs-in-the-chaos.mykajabi.com/123-svg-2021

    Thank you again for stopping by and being part of my dream and 12 Paw Designs! I hope I can be part of your dream when you sign up and take the 123-SVG class!!! Have an absolutely amazing day!!! Remember a ? Pintrest pin would be so appreciated! I can’t wait to see what you create. Please share with me. You can come back here and add a comment or add one to Facebook too!

    Also, please check out my shop. I am always adding new designs. You might also find ready made tumblers in there in the future!!!
    https://12pawdesigns.com/shop/

    If you have any questions or run into an issue please let me know!!!

    Lorri?
    Lorri@12PawDesigns.com

    Let’s Conntect!

    Want to connect more with 12 Paw Designs???:
    • Website: https://12pawdesigns.com
    • FB Page: https://www.facebook.com/12pawdesigns/
    • Instagram: https://www.instagram.com/12pawdesigns/
    • Pinterest: https://www.pinterest.com/12PawDesigns

    DO NOT resell any of the files as digital download or any other form.
    DO NOT claim the files as your own.
    DO NOT modify and resell the files in any form.