Tag: 12PD

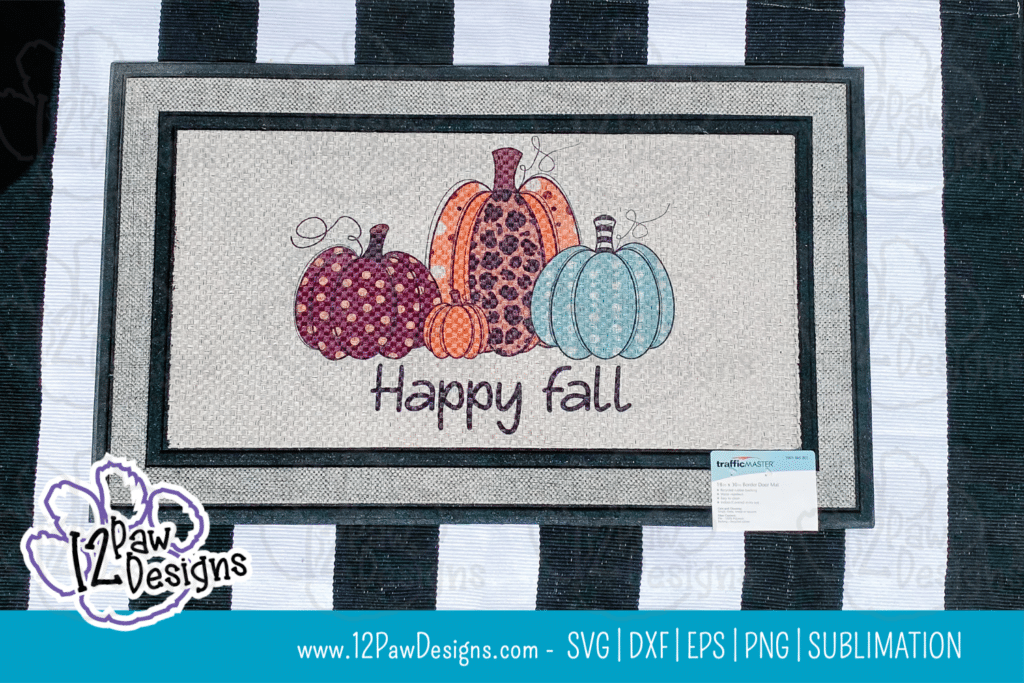
  • Happy Fall Pumpkins Sublimation Door Mat

    Happy Fall Pumpkins Sublimation Door Mat

    Happy Fall Pumpkins, Happy Fall, Fall Pumpkins, Cricut Silhouette Glowforge, Svg/Dxf/Png/Eps, Digital Download, Cut File

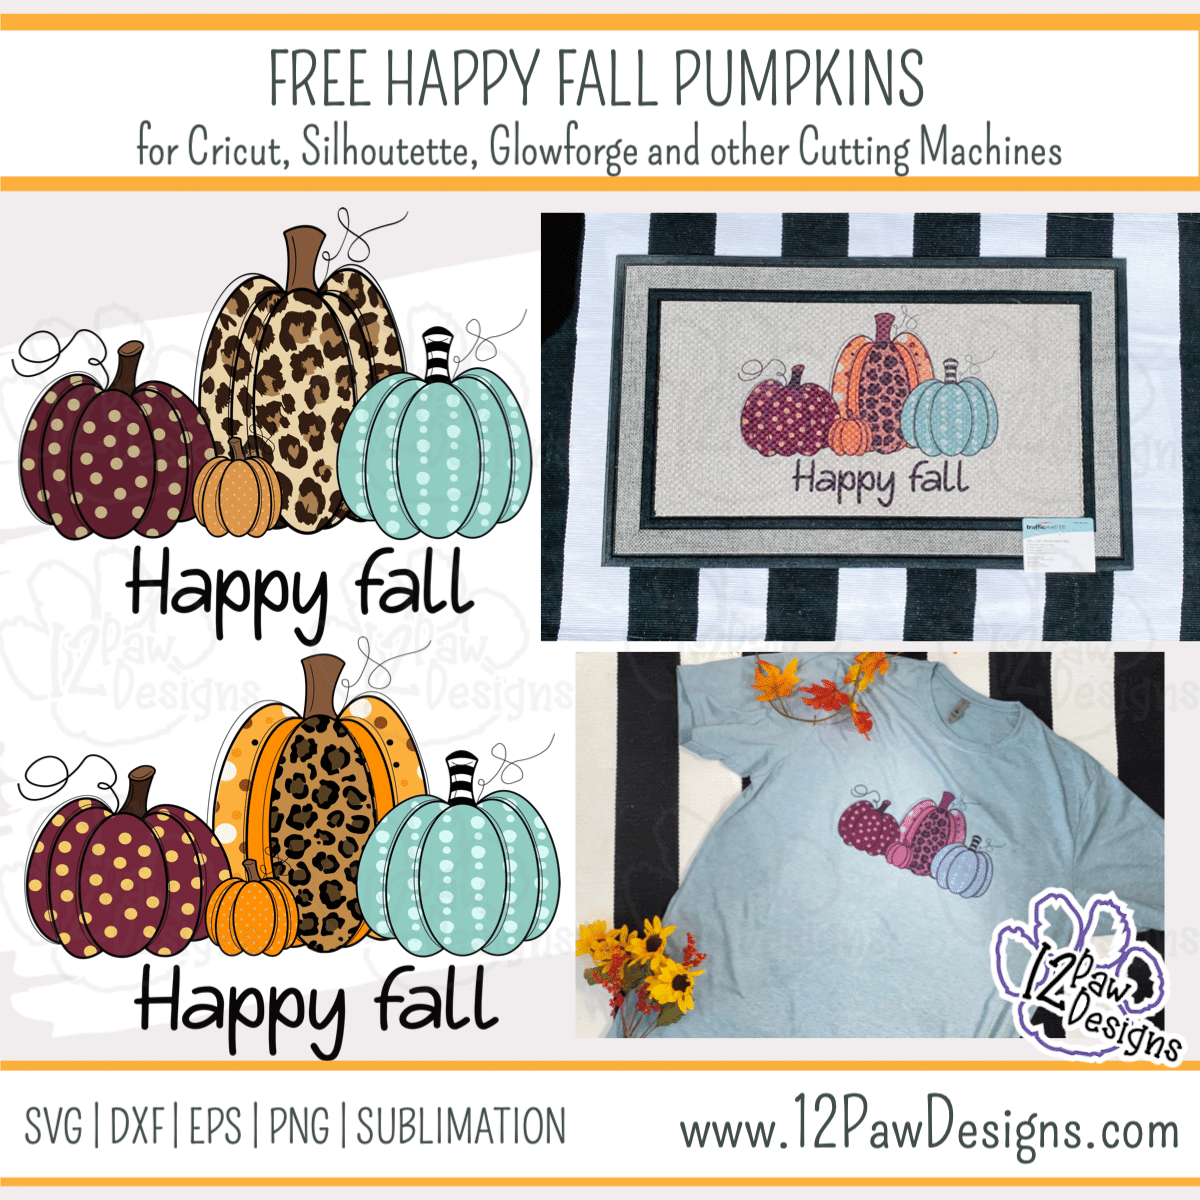
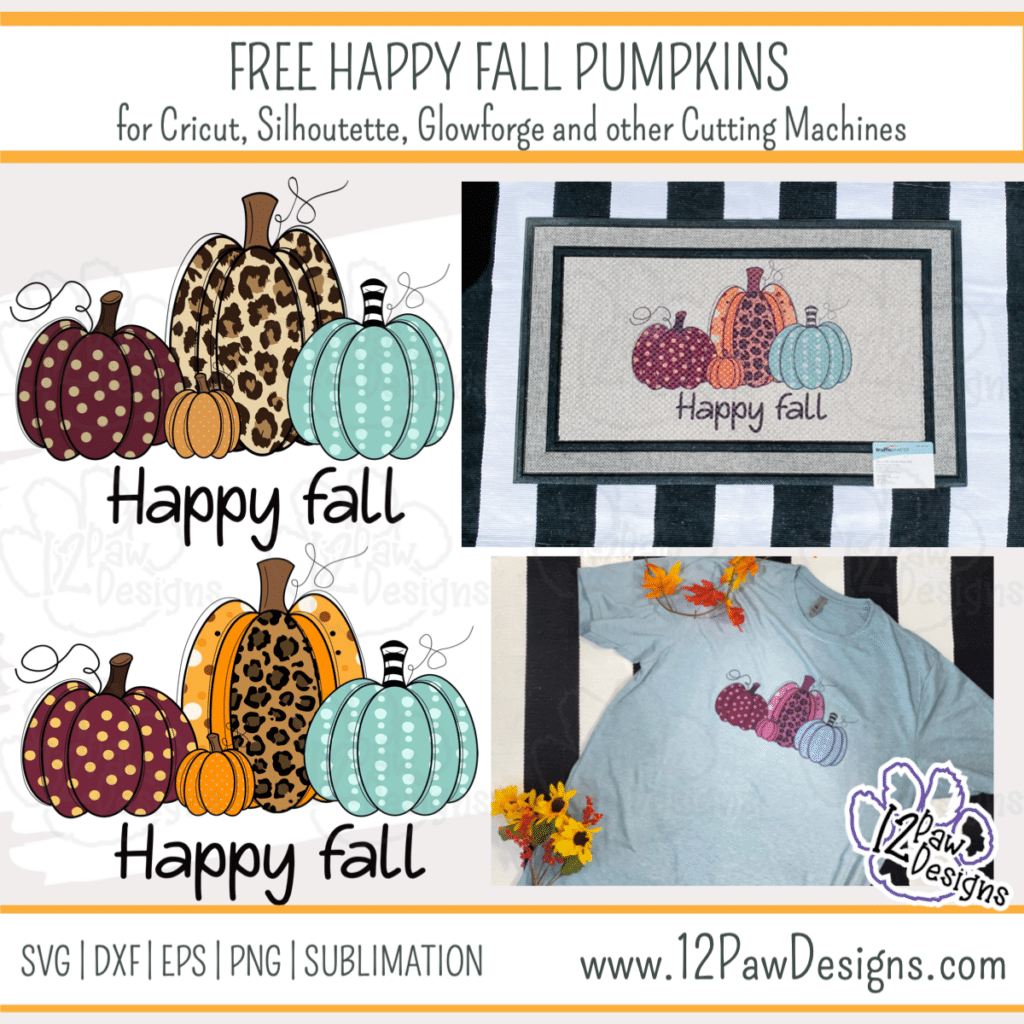
    Happy Fall! I love fall! The colors, the cooler nights, the smells, etc. So I am sharing with you my Happy Fall Pumpkins. I am using the files to do sublimation on a door mat. This is the perfect addition to any fall decor.

    I printed the design out on my convert to sublimation Epson printer and purchased ink off of Etsy. Then I pressed the image using my 15×15 heat press. I had to do 2 presses to got both halves. Check out the video tutorial to learn more.

    This weeks FREE Happy Fall Pumpkins PNG/SVG/cut file can be found in the Freebie Library. File number is 53 (remember the password is always in the bottom of your weekly email from me). I have also created a video tutorial along with some quick directions below on how I made this beautiful door mat.. I can’t wait to see your projects!!

    Remember to join our Facebook Craft Group!!!

    I am so excited to let you know that I started a Facebook Craft Group. The goal of the group is to welcome ALL crafters. I craft in different mediums, styles and type. Wood, vinyl, paint, sublimation, tumblers, etc. No matter what you do this group is for you. Come and join us!!! Click the link! Crafty Paws for All Cricut Silhouette Glowforge Sublimation and More

    Happy Fall Pumpkins Sublimation Mat Supply List

    • Sublimation Printer – I converted an Epson WF7720
    • Sublimation Ink
    • Sublimation Paper. I like A Sub 105
    • Happy Fall Pumpkins (click on the link)
    • Door Mat – The mat I am using is from Lowe’s
    • Butcher Paper or parchment paper
    • Lint Roller
    • Heat Press
    • Heat Tape
    • Bonus project – Shirt for sublimation – I used a heather shirt. They normally have a higher polyester count. Also, my shirt is a light blue heather and remember sublimation will pick up that lighter color.

    Video TutorialHappy Fall Pumpkins

    Here are the steps I took to make the Happy Fall Pumpkins Door Mat

    Step 1 – Using a sublimation printer, ink and paper, print the PNG file out. There are two different PNG files to choose from. The difference is the big pumpkin. MAKE SURE YOU MIRROR THE PRINT!

    Step 2 – Heat up your heat press to 400 degrees.

    Step 3 – While the heat press is warming up use the lint roller to clean the mat off. Then put the image on the mat. Use heat tape to tape it down well. I have a 15x15in press so I had to do 2 presses. I also wanted to make sure that the image does not move while moving the mat. So use enough tape to make sure it doesn’t. I also found something to lift the mat side up that was not in the press. The goal is to avoid ghosting images.

    Step 4 – Once everything taped down and the press is at 400 degrees. Place a piece of parchment or butcher paper over the image. Press for 60 seconds.

    Step 5 – Once the first press is done, move the mat to the other side and press again.

    Step 6 – Pull the image off the mat once everything is complete

    Step 7 – BONUS – Let’s make a shirt. Take your shirt and place a piece of parchment paper between the layers of the shirt.

    Step 8 – Place image on the shirt and tape down and press for 60 seconds. – REMEMBER: when using colored shirt you will pick up a more of a vintage look.

    Step 8 – Enjoy!

    How to get your FREE Files

    To get your FREE file please go to my Freebie Library, sign in (don’t worry if you are not a member yet, sign up and the password will be emailed to you!!! Also, remember I include it in the bottom of the weekly email too! 😉 ) and download Number 53 – Happy Fall Pumpkins. The downloaded file will have multiple file options SVG, PNG, DXF (If you have the free version of Silhouette Studio you will need this file) and EPS. 

    I really hope you enjoyed the Happy Fall Pumpkins. Remember a ? Pinterest pin would be so appreciated! I can’t wait to see what you create. Please share with me. You can come back here and add a comment or add one to Facebook too!
    Happy Fall Pumpkins, Happy Fall, Fall Pumpkins, Cricut Silhouette Glowforge, Svg/Dxf/Png/Eps, Digital Download, Cut File
    Happy Fall Pumpkins

    Also, please check out my shop. I am always adding new designs.
    https://12pawdesigns.com/shop/

    If you have any questions or run into an issue please let me know!!!

    Lorri?
    Lorri@12PawDesigns.com

    Let’s Conntect!

    Want to connect more with 12 Paw Designs???:
    • Website: https://12pawdesigns.com
    • FB Page: https://www.facebook.com/12pawdesigns/
    • FB Group: www.facebook.com/groups/craftypaw/Crafty Paws for All Cricut Silhouette Glowforge Sublimation and More
    • Instagram: https://www.instagram.com/12pawdesigns/
    • Pinterest: https://www.pinterest.com/12PawDesigns

    DO NOT resell any of the files as digital download or any other form.
    DO NOT claim the files as your own.
    DO NOT modify and resell the files in any form.
  • Hello pumpkin let’s make you in 3D

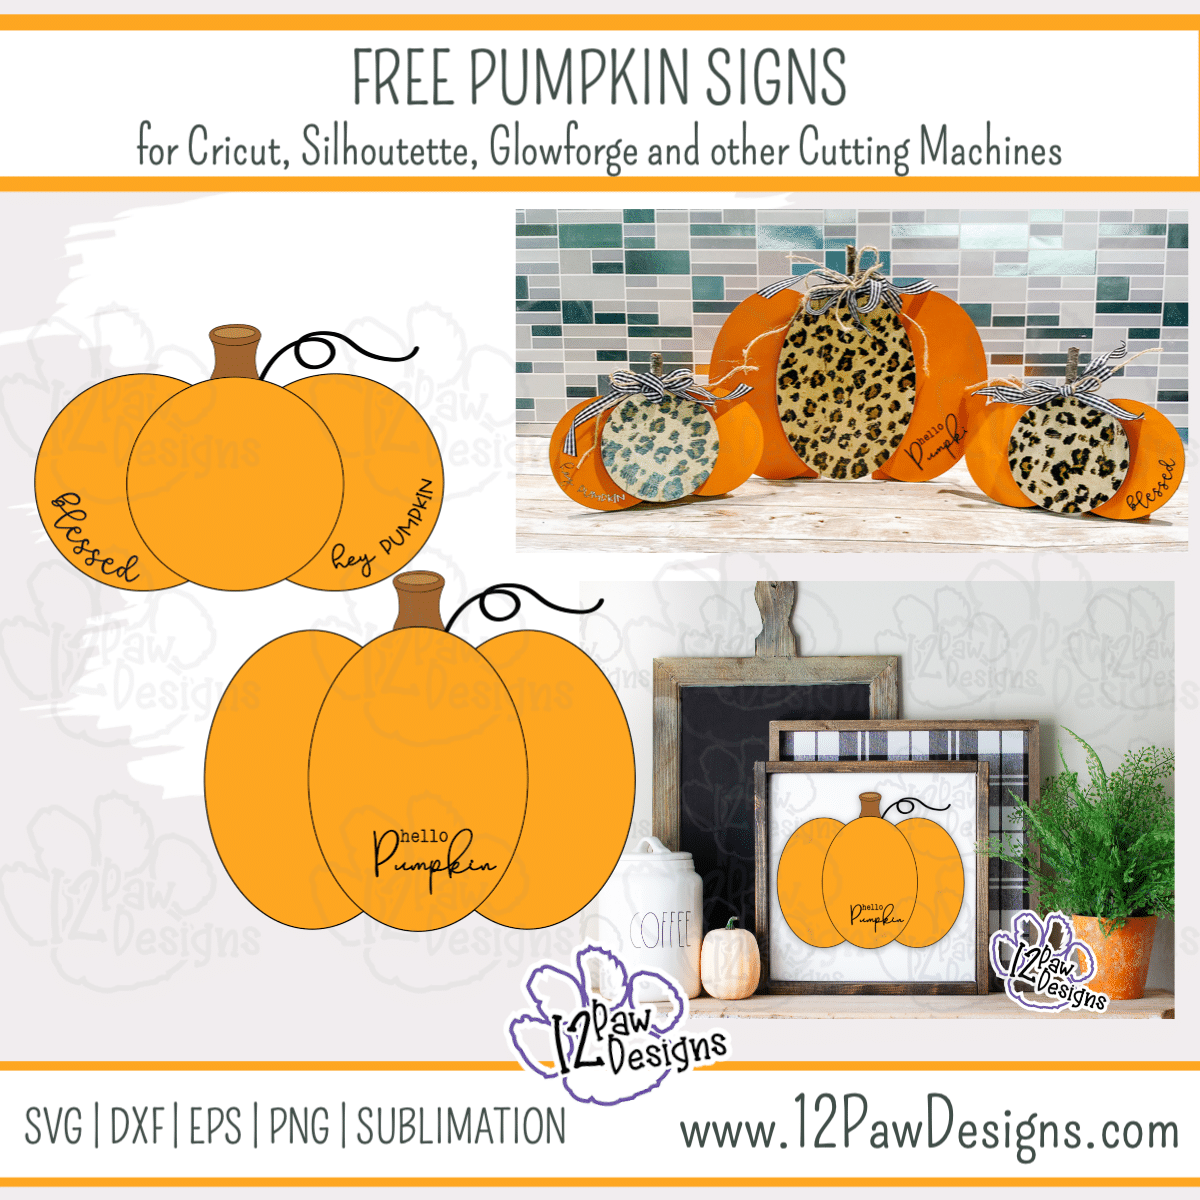
    Hello pumpkin let’s make you in 3D

    Hello Pumpkin, 3D Pumpkin, Hey Pumpkin, Cricut Silhouette Glowforge, Svg/Dxf/Png/Eps, Digital Download, Cut File

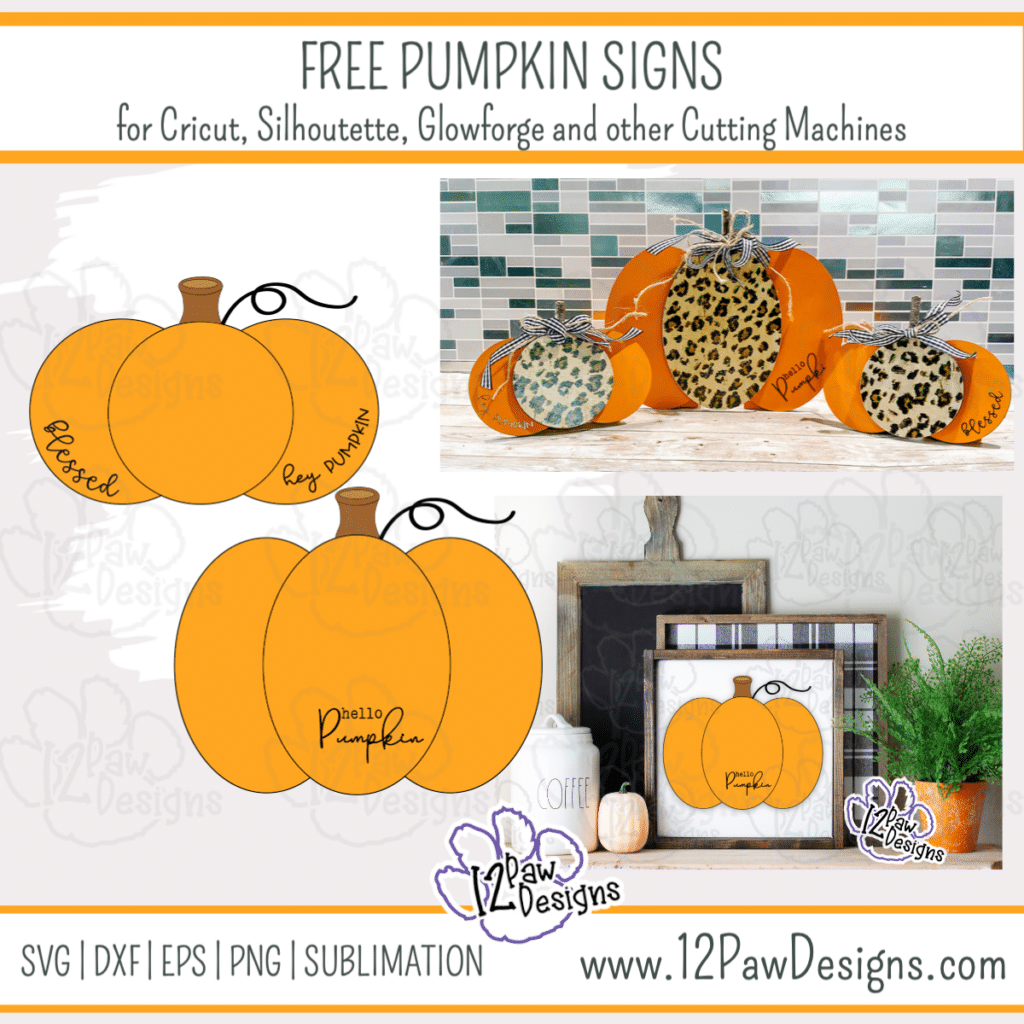
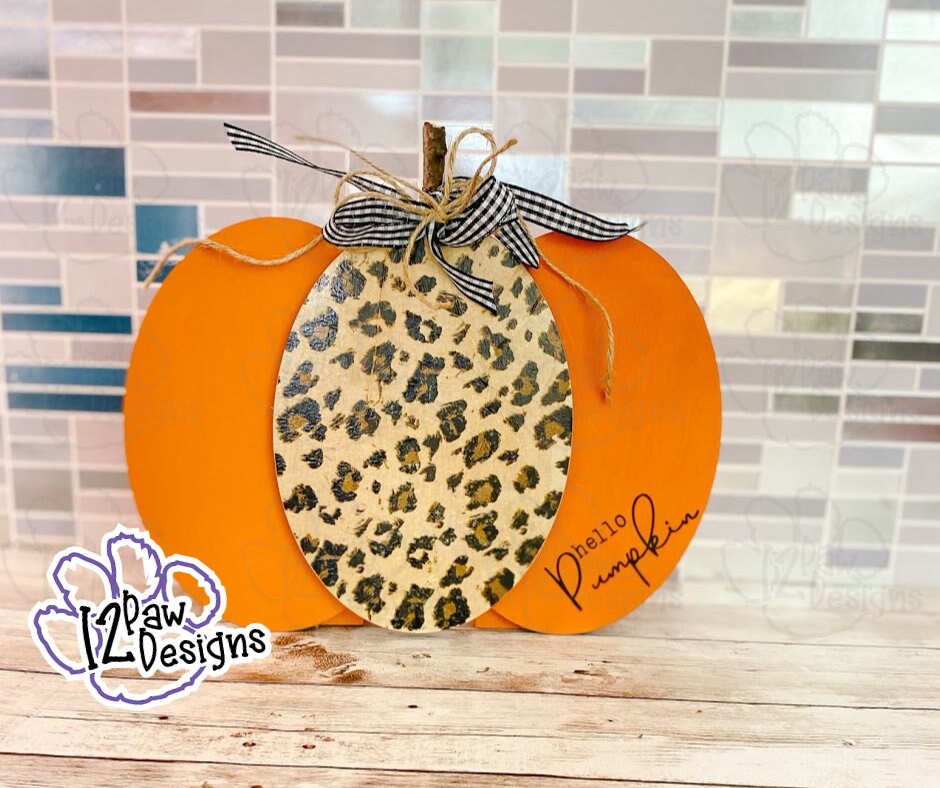
    Hello Pumpkin! Today I am sharing with you my pumpkin signs that I used to make a 3D Pumpkin. The cutting file comes with Hello Pumpkin, Hey Pumpkin and Blessed for your word choices. These are great addition to a table center piece, your fall decorations or a special gift for a friend.

    I make my 3D pumpkins with ovals and round. You can cut them yourself or pick some up at your favorite craft location. I cut my ovals and round, however, to help them stand up I used tumble tower blocks from the Dollar Tree. Then using modge podge to attach leopard print tissue paper to the pump centers.

    This weeks FREE Pumpkin Signs SVG/cut file can be found in the Freebie Library. File number is 52 (remember the password is always in the bottom of your weekly email from me). I have also created a video tutorial along with some quick directions below on how I made these fun 3D pumpkins. I can’t wait to see your projects!!

    Introducing my Facebook Craft Group!!!

    I am so excited to let you know that I started a Facebook Craft Group. The goal of the group is to welcome ALL crafters. I craft in different mediums, styles and type. Wood, vinyl, paint, sublimation, tumblers, etc. No matter what you do this group is for you. Come and join us!!! Click the link! Crafty Paws for All Cricut Silhouette Glowforge Sublimation and More

    Hello Pumpkin – 3D Pumpkin Supply List

    • Cutting Machine and software
    • Pumpkin Sign (click on the link)
    • Wood Round and or ovals
    • Tissue Paper of choice – I used leopard print from Hobby Lobby
    • Paint of Choice – I used orange. However, if I made a trio again I would paint each one different.
    • Tumble tower blocks from the Dollar Tree
    • Sand paper or sanding block – to prep your wood and sand after applying tissue paper
    • Sticks for the pumpkin stems – Check your yard or hobby lobby sells a bag for a few dollars
    • Polyacrylic or Modge Podge
    • Brushes – get my from the Dollar Tree
    • Ribbon
    • Glue gun
    • Vinyl for words
    • Weeding tools, scissors, cutting knife, transfer tape, etc

    Video Tutorial3D Pumpkin

    Here are the steps I took to make the Hello Pumpkin 3D Pumpkins

    Step 1 – Give your wood a light sanding. Cut your tissue paper or even napkins to be slightly larger then your oval or circle. Then take your polyacrylic (or modge podge) and put a thin layer on the center wood piece for the pumpkins. Then apply your tissue paper to the poly. layer. Then while smoothing it out apply a thin layer over it. Remember, you do not need a lot.

    Step 2 – While the centers are drying paint your other pieces and the tumble tower blogs (these are used to help your pumpkins stand up. You can leave the sides and back unpainted if you would like. If you are planning on doing a trio of pumpkins you can paint your pumpkins different colors.

    Step 3 – While everything is drying. Cut out the words on your cutting machine. There are 3 options for you. I also curved them to go on left or right side of the pumpkin. Weed your vinyl. If the words are too small you can always do a reverse weed. Apply your transfer tape to the vinyl.

    Step 4 – Glue your pumpkins together. The painted pieces will go behind the pattern piece. I used hot glue. You can also use E6000 to make sure it holds. I used the center piece and one of the back pieces first. Applied my glue and then stood it up on end to make sure it was even on the bottom. Then repeated to add the 3rd piece.

    Step 5 – Glue the tumble tower blocks to the back. I glued them up just slightly. I wanted a little tilt. Not much, just a little.

    Step 6 – Glue the stick to the top of the pumpkin for the stem.

    Step 7 – Apply your vinyl words to the pumpkin(s)

    Step 8 – Add some ribbon, jute, raffia, etc to the stem to finish the pumpkin off. You can tie a knot or bow.

    Step 8 – Enjoy!

    How to get your FREE Files

    To get your FREE file please go to my Freebie Library, sign in (don’t worry if you are not a member yet, sign up and the password will be emailed to you!!! Also, remember I include it in the bottom of the weekly email too! 😉 ) and download Number 52 – Pumpkin Sign. The downloaded file will have multiple file options SVG, PNG, DXF (If you have the free version of Silhouette Studio you will need this file) and EPS. 

    I really hope you enjoyed the 3D Pumpkins. Remember a ? Pinterest pin would be so appreciated! I can’t wait to see what you create. Please share with me. You can come back here and add a comment or add one to Facebook too!

    Hello Pumpkin, 3D Pumpkin, Hey Pumpkin, Cricut Silhouette Glowforge, Svg/Dxf/Png/Eps, Digital Download, Cut File
    Hello Pumpkin, 3D Pumpkin, Hey Pumpkin

    Also, please check out my shop. I am always adding new designs.
    https://12pawdesigns.com/shop/

    If you have any questions or run into an issue please let me know!!!

    Lorri?
    Lorri@12PawDesigns.com

    Let’s Conntect!

    Want to connect more with 12 Paw Designs???:
    • Website: https://12pawdesigns.com
    • FB Page: https://www.facebook.com/12pawdesigns/
    • FB Group: www.facebook.com/groups/craftypaw/Crafty Paws for All Cricut Silhouette Glowforge Sublimation and More
    • Instagram: https://www.instagram.com/12pawdesigns/
    • Pinterest: https://www.pinterest.com/12PawDesigns

    DO NOT resell any of the files as digital download or any other form.
    DO NOT claim the files as your own.
    DO NOT modify and resell the files in any form.
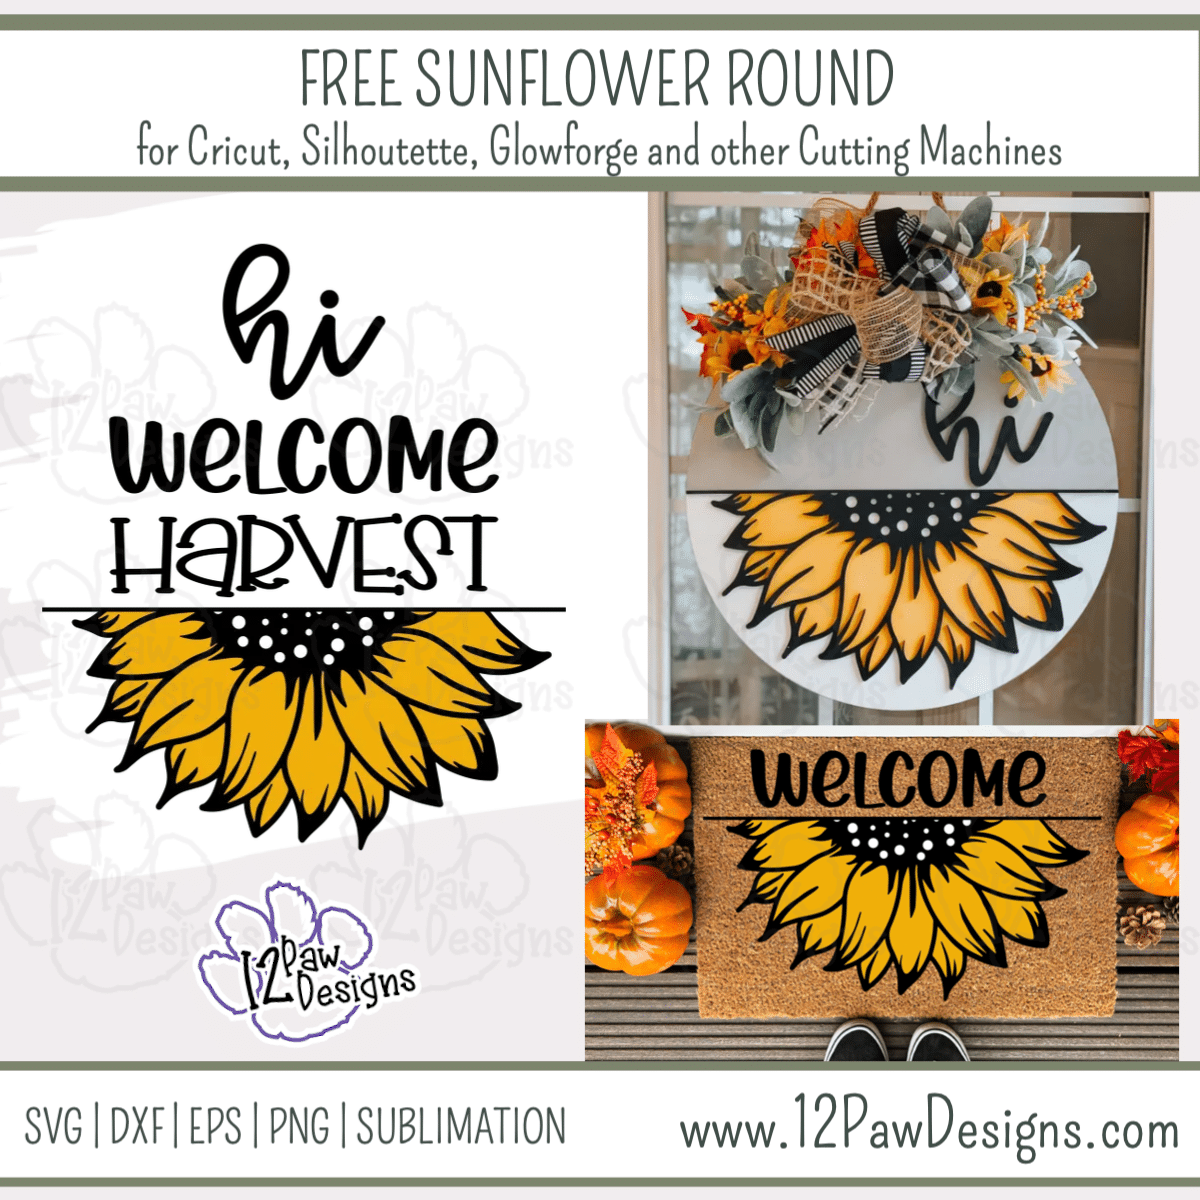
  • With Fall in the Air lets Make a Sunflower Round

    With Fall in the Air lets Make a Sunflower Round

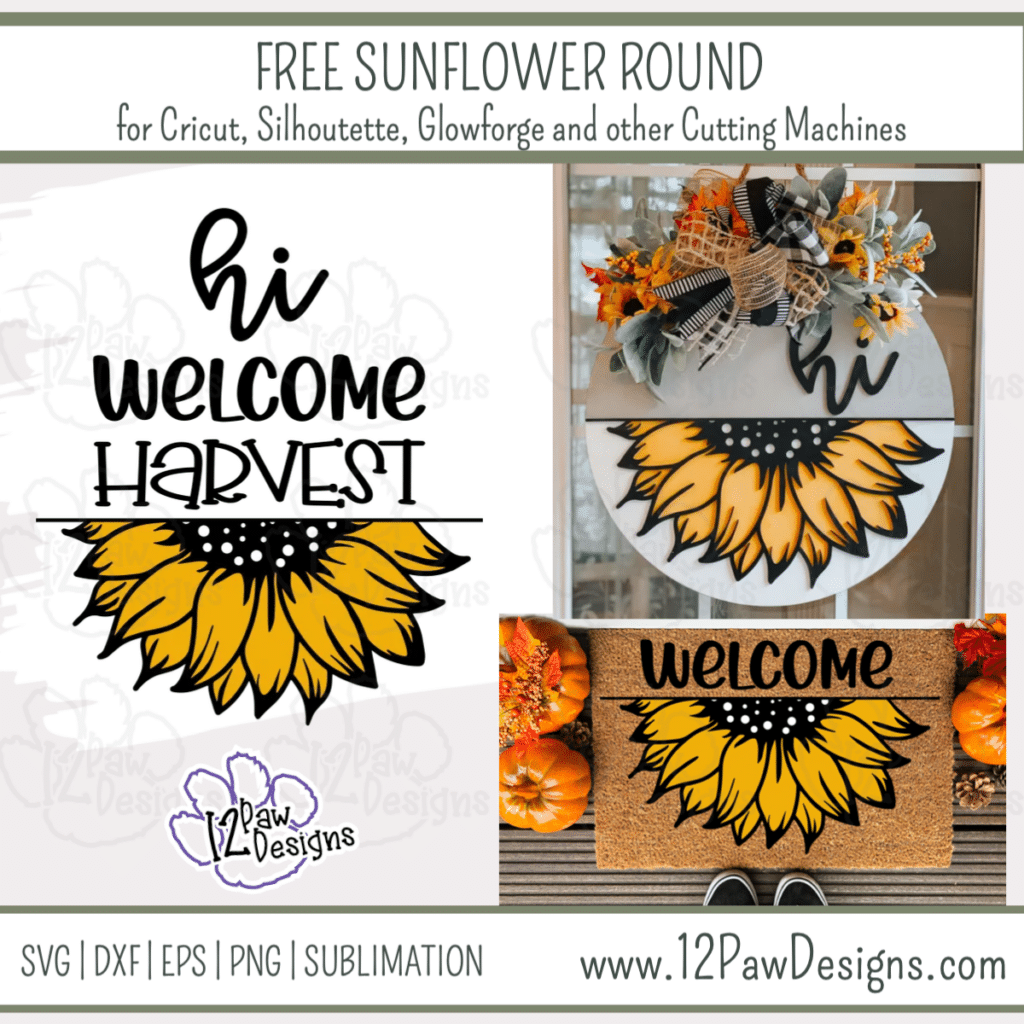
    Sunflower Round, Sunflower, Sunflower Svg, Cricut Silhouette Glowforge, Svg/Dxf/Png/Eps, Digital Download, Cut File

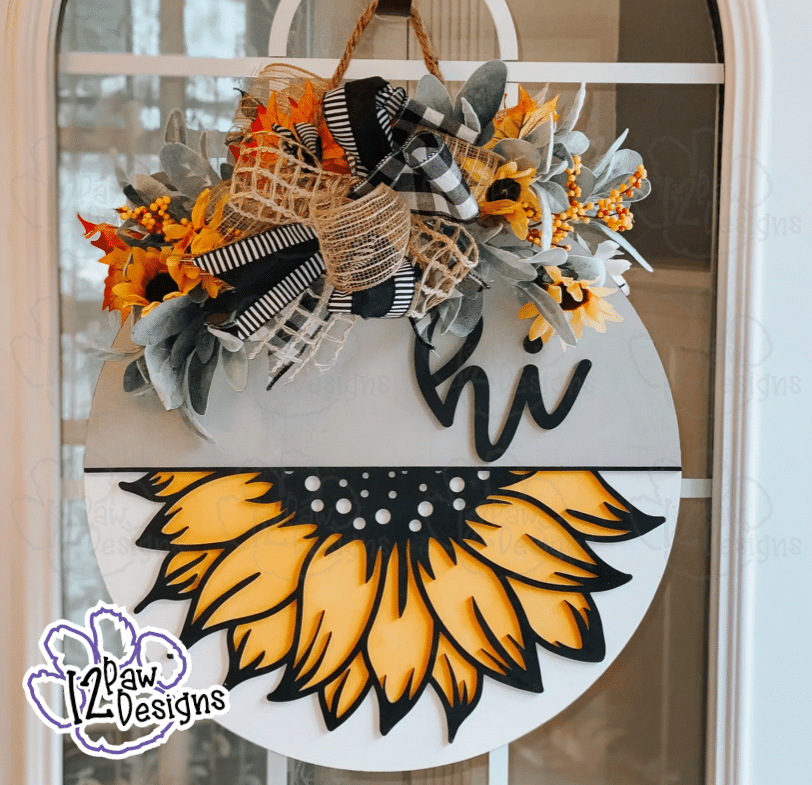
    Fall is in the air so I design a pretty Sunflower Round. The Sunflower SVG has three different words you can use. You can also leave the words off and just use the Sunflower.

    I made my round with a mix of paint and a wood overlay of the Sunflower outline. However, this can be done with all paint using a stencil or vinyl for the words and sunflower. This is such a versatile project. This would be pretty on a door mat, sign, tote bag, etc. So many options.

    This weeks FREE Sunflower SVG/cut file can be found in the Freebie Library. File number is 51 (remember the password is always in the bottom of your weekly email from me). I have also created a video tutorial along with some quick directions below on how I made this beautiful Sunflower Round. I can’t wait to see your projects!!

    Introducing my Facebook Craft Group!!!

    I am so excited to let you know that I started a Facebook Craft Group. The goal of the group is to welcome ALL crafters. I craft in different mediums, styles and type. Wood, vinyl, paint, sublimation, tumblers, etc. No matter what you do this group is for you. Come and join us!!! Click the link! Crafty Paws for All Cricut Silhouette Glowforge Sublimation and More

    Sunflower Round Supply List

    • Cutting Machine and software
    • Sunflower Round (click on the link)
    • Masking Vinyl (like oramask or starmask or mylar
    • Prepped MDF board – I cut the sunflower outline overlay on the Glowforge. However, vinyl works too!!!
    • Stain or paint of Choice – I painted the round grey and white. The sunflower I used black and then yellow for sunflower
    • Sand paper or sanding block – to prep your round
    • 18″ Round or round to your size
    • Painters tape
    • Brushes and Make-up sponges – get my from the Dollar Tree
    • Ribbon and floral to finish your round
    • Staple gun
    • Weeding tools, scissors, cutting knife, transfer tape, etc

    Video TutorialSunflower Round

    Here are the steps I took to make the Round

    Step 1 – Prep your board by sanding it. Find your board center and then use painters tape to mark your line. I then painted the one half grey. I had to mix paint for my grey. I didn’t have anything light enough. I used a heat gun to speed of drying. Once the grey is dry, tape that side off and use white to do the bottom half.

    Step 2 – While everything is drying(if needed). Open the SVG file in your cutting software (note: if you have the free version of Silhouette studio you will need the DFX files). Size the sign according to the board you will be working with. Use your masking vinyl or mylar to cut out the sunflower petals. Then cut your sunflower outline in either wood or vinyl.

    Step 3 – Once your stencil or mylar is cut do your weeding. Remember you are weeding the parts you will be painting. Mylar is great for making reusable stencils. If you are using vinyl for your sunflower outline weed that now and use transfer tape on the vinyl.

    Step 4 – Lay your stencil or mylar on your round. Since I was using a wood over lay I used it to help me line everything up. If used vinyl you can do the same thing, however, use a piece of parchment paper. Remove the backing to the vinyl and then lay it on the parchment so it doesn’t stick. Line everything up and apply the stencil mask or mylar. Note: you can paint outside your lines, I know…it’s ok on this one to go outside the lines. The vinyl or wood will cover it.

    Step 5 – Now paint the sunflower leaves. I used a make up sponge. TIP: Light paint and light handed goes a long way. If you put too much paint on the sponge or are too heavy handed you will cause bleeding. I went over my leaves a couple of times. It did not take any extra time and it dries faster this way.

    Step 6 – I set my round to the side and painted my Sunflower outline and Hi black.

    Step 6 – I then applied the wood to the top of the round. If things don’t line totally back up?? It’s ok. You can always touch up with a little paint. Nobody will notice. I had to “touch” up a few spots myself.

    Step 7 – Now to make a bow and add your floral. I used 4 kinds of ribbon for the bow. I cut 2 strips of each about 15″ long. You can watch the video for this portion. I also had a piece of floral wire read to tie off the bow. You could also use a zip tie. So take each piece of ribbon and fold two thirds of it into a loop. Leave a third hanging. Pinch where the loop meets. Then do the same with the next piece of ribbon. Do this until all 8 pieces are looped and pinched in your hand. It should look like a ribbon bouquet at this point. Now take your wire or zip tie and tie it off where you have it pinched. Now fluff. I pulled the tails out to the side and fluff the loops. NOTE: If you dont want to do a pow you could use a larger sunflower in its place and fill in the florals more.

    Next take your florals and your staple gun and apply to the round. I used ¼” staples. You are probable wondering why staples vs glue, that is due to heat. I have had florals fall off and I am not a light handed gluer either. I have a North facing door so the heat can get crazy. You could do the glue and then add the staples. If just makes sure that if you are selling your round you dont have to worry about fall off. Once I had my florals I added the bow.

    Step 8 – Look how pretty!!!! Enjoy!

    How to get your FREE Files

    To get your FREE file please go to my Freebie Library, sign in (don’t worry if you are not a member yet, sign up and the password will be emailed to you!!! Also, remember I include it in the bottom of the weekly email too! 😉 ) and download Number 51 – Sunflower Round. The downloaded file will have multiple file options SVG, PNG, DXF (If you have the free version of Silhouette Studio you will need this file) and EPS. 

    I really hope you enjoyed the sunflower round. Remember a ? Pinterest pin would be so appreciated! I can’t wait to see what you create. Please share with me. You can come back here and add a comment or add one to Facebook too!

    Sunflower Round, Sunflower, Sunflower Svg, Cricut Silhouette Glowforge, Svg/Dxf/Png/Eps, Digital Download, Cut File
    Sunflower Round, Sunflower, Sunflower Svg

    Also, please check out my shop. I am always adding new designs.
    https://12pawdesigns.com/shop/

    If you have any questions or run into an issue please let me know!!!

    Lorri?
    Lorri@12PawDesigns.com

    Let’s Conntect!

    Want to connect more with 12 Paw Designs???:
    • Website: https://12pawdesigns.com
    • FB Page: https://www.facebook.com/12pawdesigns/
    • FB Group: https://www.facebook.com/groups/809334459761115/Crafty Paws for All Cricut Silhouette Glowforge Sublimation and More
    • Instagram: https://www.instagram.com/12pawdesigns/
    • Pinterest: https://www.pinterest.com/12PawDesigns

    DO NOT resell any of the files as digital download or any other form.
    DO NOT claim the files as your own.
    DO NOT modify and resell the files in any form.
  • Fall Is My Second Favorite F Word

    Fall Is My Second Favorite F Word


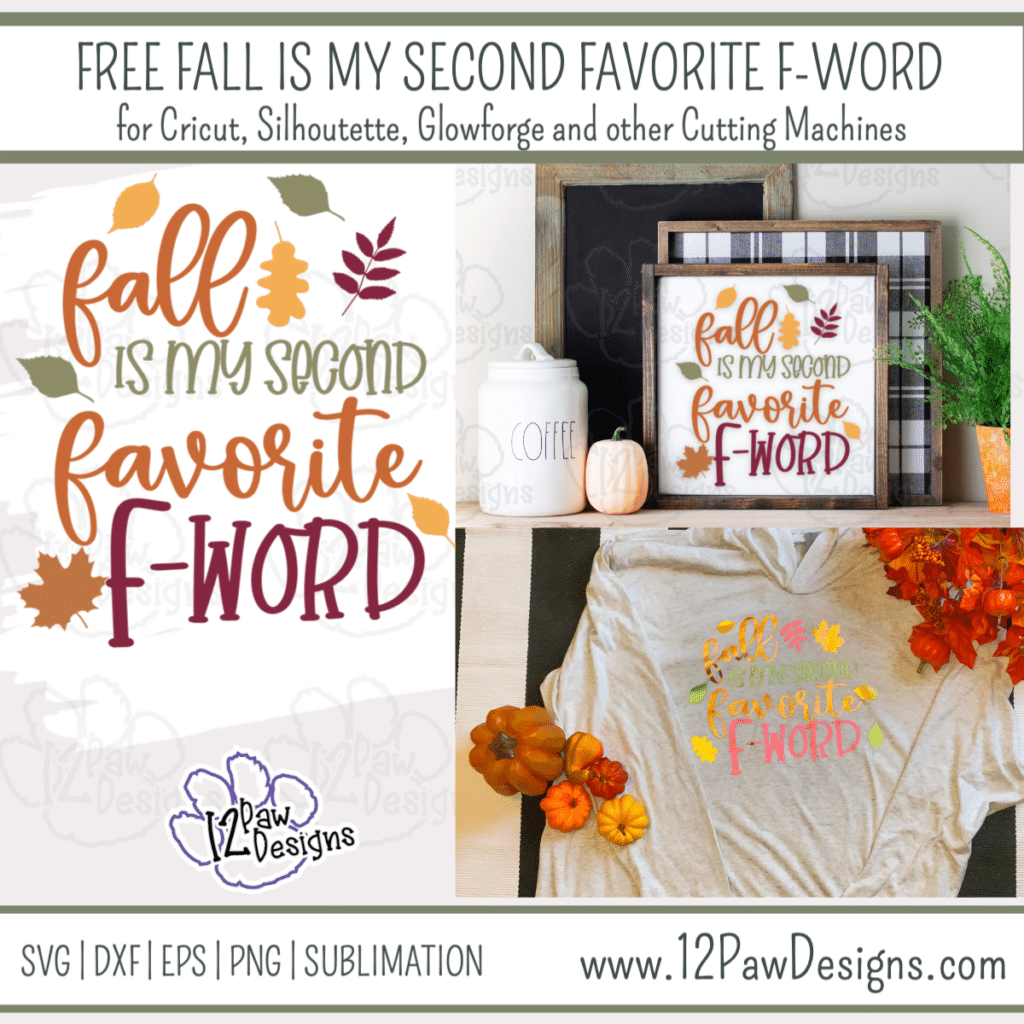
    Happy September! Hard to believe fall is around the corner. Here in Wisconsin some of the leaves are changing already. I do love fall, however, not quite ready to give up the summer attire! However, let us have some fall humor with the fun design. This week I am sharing with you Fall is my Second Favorite F Word Design.

    Fall Is My Second Favorite F Word, Fall, Fall Humor, Cricut Silhouette Glowforge, Svg/Dxf/Png/Eps, Digital Download, Cut File
    Fall Is my Second Favorite Fword

    I used some pretty metallic heat transfer vinyl to make a long sleeve shirt. This would also be fun for a sign for you desk or wall as well!!! You could also use it for a cute tote too! This weeks FREE FALL IS MY SECOND FAVORITE F WORD SVG/Cut files can be found in the Freebie Library. File number is 50. I have also created a video tutorial along with some quick directions below on how I made my shirt and some pointers! Remember to please share what you created! Check me out on Facebook and Instagram and remember a pintrest pin is always appreciated!!

    Fall is my Second Favorite F Word Supply List

    • Cutting Machine and software
    • Fall is my Second Favorite F Word (click on the link)
    • Heat Transfer Vinyl of choice – I purchased mine from 143vinyl.com
    • Heat press or Easy Press
    • Weeding tools, scissors, cutting knife, etc

    Video TutorialFall is my Second Favorite F Word


    Here are the steps I took to make my Rhinestone Shirt

    Step 1 – Upload the free file into your cutting software. Size it to your preference and cut.

    Cutting notes….I used weeding boxes around my words and leaves. I find it is easier to weed and I have less.

    Also, when cutting heat transfer vinyl you need to mirror the image. Also, make sure you are putting the vinyl on your mat the proper way. I like to think of it as pretty side down.

    I always do a test cut. No sense in wasting precious vinyl!

    Step 2 – Weed your vinyl

    Step 3 – Let’s press our HTV to our shirt. Find the center of your shirt. I like to fold mine in half and give it quick few seconds press. Once you have your fold lay the shirt down on the press. Because I cut the saying in different color I laid everything out on the shirt first using my centering line for placement. I did fold favorite in half to find the center and help me lay it out. Once I had the placement where I wanted It I took everything off but fall and favorite. This is due to those words being key for lining everything up again. Make sure when pressing the vinyl that your carrier sheets are not overlapping each other. I then pressed the first words for a few seconds. Just enough to get the vinyl to release. Metallic vinyl is a cold peel. So cool your vinyl down. Once it is cool enough to peel remove it from the shirt. Next, put the rest of the items onto the shirt and press. You can now do a full time press on the shirt. Once that is done, again, let it cool and peel the carrier sheets off. I did give the shirt one more press for a few seconds to make sure I could see some fibers in the vinyl.

    Step 4 – Enjoy your beautiful shirt!!!

    How to get your FREE Fall is my Second Favorite F-Word File

    To get your FREE file please go to my Freebie Library, sign in (don’t worry if you are not a member yet, sign up and the password will be emailed to you!!! Also, remember I include it in the bottom of the weekly email too! 😉 ) and download Number 50 – Fall is my Second favorite F Word The downloaded file will have multiple file options SVG, PNG, DXF (If you have the free version of Silhouette Studio you will need this file) and EPS. 

    I hope you enjoy the FREE files. Thank you again for stopping by and being part of my dream and 12 Paw Designs! Have an absolutely amazing day!!!

    Remember to PIN IT!!! ?

    Fall Is My Second Favorite F Word, Fall, Fall Humor, Cricut Silhouette Glowforge, Svg/Dxf/Png/Eps, Digital Download, Cut File
    Fall Is my Second Favorite Fword

    Also, please check out my shop. I am always adding new designs.
    https://12pawdesigns.com/shop/

    If you have any questions or run into an issue please let me know!!!

    Lorri?
    Lorri@12PawDesigns.com

    Let’s Conntect!

    Want to connect more with 12 Paw Designs???:
    • Website: https://12pawdesigns.com
    • FB Page: https://www.facebook.com/12pawdesigns/
    • Instagram: https://www.instagram.com/12pawdesigns/
    • Pinterest: https://www.pinterest.com/12PawDesigns

    DO NOT resell any of the files as digital download or any other form.
    DO NOT claim the files as your own.
    DO NOT modify and resell the files in any form.
  • Beautiful Apple Tiered Tray

    Beautiful Apple Tiered Tray

    Apple Tiered Tray, Fall Tiered Tray, Apple Tray Svg, Cricut Silhouette Glowforge, Svg/Dxf/Png/Eps, Digital Download, Cut File

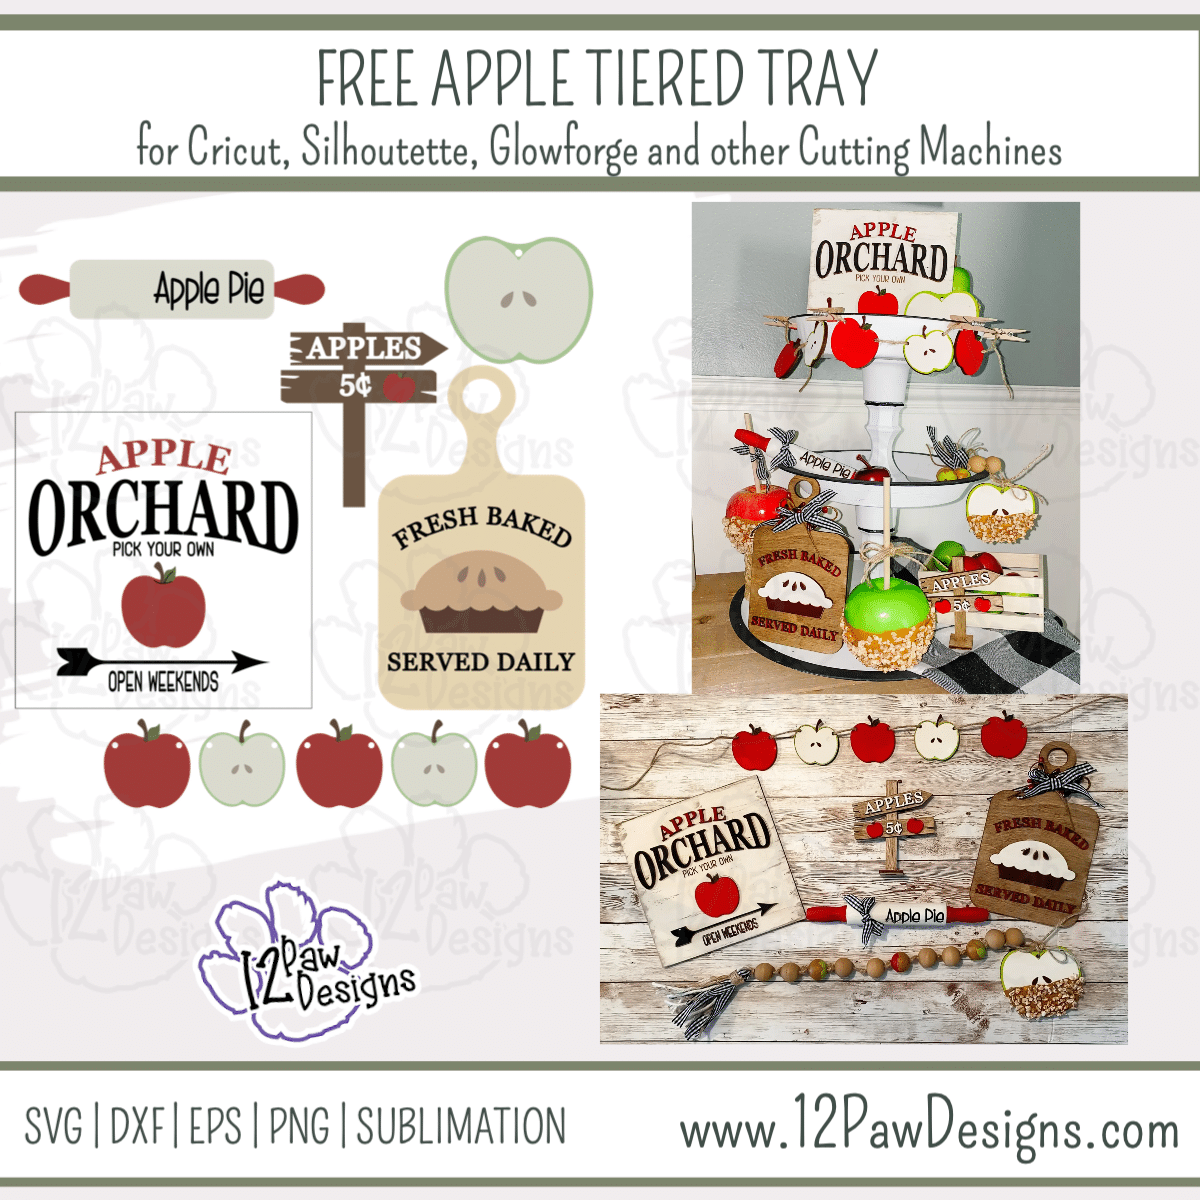
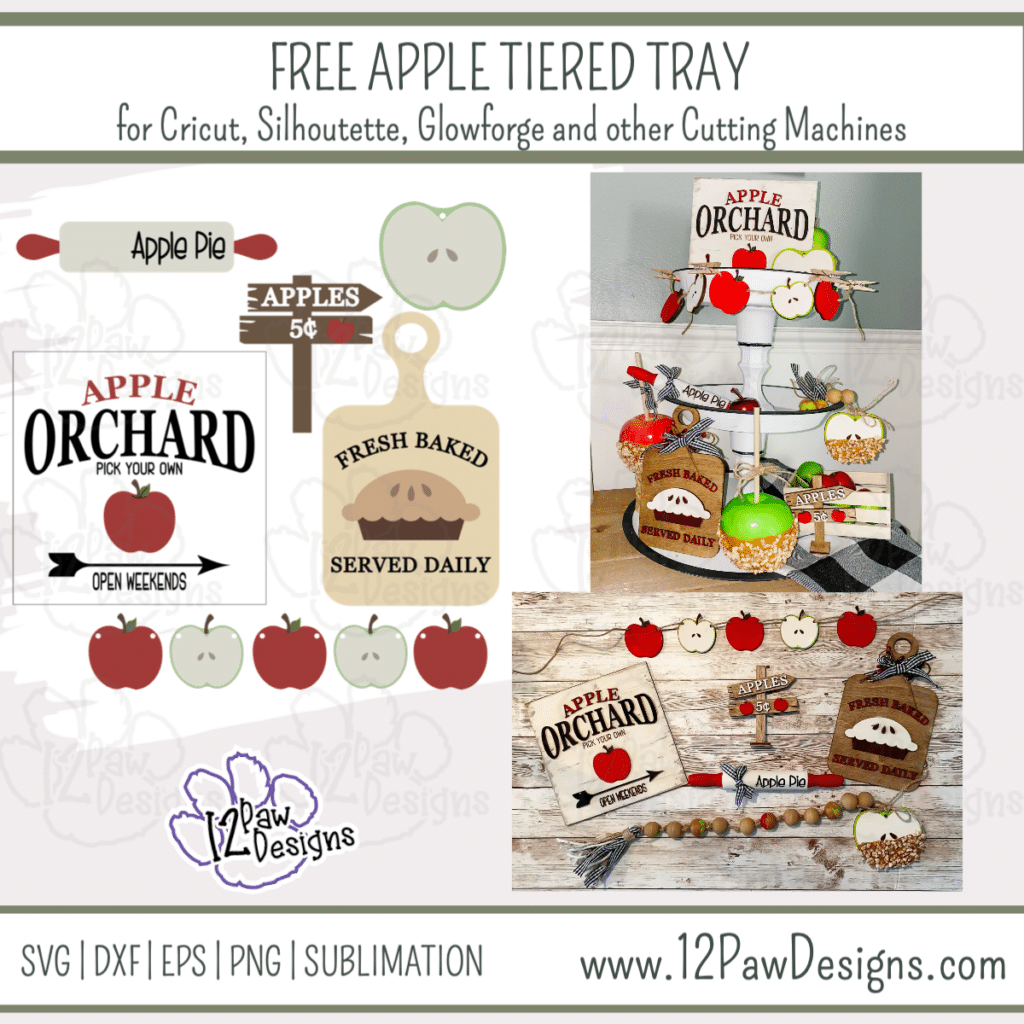
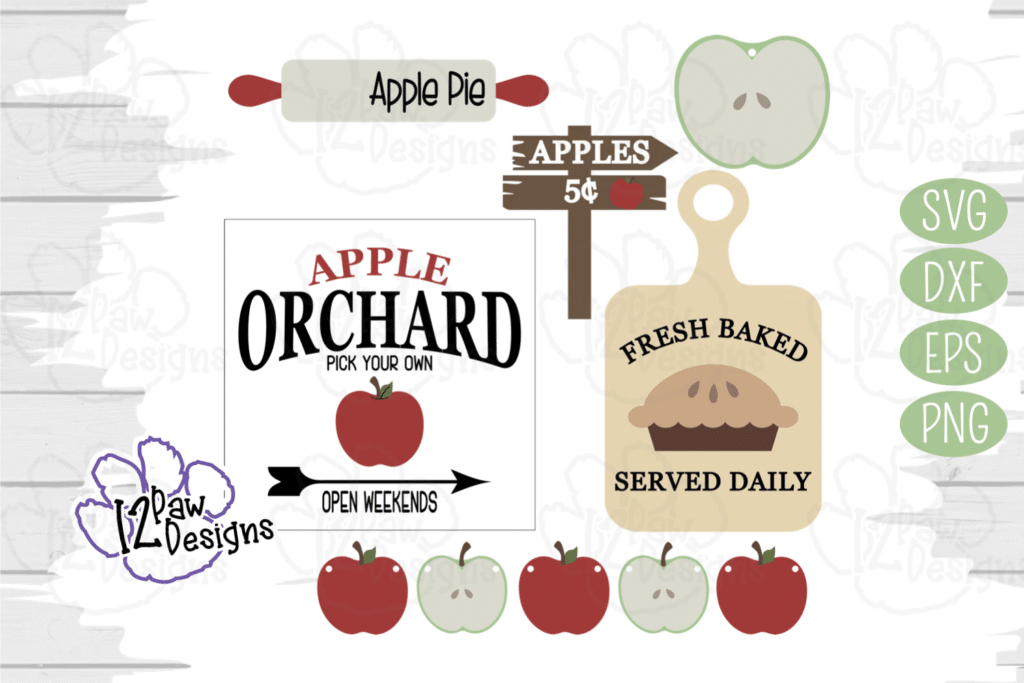
    I have never decorated with apples in the fall, however, this Apple Tiered Tray is just what I needed. So I designed this Apple Tray SVG for you and in the video and step by step I walk you through how I made it. This is a great Fall Tiered Tray for any decor!!

    This weeks FREE Apple Tiered Tray can be found in the Freebie Library. File number is 49. Check out the tutorial for tips and tricks I found along the way. Remember to please share what you created! Check me out on Facebook and Instagram and remember a pintrest pin is always appreciated!!

    Apple Tiered Tray Supply List

    • Cutting Machine or Glowforge and software
    • Apple Tiered Tray (click on the link)
    • Wood or blanks. For blanks Dollar tree has some great options. Repurpose a 6×6 sign, wood blanks, popsicle sticks for the little sign etc. For the Banner you could use chipboard, cardstock, etc
    • Mini Rolling Pin – I purchased from Amazon
    • Wood for the Glowforge that is prepped (masked) if you are using a Glowforge
    • Adhesive Vinyl in your color choice if you are doing vinyl
    • Gorilla Super Glue Gel
    • Gorilla Duck Tape
    • Hot Glue Gun and Glue
    • Paint – Red, Apple Green, Ivory and Carmel color
    • AntiqueChalk Dark Wax and Rag – I bought this from Amazon, however, you could use brown paint and a baby wipe or stain.
    • Modge Podge
    • Corn Cob – I found my at Mejier in the pet area
    • Brush, Make Sponges and Baby Wipes
    • Paint Pens – I used Posca and/or Arteza
    • Ribbon
    • Beads – I found mine painted at Hobby Lobby during a sale. You can also buy some from Amazon
    • Twine\Jute
    • Weeding tools, scissors, cutting knife, transfer tape etc

    Video TutorialApple Tiered Tray – Apple Tray SVG

    Here are the steps I took to make my Apple Tiered Tray

    Step 1 – Load the free cutting file into your favorite cutting software. For Cricut and Silhouette I set mine to 12×12. I used the Glowforge, however, most cutters can cut thin birch or chipboard (check your cutting machine). In the video I show some options for blank ideas as well!!!

    Step 2 – Cut your wood or vinyl. On the Glowforge you need to mask your wood with paper transfer tape to protect from scorching. I also put 3m adhesive tape on the back of a board and cut it so it saves time to attach items to the boards

    Step 3 – Once you have your wood or vinyl cut do your weeding. For the Glowforge that means removing the mask from the wood. I found the Gorilla duct tape works amazing!!! You can also use weeding tools, pin pen, etc I also found for the letters that it was easier to remove the mask at the same time I was pulling the 3m off the back. So i did this after the signs were painted.

    Step 4 – Paint your items. I use the Posca paint pens for the small items. They are quick and easy!! For the larger items I used acrylic paint.

    I painted the Apple Orchard sign with Ivory Chalk paint and a baby wipe. I then stained the cutting board, the apple sign and the back of the apple garland.

    For the Apples and the mask I removed the center mask first and used the baby wipe to paint that area. I then painted the solid apples with red and a baby wipe.

    Then I used the paint pens to do the pie pan, seeds, leaves and stems on the apples, etc

    Step 5 – Next I started to assemble. I put score marks on the wood so I knew where everything went. I then peeled the backing off on the 3m and attached it to the signs. I then attached all the letters. This is where i found it was easier to attach them to the gorilla tape, pull the 3m backing and then attach to the sign.

    Paint all your letters while on the signs.

    Step 6 – Let’s caramel or apples. I mixed a 1 to 1 mix of modge podge and paint. Now take your apple slice and apple the mix. You want to be thicker on this because the Corn cob needs to attach to this mix. I poured it on and then pushed it on with my finger. Set to the side to dry. Then I took the beads I painted Red and Green and applied some caramel to them

    Step 7 – Finishing touches….

    Apple Tag\beads – Lets take some ribbon and twine to make a tassel. Wrap them around your fingers multiple times to form a loop. Now take a long piece of twice and tie it to the top. Next take a small piece and wrap it around to form your tassel. Then cut the bottom. Now I like to use a piece of flora wire (I get mine from dollar tree) and use it a a twine thread, fold in half and put the twine in it. Thread it through a bead towards the tassel. Tie a knot and then tie a knot over the knot you made, I did this to make it a “thick” knot. Then repeat. I did 2 neutral beads, caramel bead, 2 beads, caramel, 2 beads, caramel 2 beads. Then attached my apple slice. I tied a knot. Then I tied a twine knot and attach to the knot.

    Cutting board. I wrapped a piece of ribbon around the handle, then added some red twig piece I picked up at the dollar tree. Then tied a bow of the ribbon and glued that to the cutting board.

    Apple sign – Super clue the little boards to the post. Push the post into the stand.

    Apple Banner – I used twine strung my apples onto that.

    Rolling pin – I wrapped that with a piece of ribbon to add that extra touch.

    Step 8 – How cute did your pieces turn out!?!?! Please share on on my social media so I can see!!!

    How to get your FREE Apple Tray SVG File

    To get your FREE file please go to my Freebie Library, sign in (don’t worry if you are not a member yet, sign up and the password will be emailed to you!!! Also, remember I include it in the bottom of the weekly email too! 😉 ) and download Number 49 – Apple Tiered Tray The downloaded file will have multiple file options SVG, PNG, DXF (If you have the free version of Silhouette Studio you will need this file) and EPS. 

    I hope you enjoy the FREE files. Thank you again for stopping by and being part of my dream and 12 Paw Designs! Have an absolutely amazing day!!!

    Remember to PIN IT!!! ?

    Apple Tiered Tray, Fall Tiered Tray, Apple Tray Svg, Cricut Silhouette Glowforge, Svg/Dxf/Png/Eps, Digital Download, Cut File
    Apple Tiered Tray

    Also, please check out my shop. I am always adding new designs.
    https://12pawdesigns.com/shop/

    If you have any questions or run into an issue please let me know!!!

    Lorri?
    Lorri@12PawDesigns.com

    Let’s Conntect!

    Want to connect more with 12 Paw Designs???:
    • Website: https://12pawdesigns.com
    • FB Page: https://www.facebook.com/12pawdesigns/
    • Instagram: https://www.instagram.com/12pawdesigns/
    • Pinterest: https://www.pinterest.com/12PawDesigns

    DO NOT resell any of the files as digital download or any other form.
    DO NOT claim the files as your own.
    DO NOT modify and resell the files in any form.