Tag: diyhomedecor

  • Crayons Make Me So Happy!

    Crayons Make Me So Happy!

    Crayons, Crayon Sign, Jumbo Crayon, Cricut Silhouette Glowforge, Svg/Dxf/Png/Eps, Digital Download, Cut File

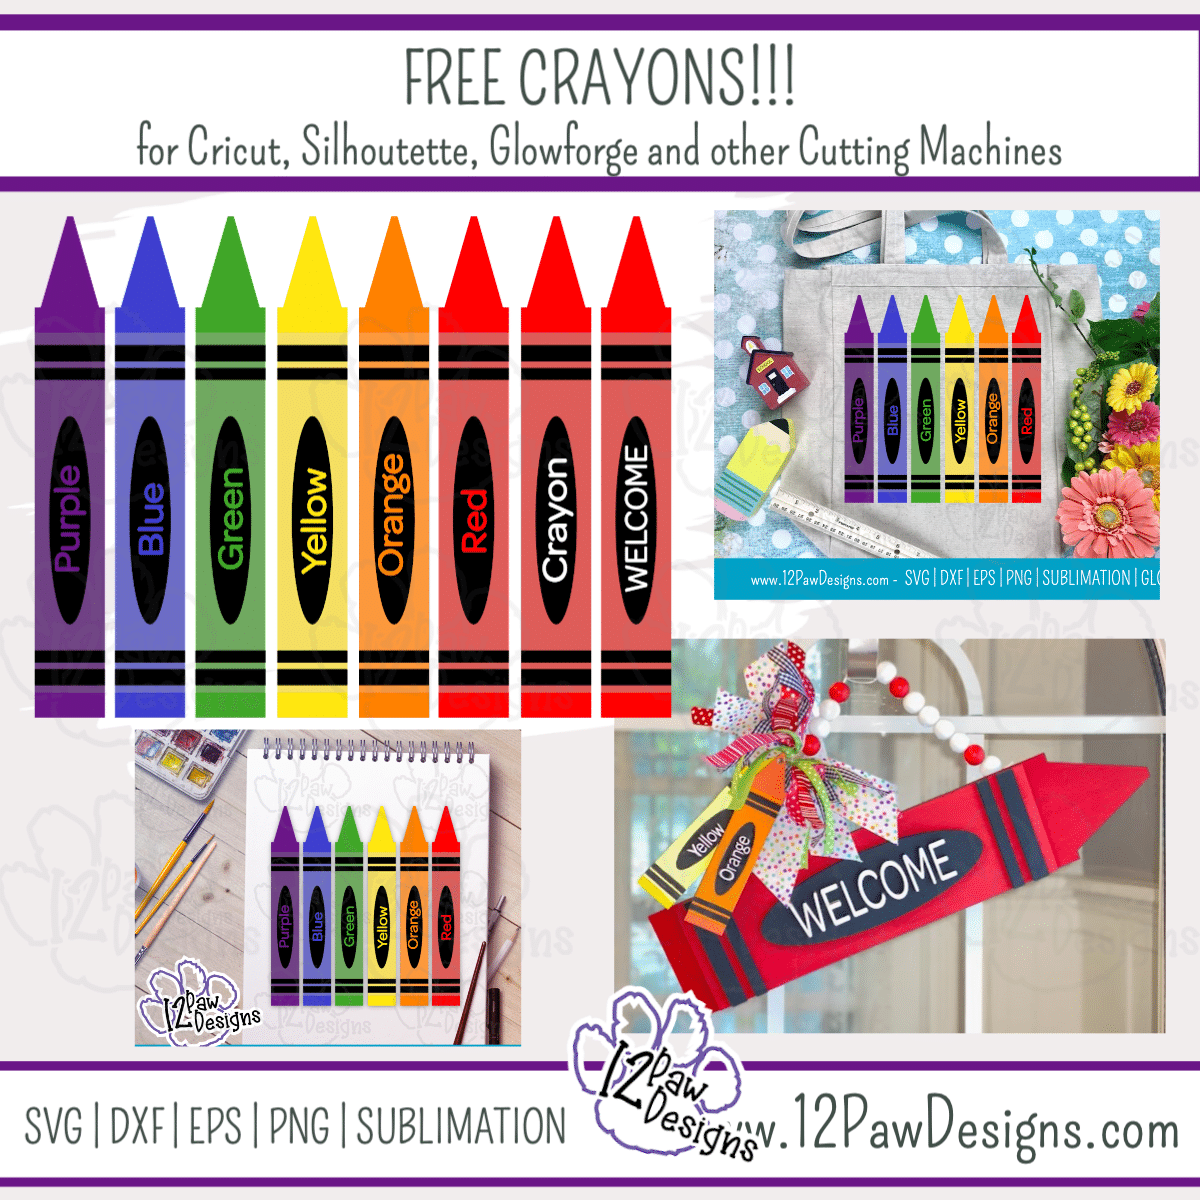
    Hello Everyone! I am so excited to share with you my crayons! Crayons make me so happy so I had to make a jumbo crayon sign with my FREE File! You can bags, shirts, keychains, etc.

    This weeks FREE Crayons can be found in the Freebie Library. File number is 46. I have also created a video tutorial along with some directions on how I made my sign and some pointers! Remember to please share what you created! Check me out on Facebook and Instagram and remember a pintrest pin is always appreciated!!

    Crayons Supply List

    • Cutting Machine or Glowforge and software
    • Crayons\Crayon Welcome (click on the link)
    • Wood (prepped if you are laser cutting) – if you are doing vinyl, you could use basswood and cut on your cutting machine or foam board, etc. I will also be offering blanks for purchase as well!!
    • Paint and Paint pens – i like paint pens for smaller areas. I used Posca
    • Gorilla Super Glue Gel
    • Make up sponges – used this vs a paint brush
    • Ribbon
    • Beads – I found mine painted at Hobby Lobby during a sale. You can also buy some from Amaozon
    • Twine\Jute

    Video Tutorial – JUMBO CRAYON SIGN

    Here are the steps I took to make my crayon

    Step 1 – Load the free cutting file into your favorite cutting software. For Cricut and Silhouette I set mine to 12×12. I used the Glowforge, however, most cutters can cut thin birch or chipboard (check your cutting machine).

    Step 2 – Cut your wood or vinyl. On the Glowforge you need to mask your wood with paper transfer tape to protect from scorching.

    Step 3 – Once you have your wood or vinyl cut do your weeding. For the Glowforge that means removing the mask from the wood. I found the Gorilla duct tape works amazing!!! You can also use weeding tools, pin pen, etc

    Step 4 – Paint your items. I use the Posca paint pens for the small items. They are quick and easy!! I stuck the smaller items on tape so they do not move. For the large crayon I used acrylic paint and make-up sponges. To make light red for the wrapper I used Red paint and added orange and a drop of white. The orange helped it from turning pink.

    Step 5 – Time to glue our items together. I use Gel super glue. I followed the PNG file that is included in your file download for placement, etc. I also show all of this in the video.

    Step 6 – Finishing touches….I took a bead strand I picked up on sale (I have used the same strand for MANY projects and I still have some left!). I pulled off what I wanted and used twine and a piece of wire for a threader and made the hanger strand. I attached to the back of the crayon.

    Messy bow. I love mess bows. You just cut strips of ribbon and lay them criss cross on top of each other. Some tie off with a zip tie. I just use twine and pull tight. I then attached to the bead hanger portion. I then took the crayon tags I made and attached to the bow. You might need to glue or double stick tape the bottom of the crayon tags to the crayon.

    Step 9 – Look how adorable your sign is!!!! Please share!!!

    How to get your FREE Crayons File

    To get your FREE file please go to my Freebie Library, sign in (don’t worry if you are not a member yet, sign up and the password will be emailed to you!!! Also, remember I include it in the bottom of the weekly email too! 😉 ) and download Number 46 – Crayons\Crayon Welcome. The downloaded file will have multiple file options SVG, PNG, DXF (If you have the free version of Silhouette Studio you will need this file) and EPS. 

    I hope you enjoy the FREE files. Thank you again for stopping by and being part of my dream and 12 Paw Designs! Have an absolutely amazing day!!!

    Remember to PIN IT!!! ?
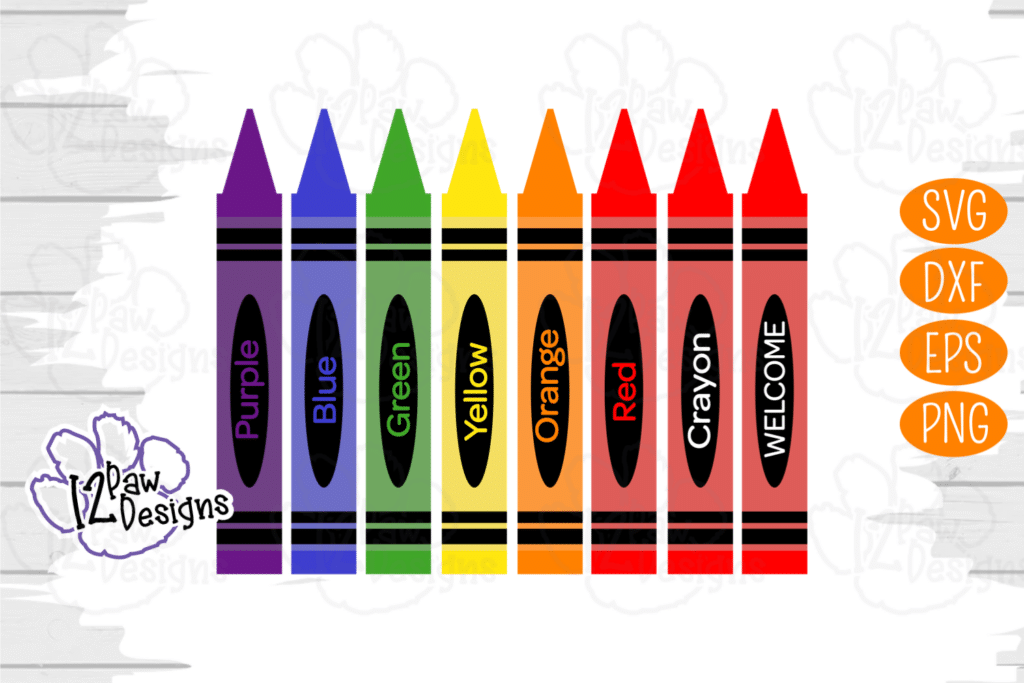
    Crayon, Crayon Sign, Jumbo Crayon, Cricut Silhouette Glowforge, Svg/Dxf/Png/Eps, Digital Download, Cut File
    12PD Crayons

    Also, please check out my shop. I am always adding new designs.
    https://12pawdesigns.com/shop/

    If you have any questions or run into an issue please let me know!!!

    Lorri?
    Lorri@12PawDesigns.com

    Let’s Conntect!

    Want to connect more with 12 Paw Designs???:
    • Website: https://12pawdesigns.com
    • FB Page: https://www.facebook.com/12pawdesigns/
    • Instagram: https://www.instagram.com/12pawdesigns/
    • Pinterest: https://www.pinterest.com/12PawDesigns

    DO NOT resell any of the files as digital download or any other form.
    DO NOT claim the files as your own.
    DO NOT modify and resell the files in any form.
  • Teacher Pencil – Live Love Teach

    Teacher Pencil – Live Love Teach

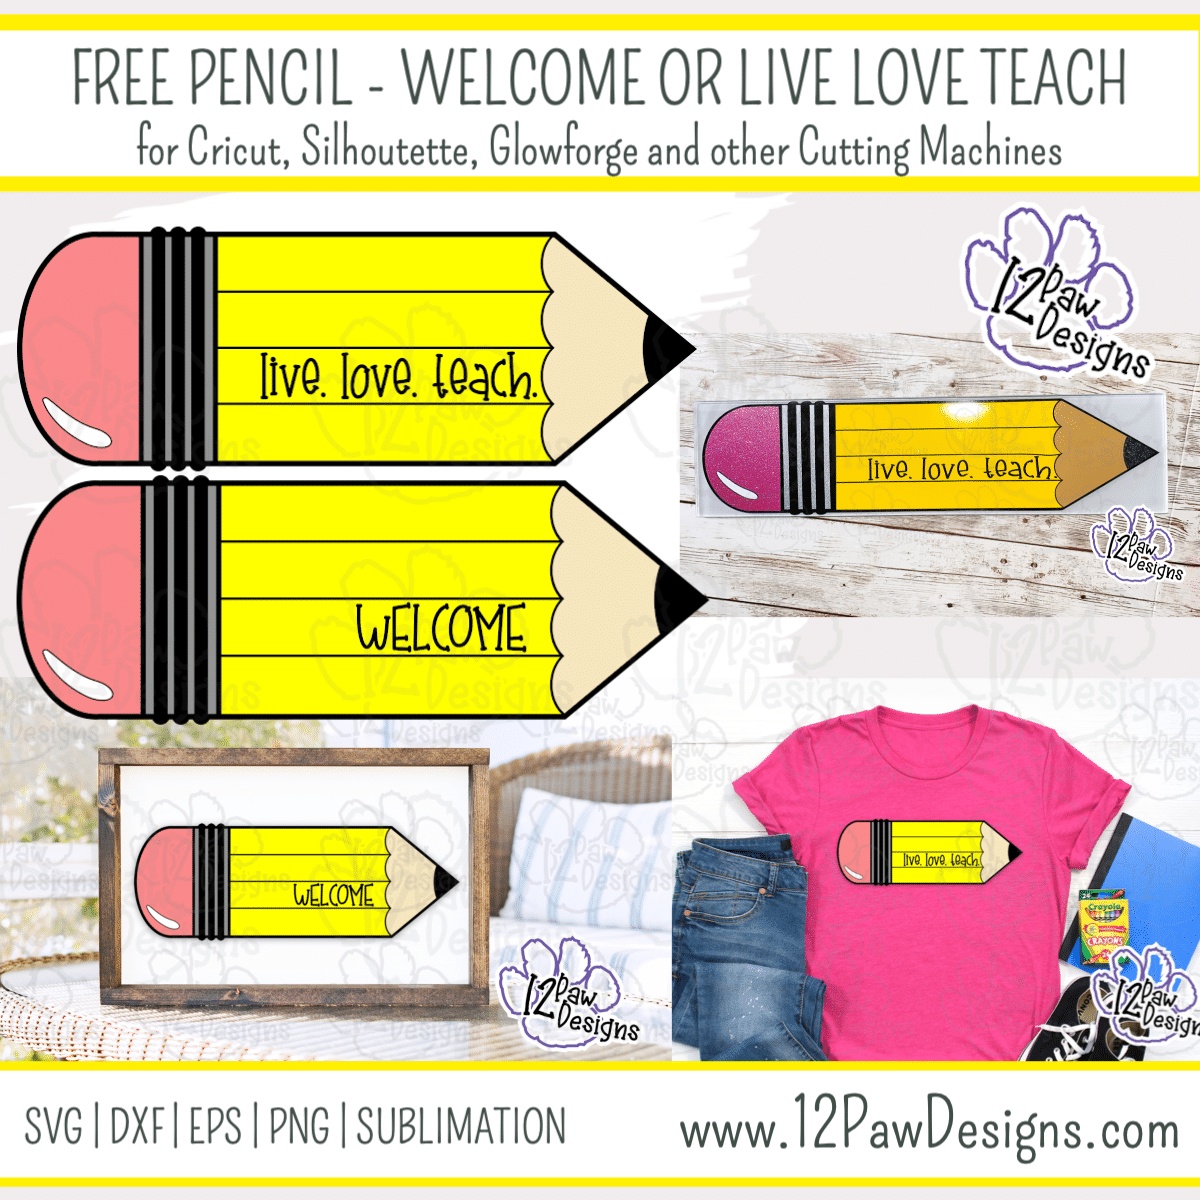
    Teacher Pencil, Welcome Pencil, Live Love Teach, Cricut Silhouette Glowforge, Svg/Dxf/Png/Eps, Sublimation, Digital Download, Cut File

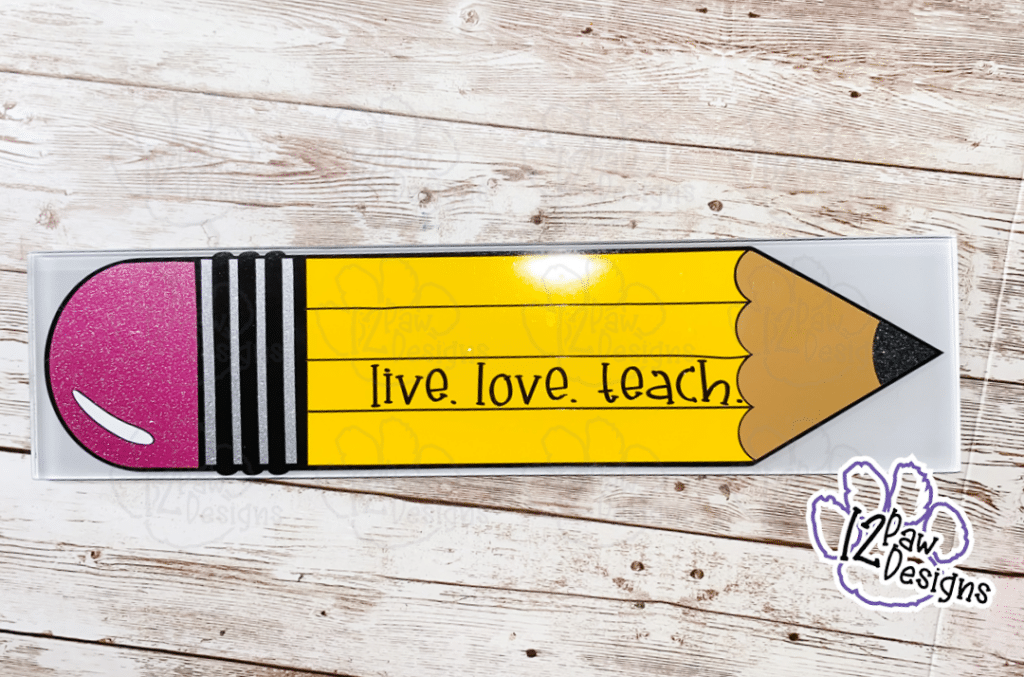
    This week I am sharing a fun Free Teacher Pencil with either Live Love Teach or Welcome cut file! You can change colors, mix media, put it on a board, etc.

    This weeks FREE SVG can be found in the Freebie Library as number 46 Teacher Pencil. I am going to use the file and make a fun subway tile!! The video and steps are too are below. This project is quick, fun and inexpensive and would be an awesome little gift. You could put it on a shirt or duplicate to make a trio and decorate a mug, shirt, etc.

    Teacher Pencil Tile Supply List

    • Cutting Machine and software
    • Teacher Pencil FREE File (click on the link)
    • Vinyl and Transfer tape of choice
    • Weeding tools, scissors, cutting knife and parchment paper
    • Alcohol and cotton pad

    Teacher Pencil Video Tutorial

    Let Your Creativity go…

    Teacher Pencil DIY Steps….

    Step 1 – Open the SVG file in your cutting software (note: if you have the free version of Silhouette studio you will need the DFX files). Size the file elements as need for the project you are making. I like to use weeding boxes to help me weed my vinyl. Cut your vinyl out. Make sure all your pieces are cut before ejecting from the cutting machine.

    For my tile I mixed glossy vinyl with glitter vinyl.

    Step 2 – Use the alcohol and cotton pad and clean the surface of your tile. You want all the oils from hands, etc off of the tile and then set aside to dry.

    Step 3 – Time to weed your vinyl. This project is fairly easy to weed. The thin lines for the pencils with a little hard. I used a tweezers to hold down an edge and then weed. I also left the words in there and cut to make it easier to place.

    Step 4 – Time to layer the vinyl. I did the layering on the tile due to the different parts and to make sure they lined up properly. You can use parchment paper to assist or eye ball and go!!!

    I did lay my eraser down wrong, however, i pulled it off and trimmed it and it was just fine!

    Step 5 – Add ice and your drink and watch the fun color change!

    How to get your FREE Files

    To get your FREE file please go to my Freebie Library, sign in (don’t worry if you are not a member yet, sign up and the password will be emailed to you!!! IT ALSO IS INCLUDED EVERY WEEK IN MY NEWSLETTER!!) and download Number 45 Teacher Pencil. The downloaded file will have multiple file options SVG, PNG, DXF (If you have the free version of Silhouette Studio you will need this file) and EPS. 

    PIN ME Please!!!!

    Teacher Pencil, Welcome Pencil, Live Love Teach, Cricut Silhouette Glowforge, Svg/Dxf/Png/Eps, Sublimation, Digital Download, Cut File

    I hope you enjoyed this tutorial and thank you again for stopping by and being part of my dream and 12 Paw Designs! Have an amazing week! Remember a ? Pintrest pin would be so appreciated! I can’t wait to see what you create. Please share with me. You can come back here and add a comment or add one to Facebook too!

    Also, follow me, links below, to see fun stuff I make through out the week. Items will be going into the shop!
    https://12pawdesigns.com/shop/

    If you have any questions or run into an issue please let me know!!!

    Lorri?
    Lorri@12PawDesigns.com

    Let’s Conntect!

    Want to connect more with 12 Paw Designs???:
    • Website: https://12pawdesigns.com
    • FB Page: https://www.facebook.com/12pawdesigns/
    • Instagram: https://www.instagram.com/12pawdesigns/
    • Pinterest: https://www.pinterest.com/12PawDesigns

    DO NOT resell any of the files as digital download or any other form.
    DO NOT claim the files as your own.
    DO NOT modify and resell the files in any form.

  • Happy Christmas in July with a Christmas Tiered Tray

    Happy Christmas in July with a Christmas Tiered Tray

    Christmas Tiered Tray, Tiered Tray, Christmas Svg, Cricut Silhouette Glowforge, Svg/Dxf/Png/Eps, Digital Download, Cut File

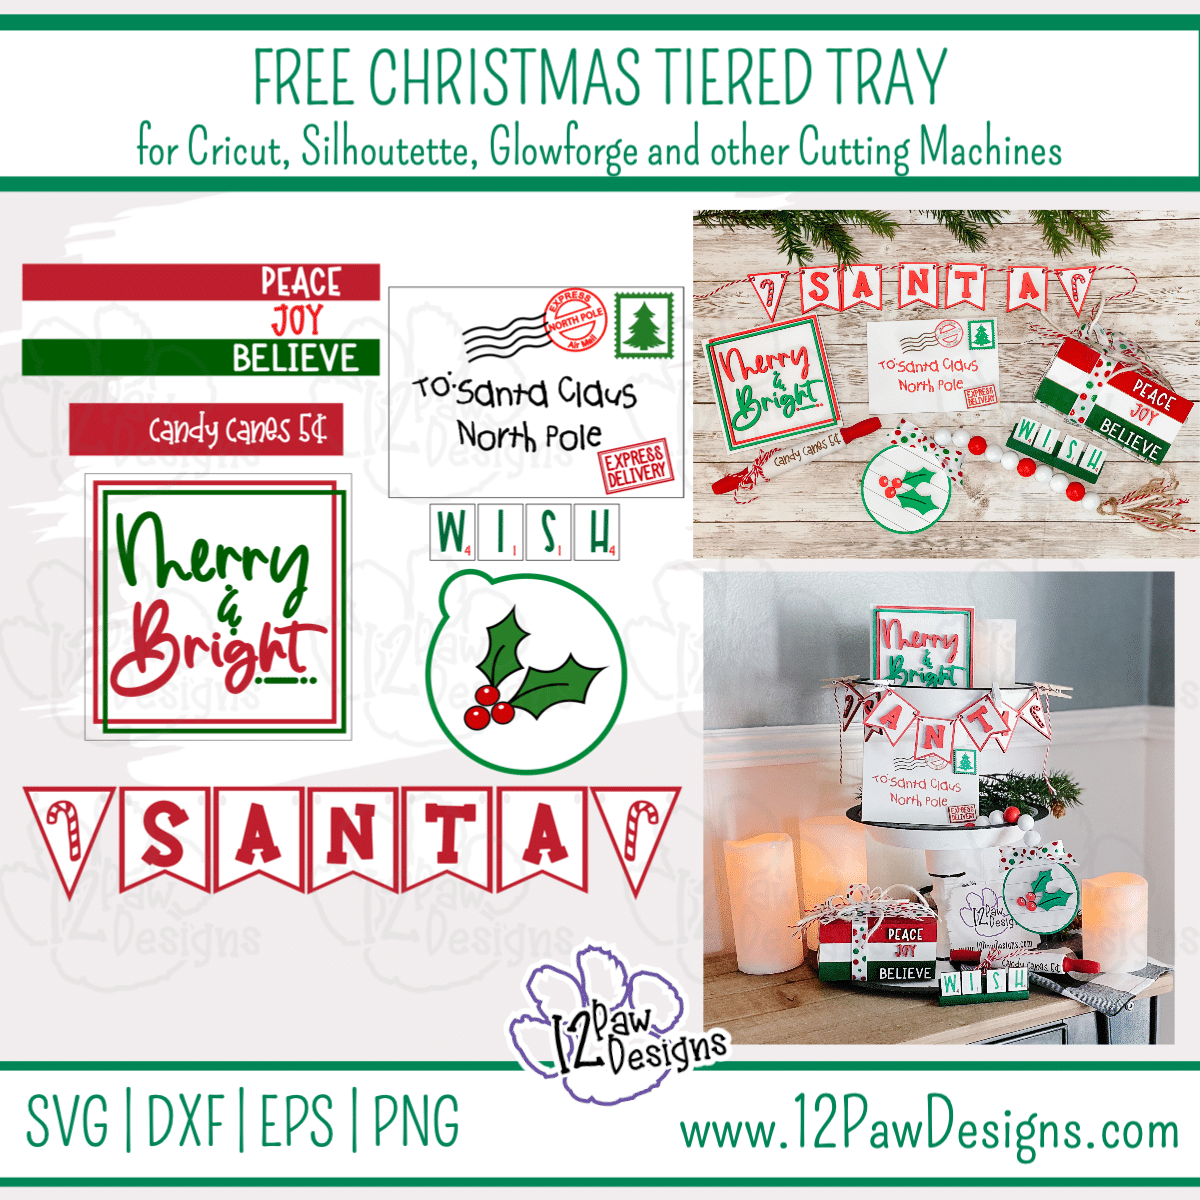
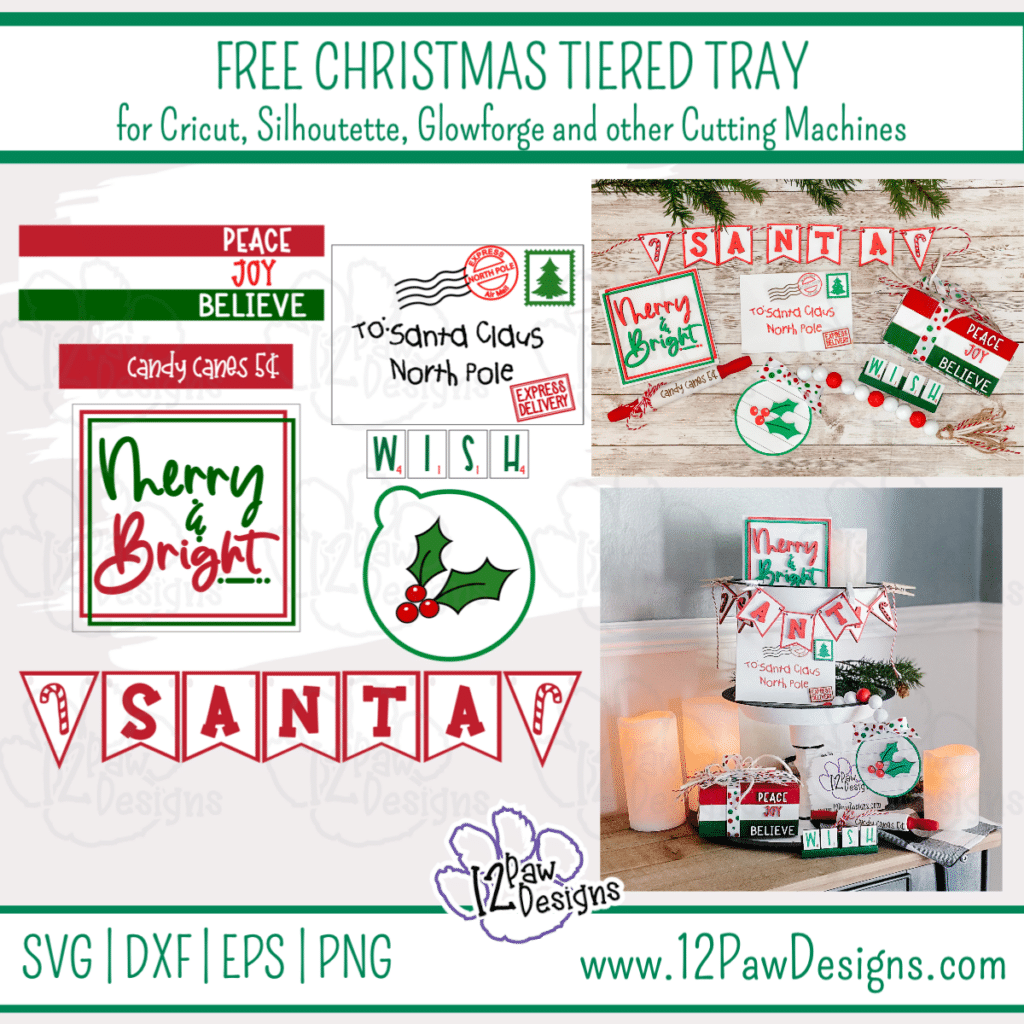
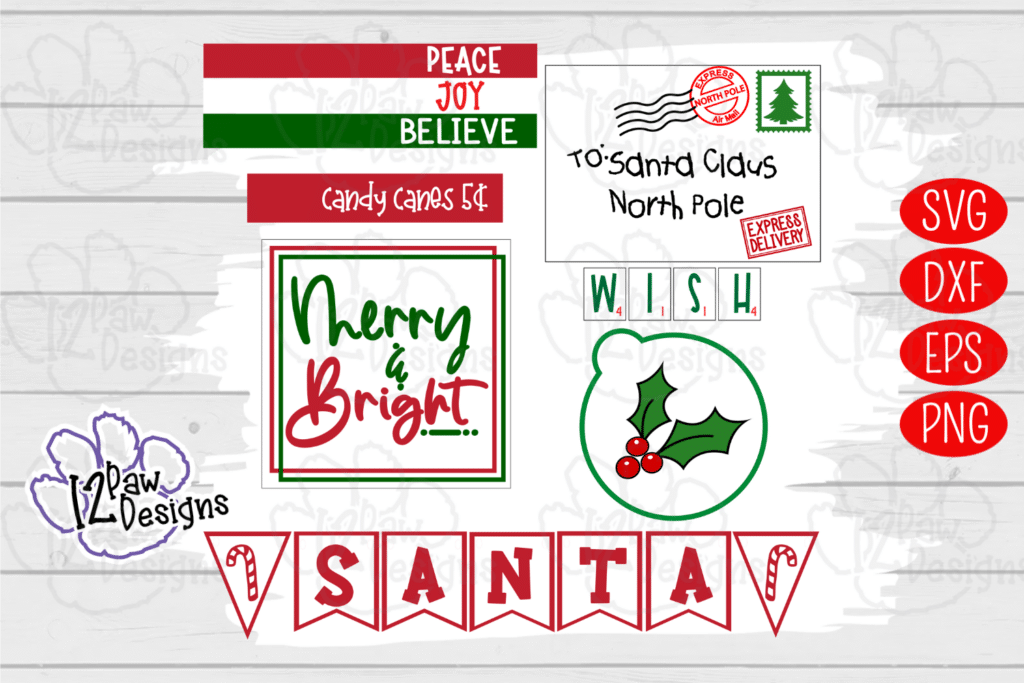
    Happy Christmas in July with this cute Christmas Tiered Tray! Let’s finish our Christmas in July with some really cute items for our tiered trays. This week our Christmas Svg include items to make stacked books (I did “faux book”), rolling pin, Santa Banner, Letter to Santa, WISH Scrabble tiles, and a holly berry tag to add to your bead garland.

    This weeks FREE Christmas Tiered Tray can be found in the Freebie Library. File number is 43. I have also created a video tutorial along with some directions on how I made my items and some pointers! Remember to please share what you created! Check me out on Facebook and Instagram and remember a pintrest pin is always appreciated!!

    Christmas Tiered Tray Supply List

    • Cutting Machine or Glowforge and software
    • Christmas Tiered Tray (click on the link)
    • Wood or blanks. For blanks Dollar tree has some great options. Repurpose a 6×6 sign, wood blanks, etc. For the Banner you could use chipboard, cardstock, etc
    • 4 Tumble Tower block from the Dollar Tree (Scrabble Tile tray)
    • 4 Scrabble Tiles – You can use the Dollar Tree 3 in 1 game or purchase tiles from Walmart
    • Mini Rolling Pin – I purchased from Amazon
    • Wood for the Glowforge that is prepped (masked) if you are using a Glowforge
    • Adhesive Vinyl in your color choice if you are doing vinyl
    • Gorilla Super Glue Gel
    • Hot Glue Gun and Glue
    • Paint and brush – I used White, Red and Green
    • Paint Pens – I used Posca and/or Arteza
    • Ribbon
    • Beads – I found mine painted at Hobby Lobby during a sale. You can also buy some from Amaozon
    • Twine\Jute
    • Weeding tools, scissors, cutting knife, transfer tape etc

    Video Tutorial – Christmas Tiered Tray – Christmas SVG

    Here are the steps I took to make the Christmas Ornaments

    Step 1 – Load the free cutting file into your favorite cutting software. For Cricut and Silhouette I set mine to 12×12. I used the Glowforge, however, most cutters can cut thin birch or chipboard (check your cutting machine). In the video I show some options for blank ideas as well!!!

    Step 2 – Cut your wood or vinyl. On the Glowforge you need to mask your wood with paper transfer tape to protect from scorching. Also, you can paint your board ahead of time to save on painting later!!!

    Step 3 – Once you have your wood or vinyl cut do your weeding. For the Glowforge that means removing the mask from the wood. I found the Gorilla duct tape works amazing!!! You can also use weeding tools, pin pen, etc

    Step 4 – Paint your items. I use the Posca paint pens for the small items. They are quick and easy!! Tweezer helps hold it as well while you paint. For the larger items I used acrylic paint. For the scrabble tray glue 2 tiles together end to end. Do this for the other 2 tiles also. Then glue them together to form your tray. Then I painted mine green. For the stacked books, i made a box with a fake front to look like books. However, you can use a mini crate for the dollar tree or their mini bibles and wrap with cardstock or vinyl!

    Step 5 – Time to glue our items together. I use Gel super glue. However, they make 3m tape that you can place on the back of the board to make it super easy to put on your wood. I followed the PNG file that is included in your file download for placement, etc. I also show all of this in the video.

    Step 6 – Finishing touches….

    Tag\beads – I used twine to thread my beads onto my tag. Then made a tassel to hang from the other end. Again, please check out the video for the demo. Then I glued a bow onto the front.

    Scrabble tray – Glue your tiles onto your scrable tray

    Letter to Santa – Attach your letters, stamp and sign. If the letters are to small for you to weed make a sticker!!! Or print on cardstock and glue on!!

    Banner – I used red and white twine from hobby lobby and strung my little banners onto that.

    Rolling pin – I wrapped that with a piece of twine to add that extra touch.

    Step 9 – How cute did your pieces turn out!?!?! Please share on on my social media so I can see!!!

    How to get your FREE Christmas Tiered Tray File

    To get your FREE file please go to my Freebie Library, sign in (don’t worry if you are not a member yet, sign up and the password will be emailed to you!!! Also, remember I include it in the bottom of the weekly email too! 😉 ) and download Number 43 – Christmas Tiered Tray The downloaded file will have multiple file options SVG, PNG, DXF (If you have the free version of Silhouette Studio you will need this file) and EPS. 

    I hope you enjoy the FREE files. Thank you again for stopping by and being part of my dream and 12 Paw Designs! Have an absolutely amazing day!!!

    Remember to PIN IT!!! ?

    Christmas Tiered Tray, Tiered Tray, Christmas Svg, Cricut Silhouette Glowforge, Svg/Dxf/Png/Eps, Digital Download, Cut File
    12PD North Pole Tiered Tray

    Also, please check out my shop. I am always adding new designs.
    https://12pawdesigns.com/shop/

    If you have any questions or run into an issue please let me know!!!

    Lorri?
    Lorri@12PawDesigns.com

    Let’s Conntect!

    Want to connect more with 12 Paw Designs???:
    • Website: https://12pawdesigns.com
    • FB Page: https://www.facebook.com/12pawdesigns/
    • Instagram: https://www.instagram.com/12pawdesigns/
    • Pinterest: https://www.pinterest.com/12PawDesigns

    DO NOT resell any of the files as digital download or any other form.
    DO NOT claim the files as your own.
    DO NOT modify and resell the files in any form.

  • Time to Deck the Halls Christmas Ornaments

    Time to Deck the Halls Christmas Ornaments

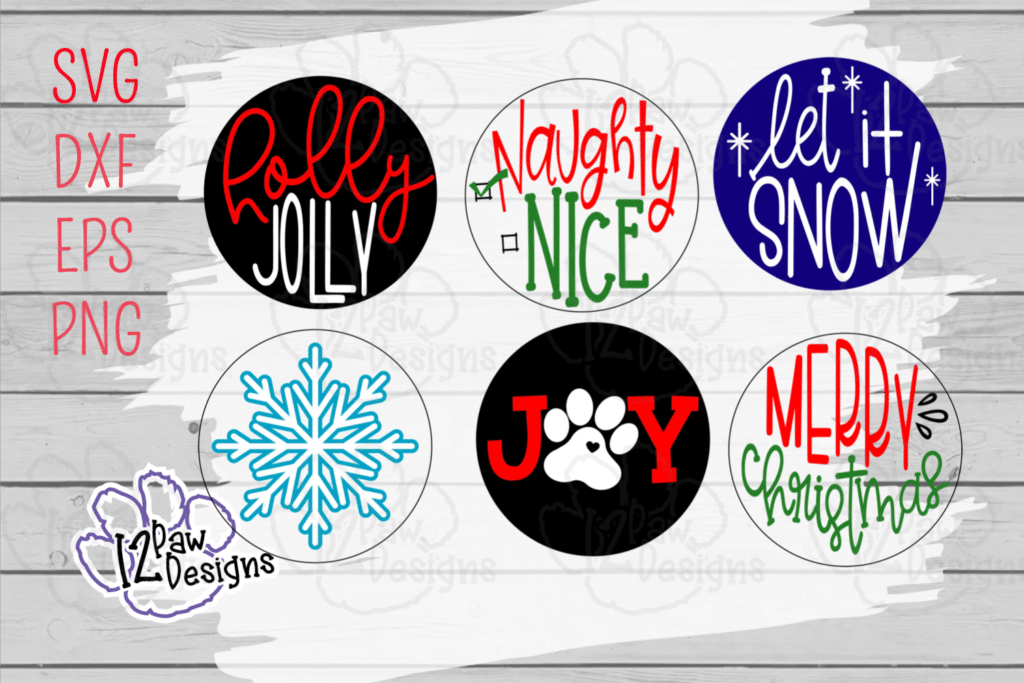
    Christmas Ornaments, Wood Slice Ornaments, Christmas Decorations, Cricut Silhouette Glowforge, Svg/Dxf/Png/Eps/Sublimation, Digital Download, Cut File

    Merry Christmas in July!!! So that means it’s time to Deck the Halls with some new Christmas Ornaments!!! I took some Wood Slice Ornaments and add some fun sayings and accents. They are sure to spruce up your Christmas Decorations!

    I did my project with my Glowforge (if you would like more information on this please let me know). However, you can totally use vinyl. Also, with the proper blades you can also cut chipboard or wood on some of the cutters (please check your machine options for this).

    This weeks FREE Christmas Ornaments can be found in the Freebie Library. File number is 42. I have also created a video tutorial along with some directions on how I made my ornaments and some pointers! Remember to please share what you created! Check me out on Facebook and Instagram and remember a pintrest pin is always appreciated!!

    Christmas Ornaments Supply List

    • Cutting Machine or Glowforge and software
    • Christmas Ornaments\Wood Slice Ornaments (click on the link)
    • Wood Slices
    • Wood for the Glowforge that is prepped (masked) if you are using a Glowforge
    • Adhesive Vinyl in your color choice if you are doing vinyl
    • Gorilla Super Glue Gel
    • Hot Glue Gun and Glue
    • Paint and brush – I used White and Black
    • Paint Pens – I used Posca and/or Arteza
    • Ribbon
    • Beads – I bought mine off of amazon
    • Twine\Jute
    • Weeding tools, scissors, cutting knife, transfer tape etc

    Video Tutorial – Christmas Decorations – Wood Slice Ornaments

    Here are the steps I took to make the Christmas Ornaments

    Step 1 – Load the free cutting file into your favorite cutting software and size appropriately. I used the Glowforge, however, most cutters can cut thin birch or chipboard (check your cutting machine). In the video I show how i load it into the Glowforge app and send it to the Glowforge. I actually show a video of it cutting.

    Step 2 – Cut your wood or vinyl. On the glow forge you need to mask your wood with paper transfer tape to protect from scorching. Also, you can paint your board ahead of time to save on painting later!!!

    Step 3 – Once you have your wood or vinyl cut do your weeding. For the Glowforge that means removing the mask from the wood. I found the Gorilla duct tape works amazing!!! You can also use weeding tools, pin pen, etc

    Step 4 – Paint your letters. I use the paint pens. They are quick and easy!! I can move pretty fast if I leave them in the board. However, tweezer helps hold it as well while you paint.

    Step 5 – Once I painted my letters I then decided what l colors I wanted on my wood disks. I then painted those and set aside to dry. You can do this earlier if you know what color are going to be or if you follow my images!

    Step 6 – Glue your letters to the wood. I use Gel super glue. However, they make 3m tape that you can place on the back of the board to make it super easy to put on your wood.

    Step 7 – Once everything is attached now we can finish off our ornaments. I used some ribbon that I folded to form the bow and then wrapped twine around them. Pull tight and knot on the back side. Then add a drop of glue to the back of the knot.

    Step 8 – Add some beads. I using twine put it through the hole of the disk. I found that using a piece of floral wire works wonders. I you can get a spool from the Dollar Tree. I use the wire like a needle threader. I bend a piece in half. Put my twine in it and then you it to put through the hole of the wood and the beads. When i put the last bead on I put a little drop of hot glue on the twine where the bead will be and then slide the bead over it and held for a second. Tie a knot at the top.

    Step 9 – Glue your bow on. You are all done!!!

    How to get your FREE Christmas Ornaments File

    To get your FREE file please go to my Freebie Library, sign in (don’t worry if you are not a member yet, sign up and the password will be emailed to you!!! Also, remember I include it in the bottom of the weekly email too! 😉 ) and download Number 42 – Christmas Ornaments\Wood Slices The downloaded file will have multiple file options SVG, PNG, DXF (If you have the free version of Silhouette Studio you will need this file) and EPS. 

    I hope you enjoy the FREE files. Thank you again for stopping by and being part of my dream and 12 Paw Designs! Have an absolutely amazing day!!!

    Remember to PIN IT!!! ?

    Christmas Ornaments, Wood Slice Ornaments, Christmas Decorations, Cricut Silhouette Glowforge, Svg/Dxf/Png/Eps/Sublimation, Digital Download, Cut File
    12PD Christmas Ornaments Rounds

    Also, please check out my shop. I am always adding new designs.
    https://12pawdesigns.com/shop/

    If you have any questions or run into an issue please let me know!!!

    Lorri?
    Lorri@12PawDesigns.com

    Let’s Conntect!

    Want to connect more with 12 Paw Designs???:
    • Website: https://12pawdesigns.com
    • FB Page: https://www.facebook.com/12pawdesigns/
    • Instagram: https://www.instagram.com/12pawdesigns/
    • Pinterest: https://www.pinterest.com/12PawDesigns

    DO NOT resell any of the files as digital download or any other form.
    DO NOT claim the files as your own.
    DO NOT modify and resell the files in any form.

  • Time for Some Teacher Appreciation!

    Time for Some Teacher Appreciation!

    12PD Teacher Appreciation

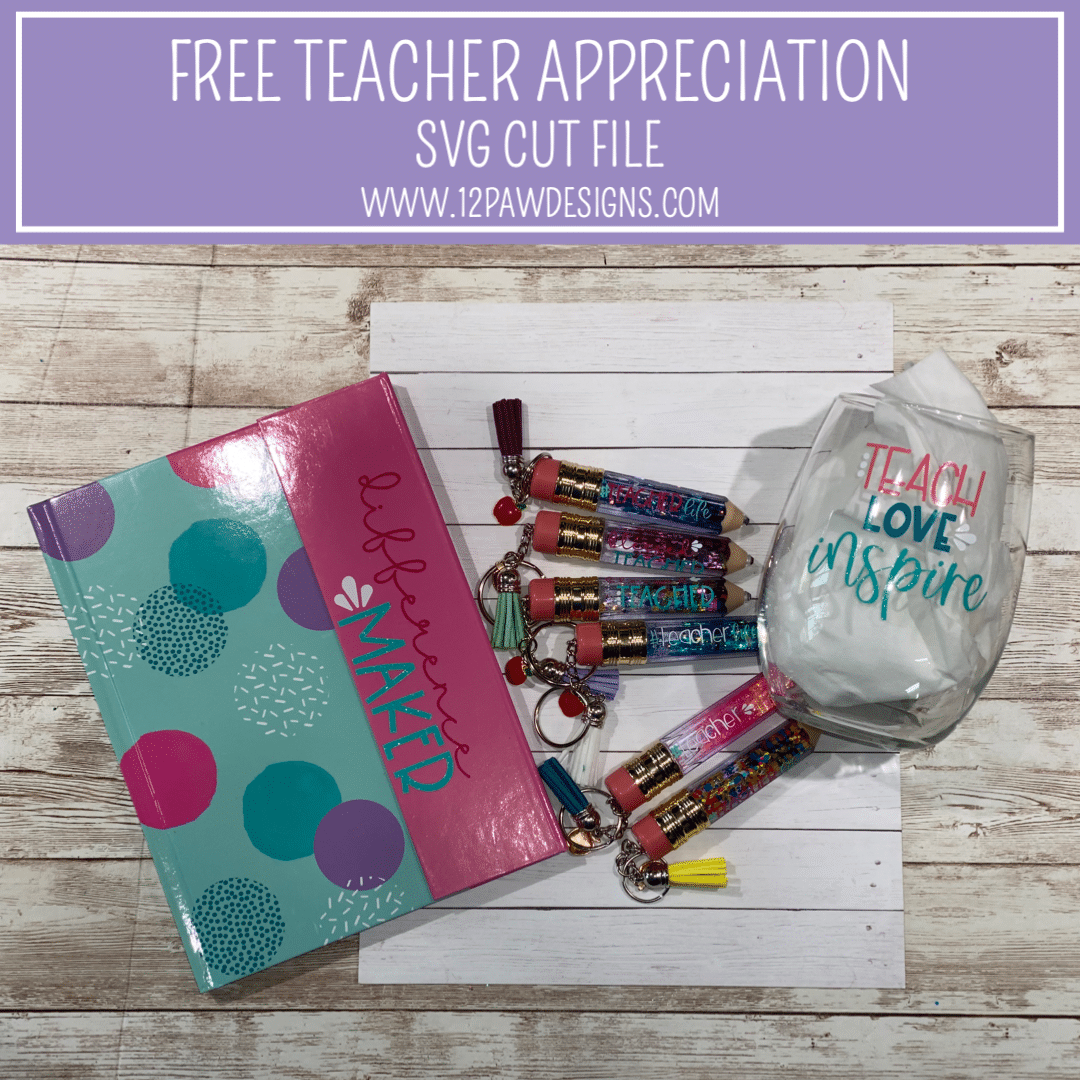
    TIME FOR SOME TEACHER APPRECIATION! It’s that Time of year where we need to show our Teachers some Appreciation! This weeks FREE SVG can be found in the Freebie Library. In the file there are 5 options for you. Two of the options can actually be used for a teach gift or something else. I have also created a video tutorial along with some quick directions below on how I made the journal, the adorable pencil keychains and the wine glass. I picked up the journal at Dollar General and the wine glass as Dollar Tree. The keychain supplies will be in the supply list below. Also in the video I talk about some other ideas for some more gifts for your favorite teacher along with possible for mom! I start the video off with this, then we make the journal, the keychains and finally the wine glass. Let your creative go and have fun with it. Have fun and share your creativity!

    I will also be adding a few new teach files in the store too!! There will also be some baseball and softball ones coming too!!!

    Teacher Appreciation Supply List

    Please note there are affiliate links in the supply list. There is no extra cost to you for using these links it just helps me to keep brining you free content! Thank you for your support,

    Time for Some Teacher Appreciation Video Tutorial

    Here is some Teacher Appreciation Ideas!

    Here are the steps I took make the Teacher Appreciation Gifts

    Step 1 – Open the SVG file in your cutting software (note: if you have the free version of Silhouette studio you will need the DFX files). Size the file elements as need for the project you are making. I used weeding boxes to help me weed my vinyl. This is especially important when doing the key chains. Cut your vinyl out. Make sure all your pieces are cut before ejecting from the cutting machine.

    Step 2 – I started with the journal and cut those pieces first. Then while the keychain vinyl was cutting I worked on the journal. Weed your vinyl. Once that is done take your transfer tape and apply it to the vinyl. Then I used parchment paper and applied my vinyl\transfer to that. Decided where i wanted it placed and then removed the parchment paper and squeegee down the vinyl. I did this same step for the second word and the applied my accents.

    Step 3 – Now for the keychains. I cut the wands off of the lip gloss tubes. Then I removed the eraser for the top. I took a small about amount of E6000 and applied it to the top and put the eraser back on the top. Let dry. I then took the baby oil and glitter (make sure your glitter is ready to use) I put the baby oil in the tube. Do not fill it up all the way. Then add your glitter. I used a piece of paper underneath to help with clean up. Now…there is such a thing as too much glitter!! You want them to galaxy float. Now decide if you need any more oil. I need a little air bubble at the top. The tubes I recommend have a plug that comes with them. BONUS! I put the plug in and then added some E6000 glue and put the cap on. You want to glue them shut to make sure you dont have an accident! Once this is done wipe your pencils with alcohol and cotton pad to get off any left over glitter and stuff. Let dry.

    Step 4 – Now weed your vinyl. Lessons learned. The bigger words you can weed easily. However, the smaller ones were a bugger! Reverse weeding did help a little, however, I applied the vinyl with weeding box to the pencil and then weeded it. Be careful not to scratch them though Once I figured this out it went relatively quickly.

    Step 5 – Now to finish the key chains. Take your needle nose and eye screw and attach it to the top. You want to make sure you go into the metal of the cap for good hold. I then opened the eye screw and fed in the key chain. Closed off the screw. Next take your jump ring and attach to the jump ring at the top. Add you tassel and apple charm. Close your ring. Now admire how stinking cute they are!!!

    Step 6 – Wine Glass. Cut out your vinyl. While that is cutting I took the glass, alcohol and the cotton pads and cleaned the glass. Let dry. Weed your vinyl. Once that is done I actually put the words together before applying to the glass. I used parchment paper again to line everything up. Then used parchment paper to apply the vinyl to the glass. Add your accents. How is is that!!! It’s so cute and fun!!

    How to get your FREE Files

    To get your FREE file please go to my Freebie Library, sign in (don’t worry if you are not a member yet, sign up and the password will be emailed to you!!!) and download Number 25 Family Word Search. The downloaded file will have multiple file options SVG, PNG, DXF (If you have the free version of Silhouette Studio you will need this file) and EPS. 

    I hope you enjoyed this tutorial and thank you again for stopping by and being part of my dream and 12 Paw Designs! Have an amazing week! Remember a ? Pintrest pin would be so appreciated! I can’t wait to see what you create. Please share with me. You can come back here and add a comment or add one to Facebook too!

    Also, please check out my shop. I am always adding new designs. You might also find ready made tumblers in there in the future!!! There might be a few extra keychains that show up there too!!
    https://12pawdesigns.com/shop/

    If you have any questions or run into an issue please let me know!!!

    Lorri?
    Lorri@12PawDesigns.com

    Let’s Conntect!

    Want to connect more with 12 Paw Designs???:
    • Website: https://12pawdesigns.com
    • FB Page: https://www.facebook.com/12pawdesigns/
    • Instagram: https://www.instagram.com/12pawdesigns/
    • Pinterest: https://www.pinterest.com/12PawDesigns

    DO NOT resell any of the files as digital download or any other form.
    DO NOT claim the files as your own.
    DO NOT modify and resell the files in any form.