Tag: tiered tray

  • Beautiful Apple Tiered Tray

    Beautiful Apple Tiered Tray

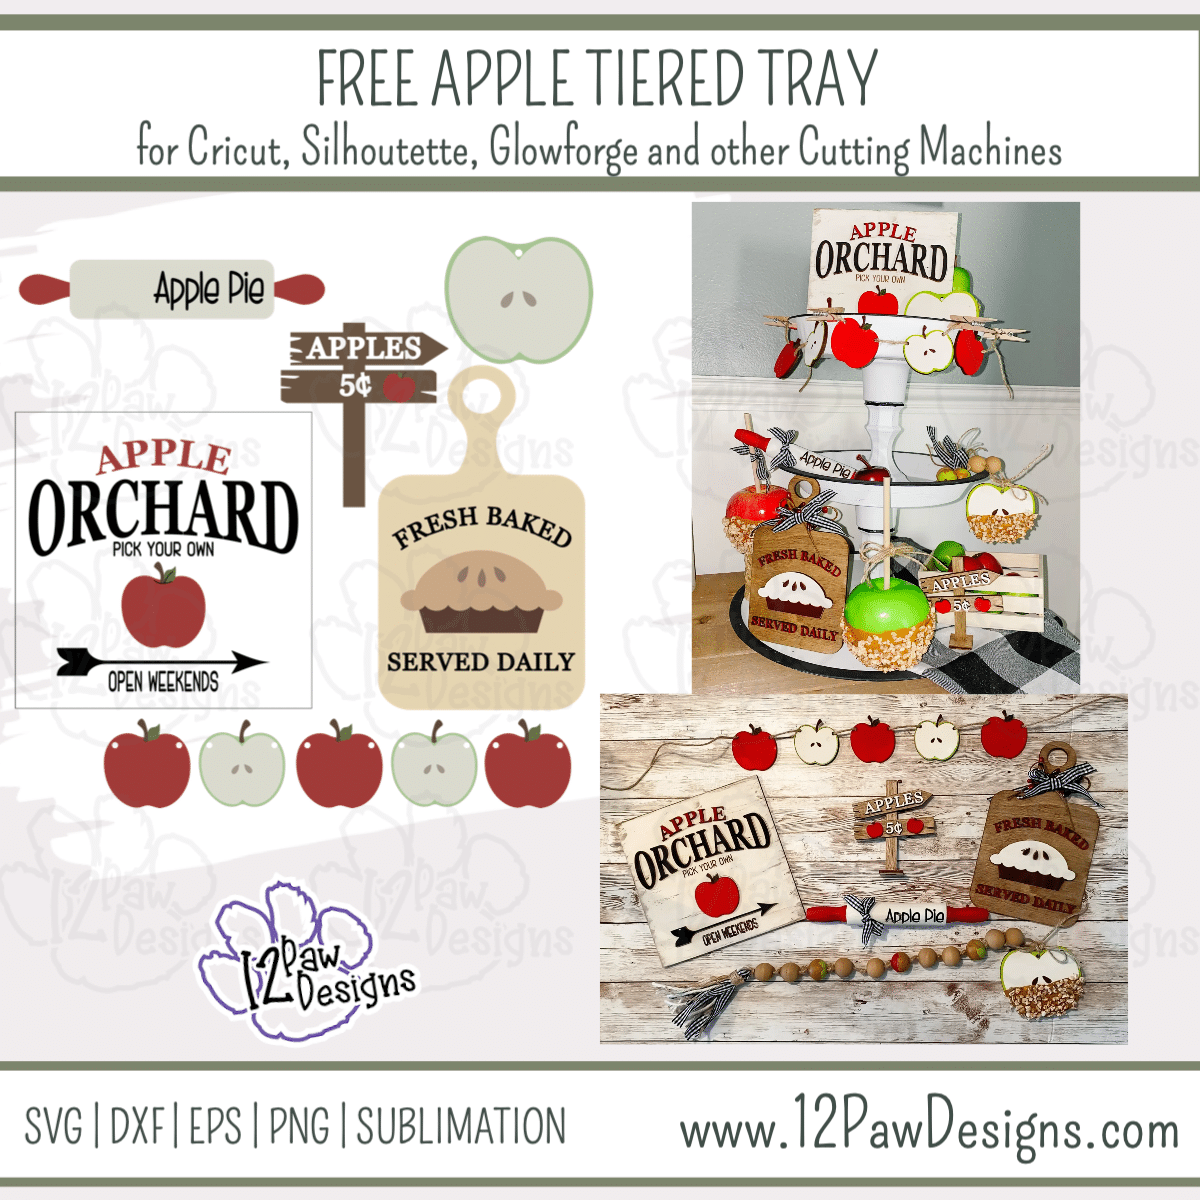
    Apple Tiered Tray, Fall Tiered Tray, Apple Tray Svg, Cricut Silhouette Glowforge, Svg/Dxf/Png/Eps, Digital Download, Cut File

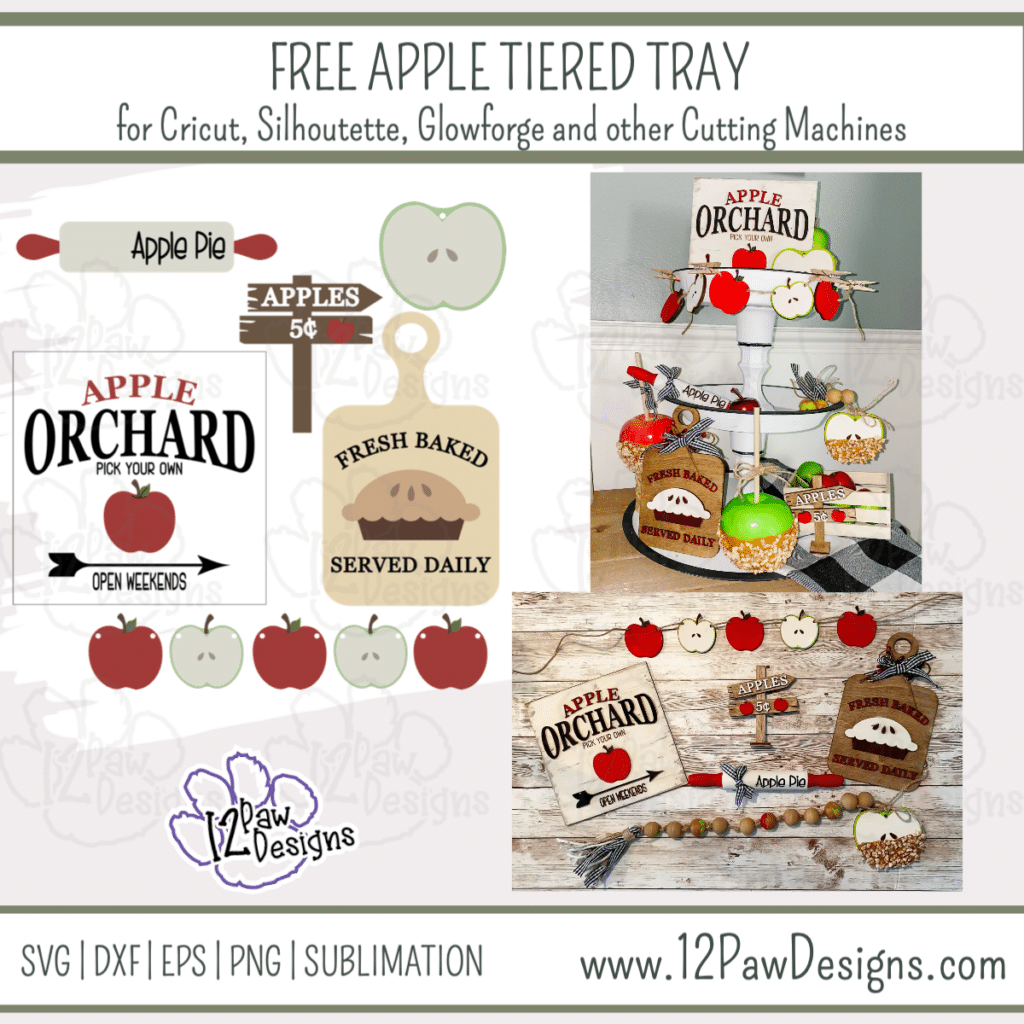
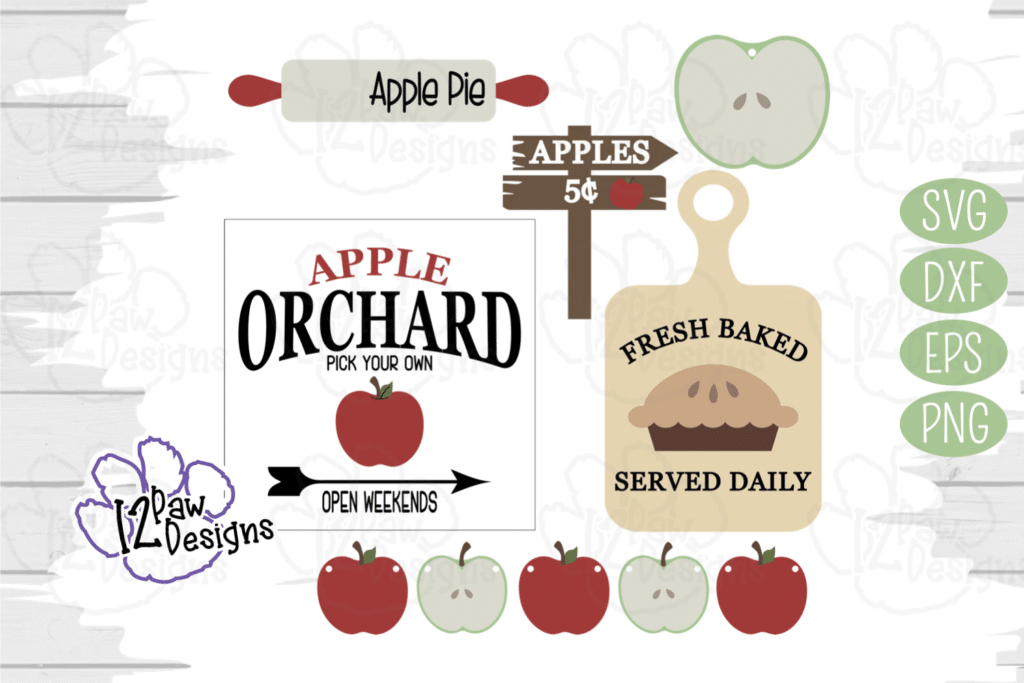
    I have never decorated with apples in the fall, however, this Apple Tiered Tray is just what I needed. So I designed this Apple Tray SVG for you and in the video and step by step I walk you through how I made it. This is a great Fall Tiered Tray for any decor!!

    This weeks FREE Apple Tiered Tray can be found in the Freebie Library. File number is 49. Check out the tutorial for tips and tricks I found along the way. Remember to please share what you created! Check me out on Facebook and Instagram and remember a pintrest pin is always appreciated!!

    Apple Tiered Tray Supply List

    • Cutting Machine or Glowforge and software
    • Apple Tiered Tray (click on the link)
    • Wood or blanks. For blanks Dollar tree has some great options. Repurpose a 6×6 sign, wood blanks, popsicle sticks for the little sign etc. For the Banner you could use chipboard, cardstock, etc
    • Mini Rolling Pin – I purchased from Amazon
    • Wood for the Glowforge that is prepped (masked) if you are using a Glowforge
    • Adhesive Vinyl in your color choice if you are doing vinyl
    • Gorilla Super Glue Gel
    • Gorilla Duck Tape
    • Hot Glue Gun and Glue
    • Paint – Red, Apple Green, Ivory and Carmel color
    • AntiqueChalk Dark Wax and Rag – I bought this from Amazon, however, you could use brown paint and a baby wipe or stain.
    • Modge Podge
    • Corn Cob – I found my at Mejier in the pet area
    • Brush, Make Sponges and Baby Wipes
    • Paint Pens – I used Posca and/or Arteza
    • Ribbon
    • Beads – I found mine painted at Hobby Lobby during a sale. You can also buy some from Amazon
    • Twine\Jute
    • Weeding tools, scissors, cutting knife, transfer tape etc

    Video TutorialApple Tiered Tray – Apple Tray SVG

    Here are the steps I took to make my Apple Tiered Tray

    Step 1 – Load the free cutting file into your favorite cutting software. For Cricut and Silhouette I set mine to 12×12. I used the Glowforge, however, most cutters can cut thin birch or chipboard (check your cutting machine). In the video I show some options for blank ideas as well!!!

    Step 2 – Cut your wood or vinyl. On the Glowforge you need to mask your wood with paper transfer tape to protect from scorching. I also put 3m adhesive tape on the back of a board and cut it so it saves time to attach items to the boards

    Step 3 – Once you have your wood or vinyl cut do your weeding. For the Glowforge that means removing the mask from the wood. I found the Gorilla duct tape works amazing!!! You can also use weeding tools, pin pen, etc I also found for the letters that it was easier to remove the mask at the same time I was pulling the 3m off the back. So i did this after the signs were painted.

    Step 4 – Paint your items. I use the Posca paint pens for the small items. They are quick and easy!! For the larger items I used acrylic paint.

    I painted the Apple Orchard sign with Ivory Chalk paint and a baby wipe. I then stained the cutting board, the apple sign and the back of the apple garland.

    For the Apples and the mask I removed the center mask first and used the baby wipe to paint that area. I then painted the solid apples with red and a baby wipe.

    Then I used the paint pens to do the pie pan, seeds, leaves and stems on the apples, etc

    Step 5 – Next I started to assemble. I put score marks on the wood so I knew where everything went. I then peeled the backing off on the 3m and attached it to the signs. I then attached all the letters. This is where i found it was easier to attach them to the gorilla tape, pull the 3m backing and then attach to the sign.

    Paint all your letters while on the signs.

    Step 6 – Let’s caramel or apples. I mixed a 1 to 1 mix of modge podge and paint. Now take your apple slice and apple the mix. You want to be thicker on this because the Corn cob needs to attach to this mix. I poured it on and then pushed it on with my finger. Set to the side to dry. Then I took the beads I painted Red and Green and applied some caramel to them

    Step 7 – Finishing touches….

    Apple Tag\beads – Lets take some ribbon and twine to make a tassel. Wrap them around your fingers multiple times to form a loop. Now take a long piece of twice and tie it to the top. Next take a small piece and wrap it around to form your tassel. Then cut the bottom. Now I like to use a piece of flora wire (I get mine from dollar tree) and use it a a twine thread, fold in half and put the twine in it. Thread it through a bead towards the tassel. Tie a knot and then tie a knot over the knot you made, I did this to make it a “thick” knot. Then repeat. I did 2 neutral beads, caramel bead, 2 beads, caramel, 2 beads, caramel 2 beads. Then attached my apple slice. I tied a knot. Then I tied a twine knot and attach to the knot.

    Cutting board. I wrapped a piece of ribbon around the handle, then added some red twig piece I picked up at the dollar tree. Then tied a bow of the ribbon and glued that to the cutting board.

    Apple sign – Super clue the little boards to the post. Push the post into the stand.

    Apple Banner – I used twine strung my apples onto that.

    Rolling pin – I wrapped that with a piece of ribbon to add that extra touch.

    Step 8 – How cute did your pieces turn out!?!?! Please share on on my social media so I can see!!!

    How to get your FREE Apple Tray SVG File

    To get your FREE file please go to my Freebie Library, sign in (don’t worry if you are not a member yet, sign up and the password will be emailed to you!!! Also, remember I include it in the bottom of the weekly email too! 😉 ) and download Number 49 – Apple Tiered Tray The downloaded file will have multiple file options SVG, PNG, DXF (If you have the free version of Silhouette Studio you will need this file) and EPS. 

    I hope you enjoy the FREE files. Thank you again for stopping by and being part of my dream and 12 Paw Designs! Have an absolutely amazing day!!!

    Remember to PIN IT!!! ?
    Apple Tiered Tray, Fall Tiered Tray, Apple Tray Svg, Cricut Silhouette Glowforge, Svg/Dxf/Png/Eps, Digital Download, Cut File
    Apple Tiered Tray

    Also, please check out my shop. I am always adding new designs.
    https://12pawdesigns.com/shop/

    If you have any questions or run into an issue please let me know!!!

    Lorri?
    Lorri@12PawDesigns.com

    Let’s Conntect!

    Want to connect more with 12 Paw Designs???:
    • Website: https://12pawdesigns.com
    • FB Page: https://www.facebook.com/12pawdesigns/
    • Instagram: https://www.instagram.com/12pawdesigns/
    • Pinterest: https://www.pinterest.com/12PawDesigns

    DO NOT resell any of the files as digital download or any other form.
    DO NOT claim the files as your own.
    DO NOT modify and resell the files in any form.
  • Happy Christmas in July with a Christmas Tiered Tray

    Happy Christmas in July with a Christmas Tiered Tray

    Christmas Tiered Tray, Tiered Tray, Christmas Svg, Cricut Silhouette Glowforge, Svg/Dxf/Png/Eps, Digital Download, Cut File

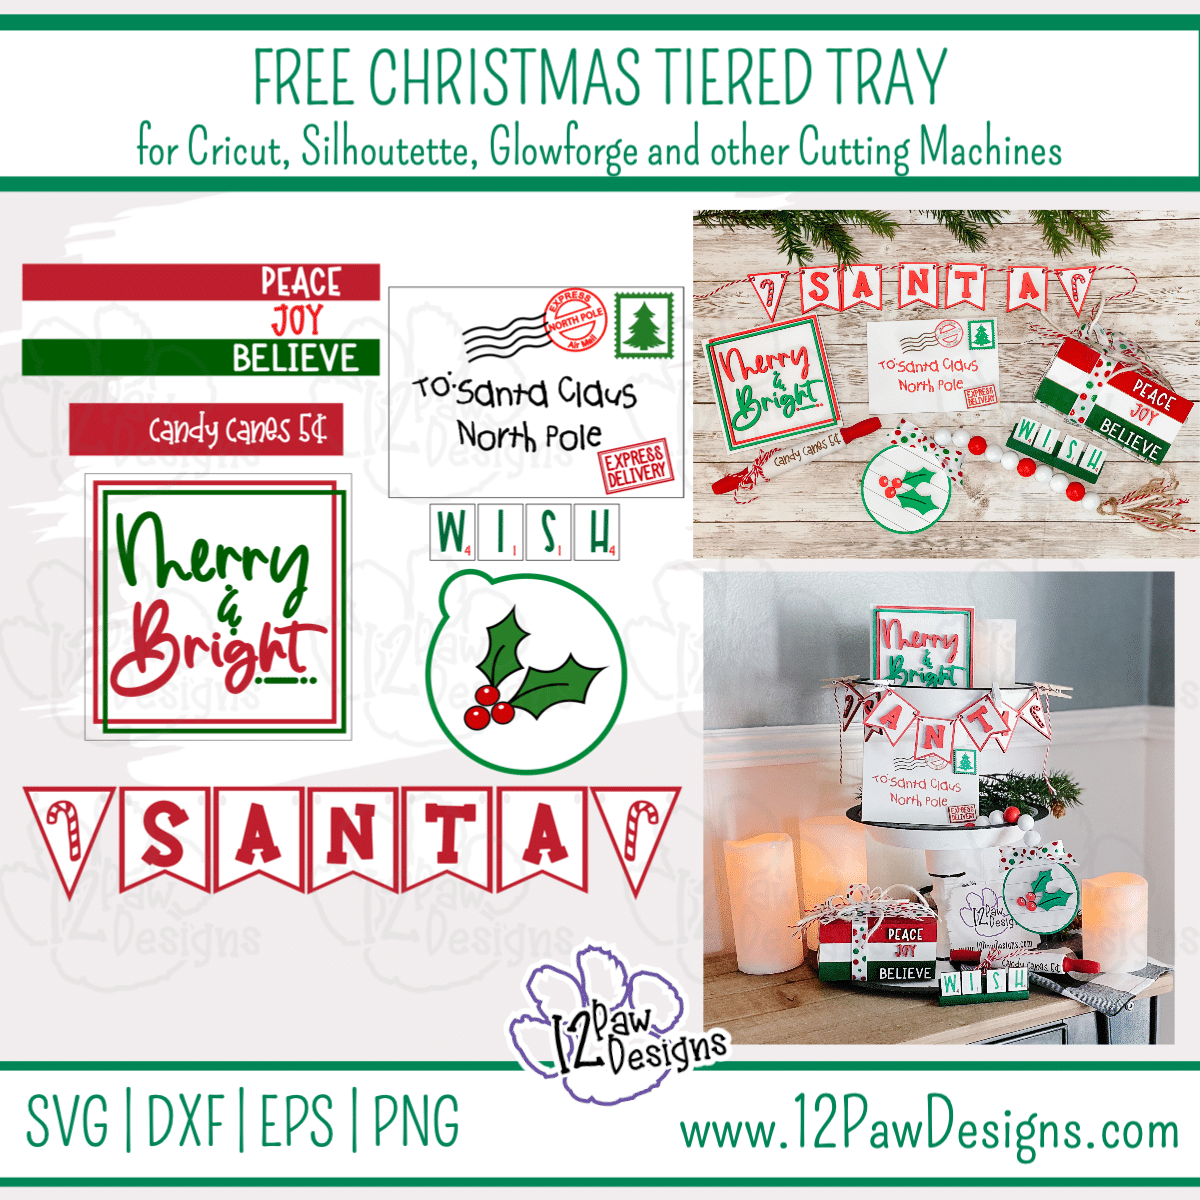
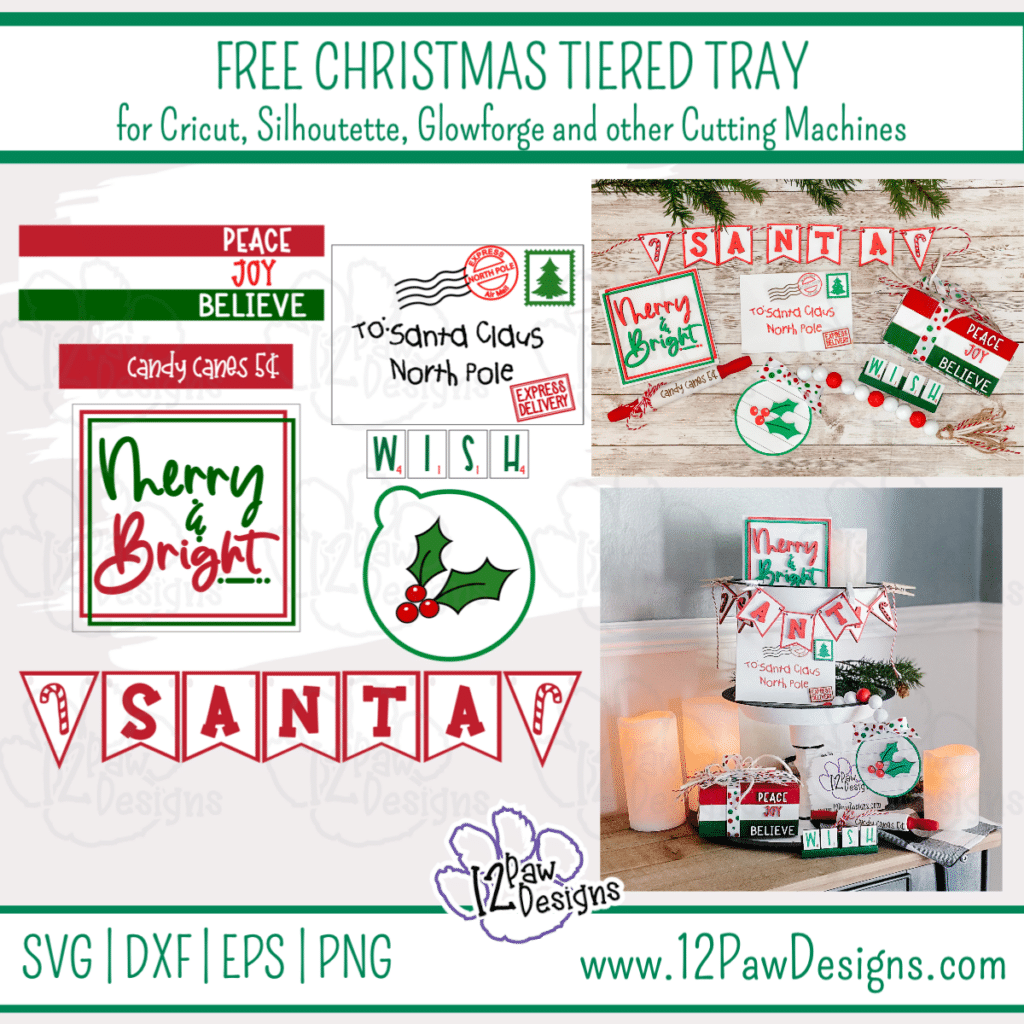
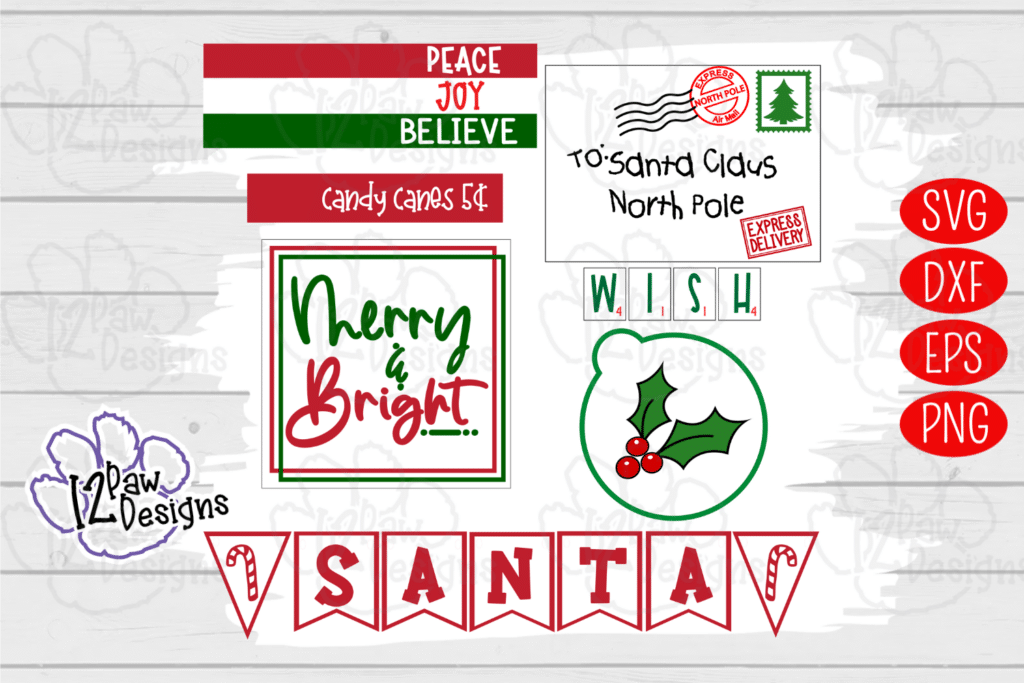
    Happy Christmas in July with this cute Christmas Tiered Tray! Let’s finish our Christmas in July with some really cute items for our tiered trays. This week our Christmas Svg include items to make stacked books (I did “faux book”), rolling pin, Santa Banner, Letter to Santa, WISH Scrabble tiles, and a holly berry tag to add to your bead garland.

    This weeks FREE Christmas Tiered Tray can be found in the Freebie Library. File number is 43. I have also created a video tutorial along with some directions on how I made my items and some pointers! Remember to please share what you created! Check me out on Facebook and Instagram and remember a pintrest pin is always appreciated!!

    Christmas Tiered Tray Supply List

    • Cutting Machine or Glowforge and software
    • Christmas Tiered Tray (click on the link)
    • Wood or blanks. For blanks Dollar tree has some great options. Repurpose a 6×6 sign, wood blanks, etc. For the Banner you could use chipboard, cardstock, etc
    • 4 Tumble Tower block from the Dollar Tree (Scrabble Tile tray)
    • 4 Scrabble Tiles – You can use the Dollar Tree 3 in 1 game or purchase tiles from Walmart
    • Mini Rolling Pin – I purchased from Amazon
    • Wood for the Glowforge that is prepped (masked) if you are using a Glowforge
    • Adhesive Vinyl in your color choice if you are doing vinyl
    • Gorilla Super Glue Gel
    • Hot Glue Gun and Glue
    • Paint and brush – I used White, Red and Green
    • Paint Pens – I used Posca and/or Arteza
    • Ribbon
    • Beads – I found mine painted at Hobby Lobby during a sale. You can also buy some from Amaozon
    • Twine\Jute
    • Weeding tools, scissors, cutting knife, transfer tape etc

    Video TutorialChristmas Tiered Tray – Christmas SVG

    Here are the steps I took to make the Christmas Ornaments

    Step 1 – Load the free cutting file into your favorite cutting software. For Cricut and Silhouette I set mine to 12×12. I used the Glowforge, however, most cutters can cut thin birch or chipboard (check your cutting machine). In the video I show some options for blank ideas as well!!!

    Step 2 – Cut your wood or vinyl. On the Glowforge you need to mask your wood with paper transfer tape to protect from scorching. Also, you can paint your board ahead of time to save on painting later!!!

    Step 3 – Once you have your wood or vinyl cut do your weeding. For the Glowforge that means removing the mask from the wood. I found the Gorilla duct tape works amazing!!! You can also use weeding tools, pin pen, etc

    Step 4 – Paint your items. I use the Posca paint pens for the small items. They are quick and easy!! Tweezer helps hold it as well while you paint. For the larger items I used acrylic paint. For the scrabble tray glue 2 tiles together end to end. Do this for the other 2 tiles also. Then glue them together to form your tray. Then I painted mine green. For the stacked books, i made a box with a fake front to look like books. However, you can use a mini crate for the dollar tree or their mini bibles and wrap with cardstock or vinyl!

    Step 5 – Time to glue our items together. I use Gel super glue. However, they make 3m tape that you can place on the back of the board to make it super easy to put on your wood. I followed the PNG file that is included in your file download for placement, etc. I also show all of this in the video.

    Step 6 – Finishing touches….

    Tag\beads – I used twine to thread my beads onto my tag. Then made a tassel to hang from the other end. Again, please check out the video for the demo. Then I glued a bow onto the front.

    Scrabble tray – Glue your tiles onto your scrable tray

    Letter to Santa – Attach your letters, stamp and sign. If the letters are to small for you to weed make a sticker!!! Or print on cardstock and glue on!!

    Banner – I used red and white twine from hobby lobby and strung my little banners onto that.

    Rolling pin – I wrapped that with a piece of twine to add that extra touch.

    Step 9 – How cute did your pieces turn out!?!?! Please share on on my social media so I can see!!!

    How to get your FREE Christmas Tiered Tray File

    To get your FREE file please go to my Freebie Library, sign in (don’t worry if you are not a member yet, sign up and the password will be emailed to you!!! Also, remember I include it in the bottom of the weekly email too! 😉 ) and download Number 43 – Christmas Tiered Tray The downloaded file will have multiple file options SVG, PNG, DXF (If you have the free version of Silhouette Studio you will need this file) and EPS. 

    I hope you enjoy the FREE files. Thank you again for stopping by and being part of my dream and 12 Paw Designs! Have an absolutely amazing day!!!

    Remember to PIN IT!!! ?

    Christmas Tiered Tray, Tiered Tray, Christmas Svg, Cricut Silhouette Glowforge, Svg/Dxf/Png/Eps, Digital Download, Cut File
    12PD North Pole Tiered Tray

    Also, please check out my shop. I am always adding new designs.
    https://12pawdesigns.com/shop/

    If you have any questions or run into an issue please let me know!!!

    Lorri?
    Lorri@12PawDesigns.com

    Let’s Conntect!

    Want to connect more with 12 Paw Designs???:
    • Website: https://12pawdesigns.com
    • FB Page: https://www.facebook.com/12pawdesigns/
    • Instagram: https://www.instagram.com/12pawdesigns/
    • Pinterest: https://www.pinterest.com/12PawDesigns

    DO NOT resell any of the files as digital download or any other form.
    DO NOT claim the files as your own.
    DO NOT modify and resell the files in any form.
  • Time for the Red White and Blue!

    Time for the Red White and Blue!

    Time for the Red White and Blue! Memorial Day is a few weeks away then we have the 4th of July so lets show our love for our country by creating fun Red White and Blue Tiered Tray This Patriotic Bundle can be used for so much more than just a tiered tray! There is the fun banner, the USA Waving flag words, the signs, etc. They can be used for other piece or projects! The America with the star with look amazing on a shirt or a tank as well! Let your creativity flow!!! I have included the link to the free file location, created a video tutorial and gave a brief tutorial below!

    Patriotic Tray SVG - Patriotic Bundle - Red White and Blue - Cricut - Silhouette - svg/dxf/png/eps/sublimation - Digital Download - Cut File
    12PD Patriotic Tray Bundle

    Red White and Blue Inspiration!

    Time for the Red White and Blue Supply List

    • Cutting Machine and software
    • Patriotic Tray Bundle (number 32) (click on the link)
    • Permanent Vinyl of your Choice – I use Starcraft from 143vinyl.com
    • Red, White and Blue Paint and paint brush
    • Patriotic Ribbon and twine\jute
    • Mini Rolling Pin
    • Sand paper or sanding block, Scrapper, Glue Gun, Parchment Paper
    • Dollar Tree items, 6×6 signs, mini wooden crates, tumble tower block, snake puzzle, 3 in 1 board game for the scrabble pieces or scrabble piece from Walmart
    • Wooden Tag – I purchased mine from Hobby Lobby
    • Wooden beads
    • White Card stock
    • Weeding tools, scissors, cutting knife, transfer tape, etc

    Video TutorialTime for the Red White and Blue!

    Here are the steps I took to make the Patriotic Tiered Tray

    Step 1 – If you are using a sign from the Dollar Tree that has an image on it scrap it off. I found if I got it wet it came off real easy. Once that is done paint the items that need to be white white. On mine I painted the edges of the 6×6 signs white to start with and then painted them red and blue after. It helped cover up the green that i had on mine. After the white is dry paint the other things blue and red. For the scrabble tray I took 4 tumble tower blocks and glued them together to form the tray. I then painted it blue. I painted the bottom (actually top, but it will be flipped over) slat of the mini crate blue and the other end red. I painted the middle of the mini rolling pin red also.

    Step 2 – While everything is drying. Open the SVG file in your cutting software (note: if you have the free version of Silhouette studio you will need the DFX files). Size the items according to the supplies you will be working with. Then cut out your vinyl.

    Step 3 – Once your adhesive is cut weed your vinyl. For the small detailed items I found that reverse weeding working best. Put your transfer tape on the item and remove what you do not want from there. I have the noted in the video.

    Step 4 – Once everything is weeded time to apply the vinyl to our projects. I have things organized and group for you so the America sign with the star the red is all together. So I put the transfer tape on the red portion. Used parchment paper to align everything up I placed it on the blue offset. Then I applied it to the sign. Then I put the white on top.

    For Let Freedom Ring I put the transfer tape on the white portion, then used parchment paper to align it up on top of the red and placed. then repeated to put it on the blue. The applied it to the sign.

    Continue placing the rest of t the vinyl on your pieced.

    Step 5 – For the banner I did the print and cut and printed it on white cardstock and then cut that out on my cutting machine. So easy and a time saver!

    Step 6 – Now add your decorative accents. For the rolling pin i tied a piece of star ribbon on the one end. For the books I used a wide burlap patriot ribbon to cover the slats of the crate. The made a messy bow and put that on top with white jute. Have fun and play with this step! Use what you have!!

    How to get your FREE Patriotic Tiered Tray Files

    To get your FREE file please go to my Freebie Library, sign in (don’t worry if you are not a member yet, sign up and the password will be emailed to you!!! Also, remember I include it in the bottom of the weekly email too! 😉 ) and download Number 32 – Patriotic Tray Bundle. The downloaded file will have multiple file options SVG, PNG, DXF (If you have the free version of Silhouette Studio you will need this file) and EPS. 

    I hope you enjoy the FREE tiered tray file. Thank you again for stopping by and being part of my dream and 12 Paw Designs! Have an absolutely amazing day!!! Remember a ? Pintrest pin would be so appreciated!

    Also, please check out my shop. I am always adding new designs. You might also find ready made tumblers in there in the future!!!
    https://12pawdesigns.com/shop/

    As a special thank you use code BDAY20 to take 20% off anything in the shop right now! It is my birthday month and I want to share it with you!!!

    If you have any questions or run into an issue please let me know!!!

    Lorri?
    Lorri@12PawDesigns.com

    Let’s Conntect!

    Want to connect more with 12 Paw Designs???:
    • Website: https://12pawdesigns.com
    • FB Page: https://www.facebook.com/12pawdesigns/
    • Instagram: https://www.instagram.com/12pawdesigns/
    • Pinterest: https://www.pinterest.com/12PawDesigns

    DO NOT resell any of the files as digital download or any other form.
    DO NOT claim the files as your own.
    DO NOT modify and resell the files in any form.
  • A TIERED TRAY A BUNNY WOULD LOVE!

    A TIERED TRAY A BUNNY WOULD LOVE!

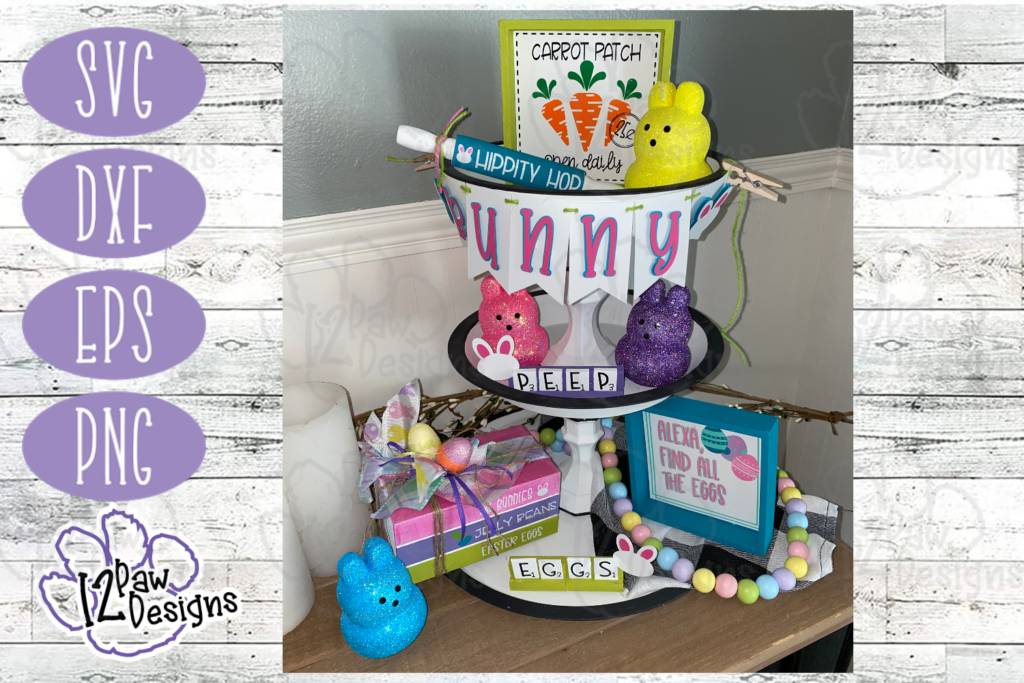
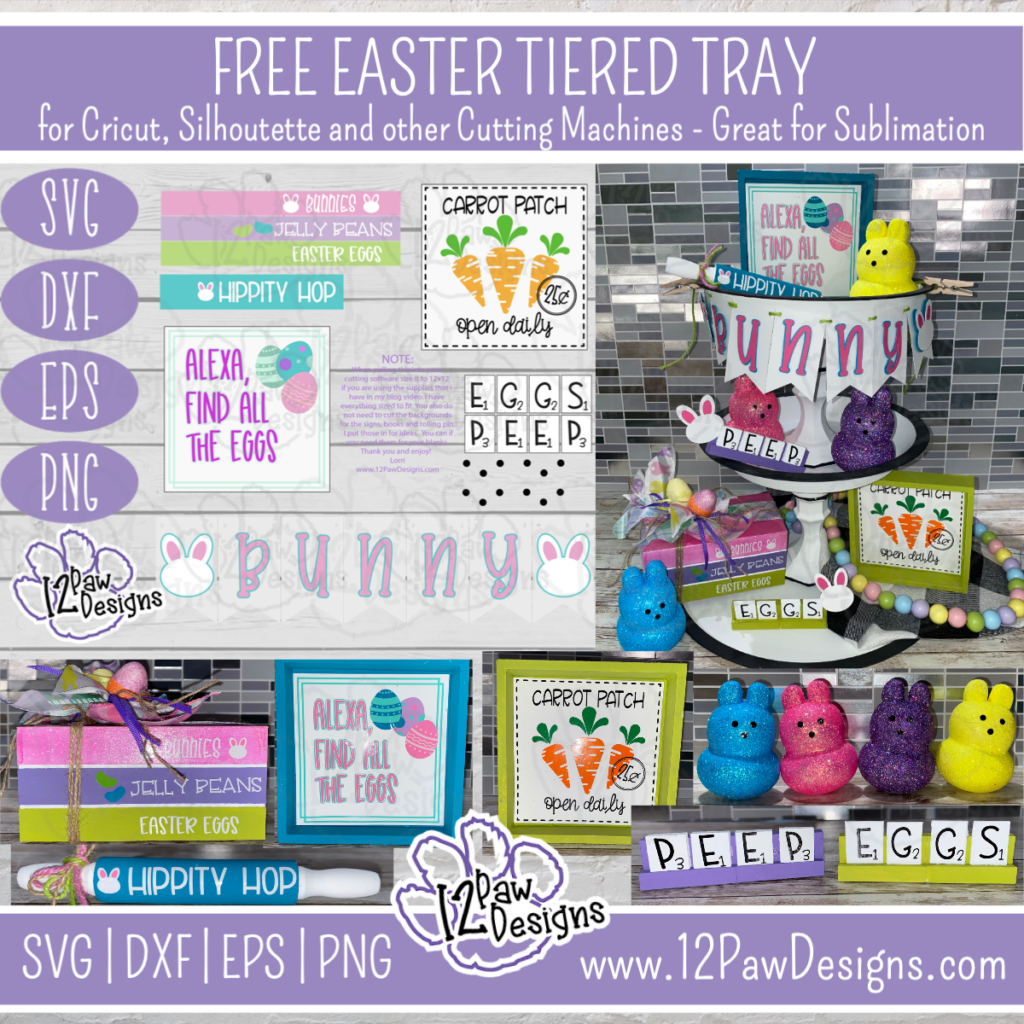
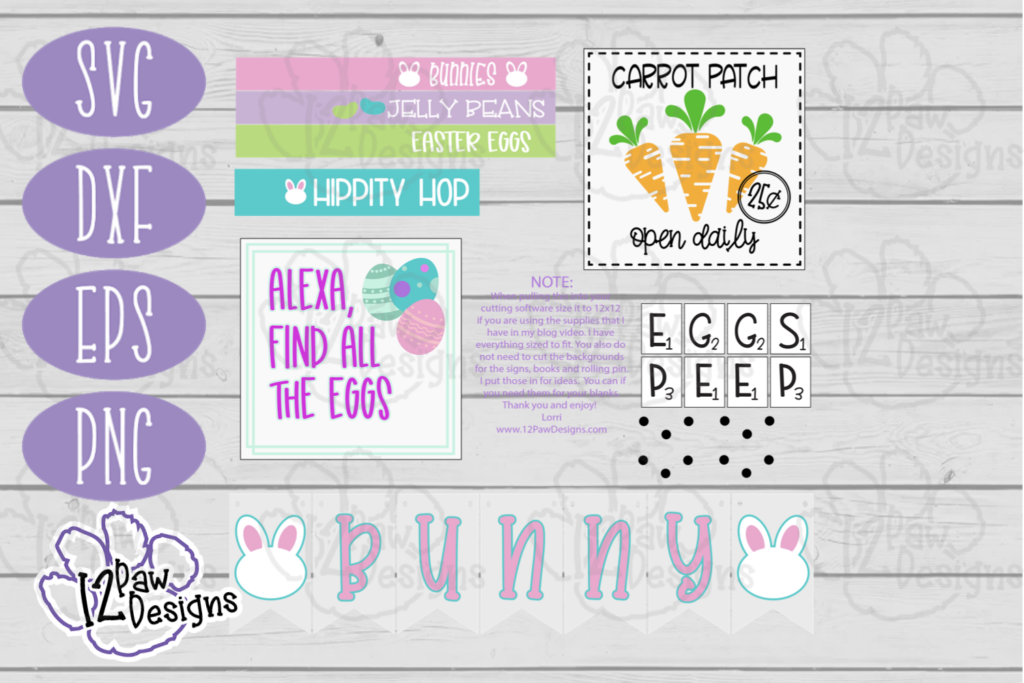
    Happy Sunday Funday Freebie! Today we are making a Tiered Tray a Bunny Would Love! Tiered trays are so popular and absolutely love mine so much I actually have two!. We are making books, rolling pin, signs, banner, scrabble trays and glitter peeps. So yes, any BUNNY would love this! Here are some pictures of my finished project. Below is a supply list and video tutorial along with the link to the FREE files.

    Easter Tiered Tray SVG- Tiered Tray Cut File - Cricut Silhouette - svg/dxf/png/eps - Digital Download
    Easter Tiered Tray SVG- Tiered Tray Cut File – Cricut Silhouette – svg/dxf/png/eps – Digital Download

    Supply List

    Cutting Machine and software
    Vinyl– Todays vinyl is from https://www.143vinyl.com/ it is the Starcraft brand and I used white, black, orange, green, 2 colors of purple, 2 colors of pink, 2 colors of teal
    White, teal and pink cardstock
    Weeding tool, scissors, cutting knife, glue gun, paint brushes, foam tape and transfer tape
    Dollar tree – tumble tower blocks, 3 in 1 game (for the scrabble pieces or you can purchase them from walmart), small wood crate for the books (you can also cut 3.5×5″ wood blocks)
    Wooden rolling pin
    Blanks for signs
    Modge Podge
    Glitter
    Plaster Bunnies from the Dollar Tree
    Ribbon of choice and jute

    To get your FREE file please go to my Freebie Library, sign in (don’t worry if you are not a member yet, sign up and the password will be emailed to you!!!) and download Number 17 Easter Tiered Tray. There are file options SVG, PNG, DXF (If you have the free version of Silhouette Studio you will need this file) and EPS. 

    I hope you enjoy the FREE tiered tray file. Thank you again for stopping by and being part of my dream and 12 Paw Designs! Have an absolutely amazing day!!! Remember a ? Pintrest pin would be so appreciated!

    Also, please check out my shop. I am always adding new designs. You might also find ready made tumblers in there in the future!!!
    https://12pawdesigns.com/shop/

    As a special thank you use code BDAY20 to take 20% off anything in the shop right now! It is my birthday month and I want to share it with you!!!

    If you have any questions or run into an issue please let me know!!!

    Lorri?
    Lorri@12PawDesigns.com

    Let’s Conntect!

    Want to connect more with 12 Paw Designs???:
    • Website: https://12pawdesigns.com
    • FB Page: https://www.facebook.com/12pawdesigns/
    • Instagram: https://www.instagram.com/12pawdesigns/
    • Pinterest: https://www.pinterest.com/12PawDesigns

    DO NOT resell any of the files as digital download or any other form.
    DO NOT claim the files as your own.
    DO NOT modify and resell the files in any form.

  • LUCK OF THE IRISH TIERED TRAY

    LUCK OF THE IRISH TIERED TRAY

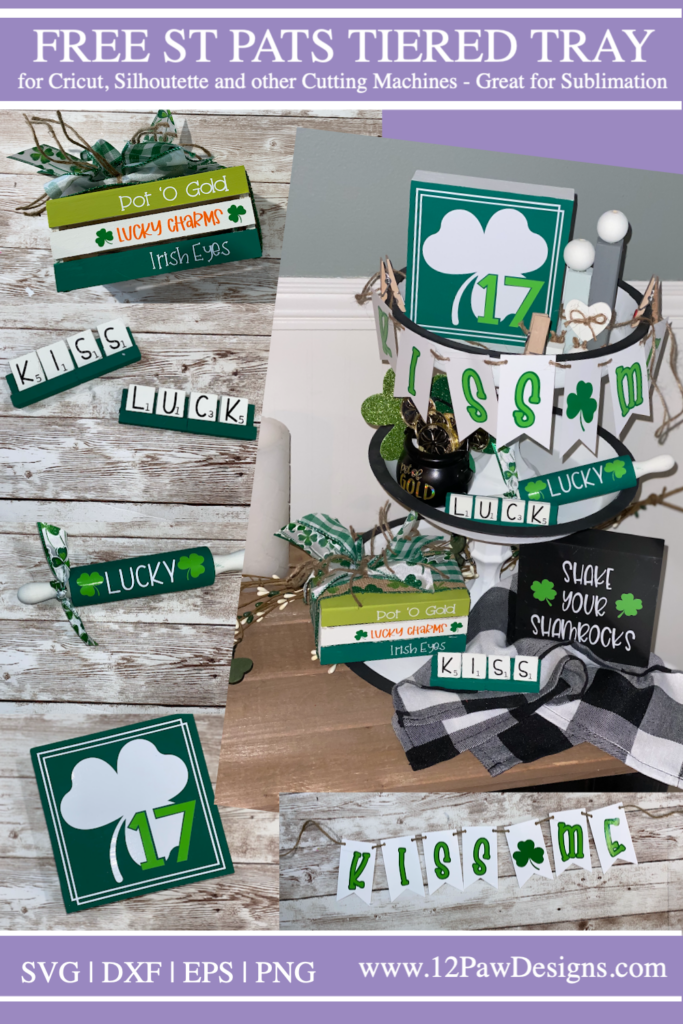
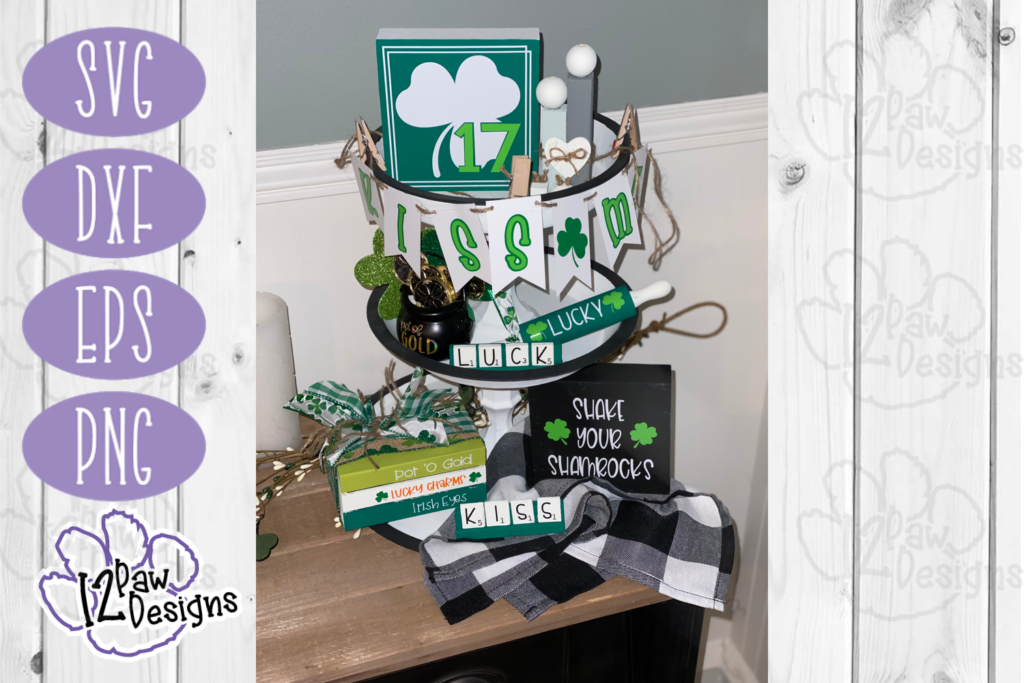
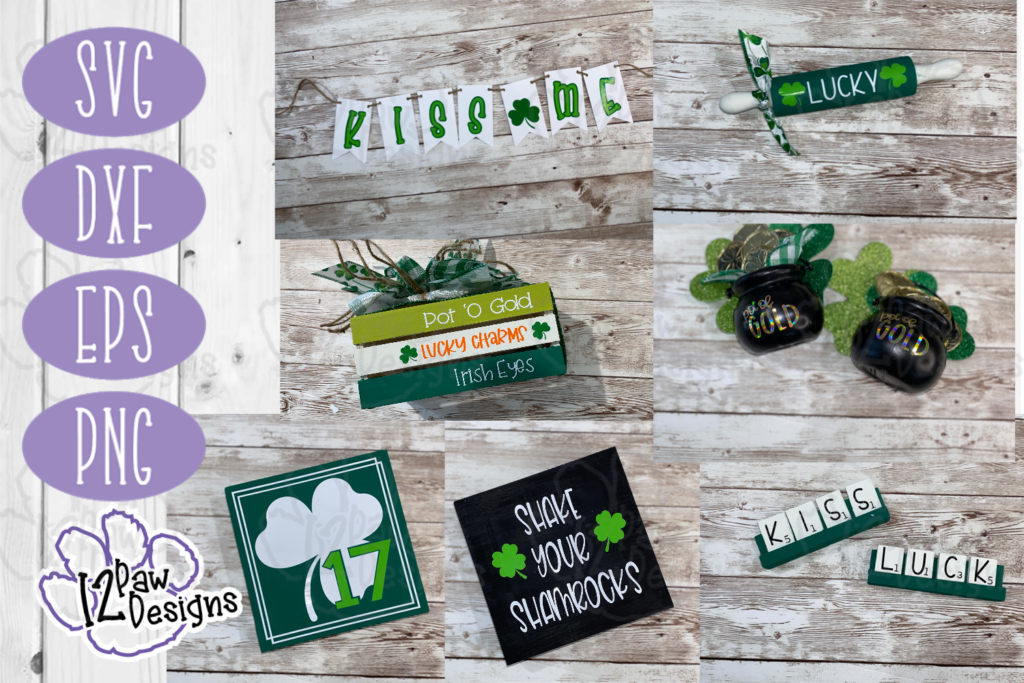
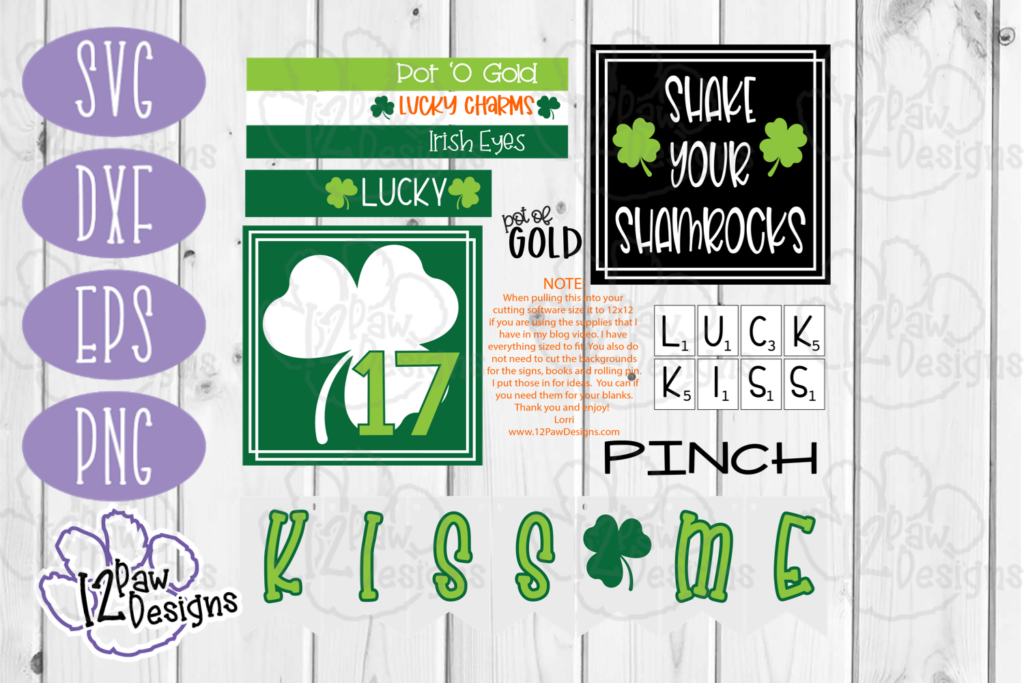
    Happy Sunday! Which means HAPPY SUNDAY FUNDAY FREEBIE!! Today we are making a Luck of the Irish Tiered Tray (aka St Patrick’s Day)!!! I have designed and created items to decorate my tiered trays for St Patrick’s Day!! So I thought I would share with you the cut file so that you can make your own. Below you will find the video tutorial of the steps that I took to create the items.

    St Patricks Day Tiered Tray SVG- Tiered Tray Cut File - Cricut Silhouette - svg/dxf/png/eps - Digital Download
    St Patricks Day Tiered Tray SVG- Tiered Tray Cut File – Cricut Silhouette – svg/dxf/png/eps – Digital Download

    Supply List

    Cutting Machine and software
    Vinyl– Todays vinyl is from https://www.143vinyl.com/ it is the Starcraft brand and I used white, black, orange and 2 different greens.
    White cardstock
    Weeding tool, scissors, cutting knife, glue gun, paint brushes and transfer tape
    Dollar tree – tumble tower blocks, 3 in 1 game (for the scrabble pieces or you can purchase them from walmart), gold coins, glitter shamrocks, black pots, small wood crate for the books (you can also cut 3.5×5″ wood blocks)
    Wooden rolling pin
    Blanks for signs
    Ribbon of choice and jute

    To get your FREE file please go to my Freebie Library, sign in (don’t worry if you are not a member yet, sign up and the password will be emailed to you!!!) and download Number 14 St Patricks Day Tiered Tray. There are file options SVG, PNG, DXF (If you have the free version of Silhouette Studio you will need this file) and EPS. 

    I hope you enjoy the FREE tiered tray file. Thank you again for stopping by and being part of my dream and 12 Paw Designs! Have an absolutely amazing day!!! Remember a ? Pintrest pin would be so appreciated!

    Also, please check out my shop. I am always adding new designs. You might also find ready made tumblers in there in the future!!!
    https://12pawdesigns.com/shop/

    As a special thank you use code BDAY20 to take 20% off anything in the shop right now! It is my birthday month and I want to share it with you!!!

    If you have any questions or run into an issue please let me know!!!

    Lorri?
    Lorri@12PawDesigns.com

    Let’s Conntect!

    Want to connect more with 12 Paw Designs???:
    • Website: https://12pawdesigns.com
    • FB Page: https://www.facebook.com/12pawdesigns/
    • Instagram: https://www.instagram.com/12pawdesigns/
    • Pinterest: https://www.pinterest.com/12PawDesigns

    DO NOT resell any of the files as digital download or any other form.
    DO NOT claim the files as your own.
    DO NOT modify and resell the files in any form.