Category: Sublimation

  • Time to Deck the Halls Christmas Ornaments

    Time to Deck the Halls Christmas Ornaments

    Christmas Ornaments, Wood Slice Ornaments, Christmas Decorations, Cricut Silhouette Glowforge, Svg/Dxf/Png/Eps/Sublimation, Digital Download, Cut File

    Merry Christmas in July!!! So that means it’s time to Deck the Halls with some new Christmas Ornaments!!! I took some Wood Slice Ornaments and add some fun sayings and accents. They are sure to spruce up your Christmas Decorations!

    I did my project with my Glowforge (if you would like more information on this please let me know). However, you can totally use vinyl. Also, with the proper blades you can also cut chipboard or wood on some of the cutters (please check your machine options for this).

    This weeks FREE Christmas Ornaments can be found in the Freebie Library. File number is 42. I have also created a video tutorial along with some directions on how I made my ornaments and some pointers! Remember to please share what you created! Check me out on Facebook and Instagram and remember a pintrest pin is always appreciated!!

    Christmas Ornaments Supply List

    • Cutting Machine or Glowforge and software
    • Christmas Ornaments\Wood Slice Ornaments (click on the link)
    • Wood Slices
    • Wood for the Glowforge that is prepped (masked) if you are using a Glowforge
    • Adhesive Vinyl in your color choice if you are doing vinyl
    • Gorilla Super Glue Gel
    • Hot Glue Gun and Glue
    • Paint and brush – I used White and Black
    • Paint Pens – I used Posca and/or Arteza
    • Ribbon
    • Beads – I bought mine off of amazon
    • Twine\Jute
    • Weeding tools, scissors, cutting knife, transfer tape etc

    Video TutorialChristmas Decorations – Wood Slice Ornaments

    Here are the steps I took to make the Christmas Ornaments

    Step 1 – Load the free cutting file into your favorite cutting software and size appropriately. I used the Glowforge, however, most cutters can cut thin birch or chipboard (check your cutting machine). In the video I show how i load it into the Glowforge app and send it to the Glowforge. I actually show a video of it cutting.

    Step 2 – Cut your wood or vinyl. On the glow forge you need to mask your wood with paper transfer tape to protect from scorching. Also, you can paint your board ahead of time to save on painting later!!!

    Step 3 – Once you have your wood or vinyl cut do your weeding. For the Glowforge that means removing the mask from the wood. I found the Gorilla duct tape works amazing!!! You can also use weeding tools, pin pen, etc

    Step 4 – Paint your letters. I use the paint pens. They are quick and easy!! I can move pretty fast if I leave them in the board. However, tweezer helps hold it as well while you paint.

    Step 5 – Once I painted my letters I then decided what l colors I wanted on my wood disks. I then painted those and set aside to dry. You can do this earlier if you know what color are going to be or if you follow my images!

    Step 6 – Glue your letters to the wood. I use Gel super glue. However, they make 3m tape that you can place on the back of the board to make it super easy to put on your wood.

    Step 7 – Once everything is attached now we can finish off our ornaments. I used some ribbon that I folded to form the bow and then wrapped twine around them. Pull tight and knot on the back side. Then add a drop of glue to the back of the knot.

    Step 8 – Add some beads. I using twine put it through the hole of the disk. I found that using a piece of floral wire works wonders. I you can get a spool from the Dollar Tree. I use the wire like a needle threader. I bend a piece in half. Put my twine in it and then you it to put through the hole of the wood and the beads. When i put the last bead on I put a little drop of hot glue on the twine where the bead will be and then slide the bead over it and held for a second. Tie a knot at the top.

    Step 9 – Glue your bow on. You are all done!!!

    How to get your FREE Christmas Ornaments File

    To get your FREE file please go to my Freebie Library, sign in (don’t worry if you are not a member yet, sign up and the password will be emailed to you!!! Also, remember I include it in the bottom of the weekly email too! 😉 ) and download Number 42 – Christmas Ornaments\Wood Slices The downloaded file will have multiple file options SVG, PNG, DXF (If you have the free version of Silhouette Studio you will need this file) and EPS. 

    I hope you enjoy the FREE files. Thank you again for stopping by and being part of my dream and 12 Paw Designs! Have an absolutely amazing day!!!

    Remember to PIN IT!!! ?
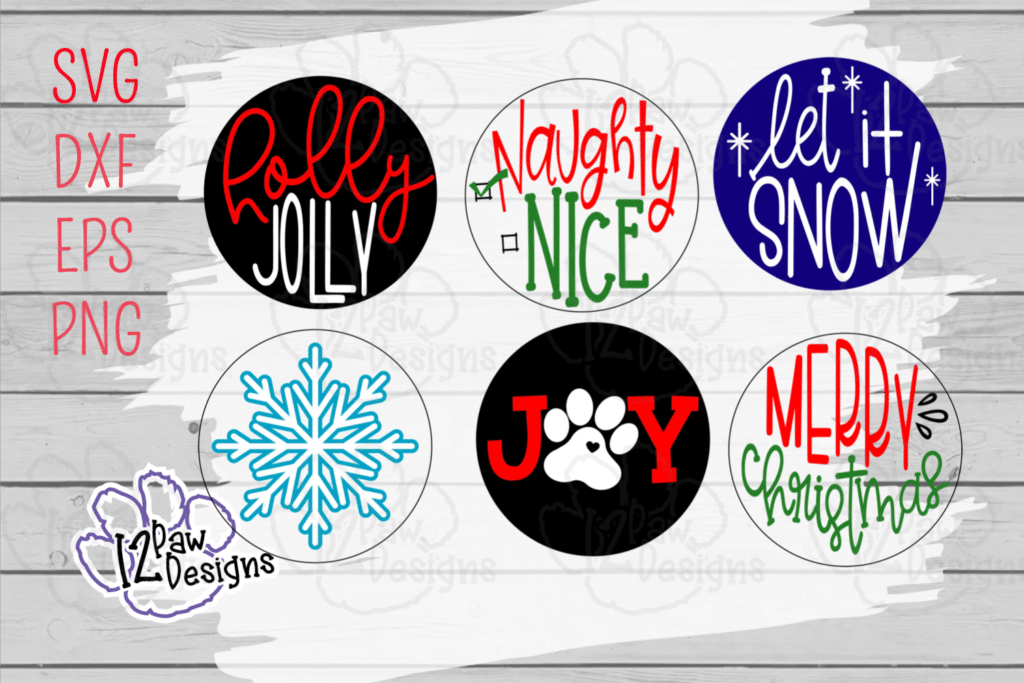
    Christmas Ornaments, Wood Slice Ornaments, Christmas Decorations, Cricut Silhouette Glowforge, Svg/Dxf/Png/Eps/Sublimation, Digital Download, Cut File
    12PD Christmas Ornaments Rounds

    Also, please check out my shop. I am always adding new designs.
    https://12pawdesigns.com/shop/

    If you have any questions or run into an issue please let me know!!!

    Lorri?
    Lorri@12PawDesigns.com

    Let’s Conntect!

    Want to connect more with 12 Paw Designs???:
    • Website: https://12pawdesigns.com
    • FB Page: https://www.facebook.com/12pawdesigns/
    • Instagram: https://www.instagram.com/12pawdesigns/
    • Pinterest: https://www.pinterest.com/12PawDesigns

    DO NOT resell any of the files as digital download or any other form.
    DO NOT claim the files as your own.
    DO NOT modify and resell the files in any form.

  • Fun With Christmas Sayings and Tags!

    Fun With Christmas Sayings and Tags!

    Christmas Sayings, Holiday Tags, Holiday Sayings, Cricut Silhouette Glowforge, Svg/Dxf/Png/Eps/Sublimation, Digital Download, Cut File

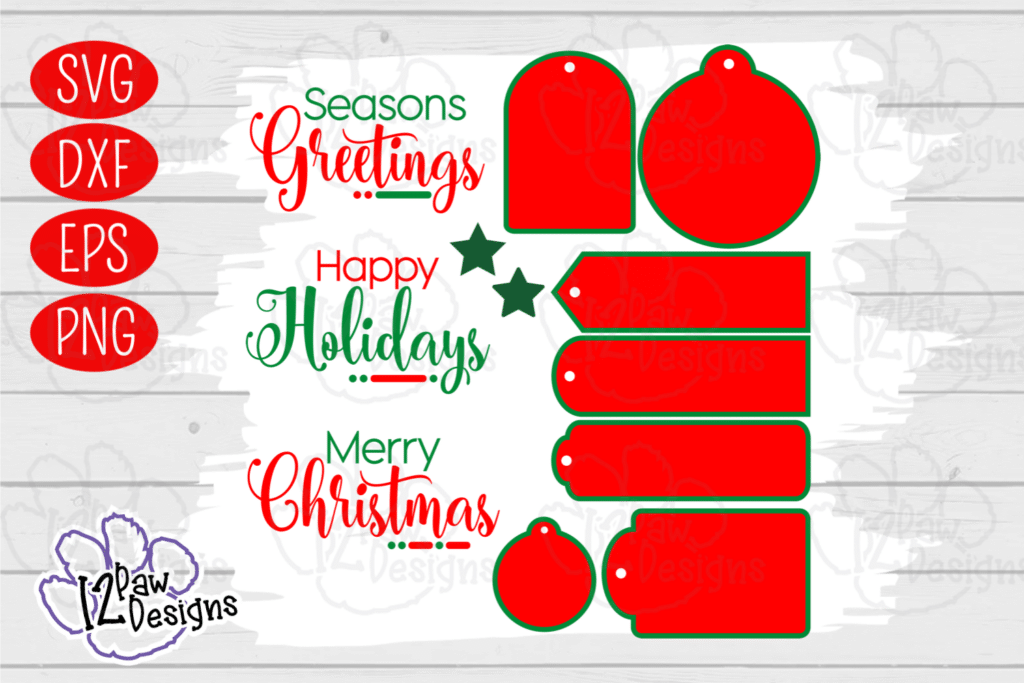
    For this weeks Christmas in July celebration I have designed and created some fun Christmas Sayings that can be used on holiday tags, cards, signs, etc. I included three holiday sayings multiple options for tags! The project I am sharing with this week is Christmas Wine Bottles. I added vinyl to some and then made tags for others. I hope you enjoy and can’t wait to see what you create!!

    This weeks FREE Holiday Sayings and Tags can be found in the Freebie Library. File number is 41. I have also created a video tutorial along with some directions on how I made my bottles and some pointers! Remember to please share what you created! Check me out on Facebook and Instagram and remember a pintrest pin is always appreciated!!

    Also, everything in the shop is 25% until Wednesday!!! No code is needed or anything!! The discount will be automatically applied!!! Enjoy!!

    Christmas Sayings Supply List

    • Cutting Machine and software
    • Holiday Sayings and Tags (click on the link)
    • Wine Bottle(s)
    • LED Wine Bottle Lights
    • Adhesive Vinyl in your color choice
    • Hot Glue Gun and glue
    • Rust-oleum Frosted Glass Spray paint – Walmart or Home Depot
    • Christmas greenery and decorations
    • Epson salt
    • Glitter
    • Modge Podge and brush or sponge
    • Twine
    • Alcohol and cotton pad
    • Parchment Paper
    • Weeding tools, scissors, cutting knife, transfer tape etc

    Video TutorialHoliday Sayings and Tags

    Here are the steps I took to Christmas Sayings and Holiday Tag Wine Bottles

    Step 1 – Spray your bottles with the Frosted Glass Spray paint. I put a glove on and held them by the neck and sprayed them outside. Then i just put them on parchment paper to dry.

    Step 2 – If you want to do the snow effect on your bottles lets do that now. First lets mix our epson salt and glitter. I used a small container and put some salt in it and then added glitter. I did this all by look and appeal. Now use your glue gun and applied glue to the bottle. I used some tape to give my bottle a clean edge. Then applied the glue below it. It is easier to stand the bottle up and let gravity help with the drips. Now apply your first layer of epson\glitter. Once that is dry take your modge podge and sponge or brush and pounce over the top of the first layer and fill in your gaps (again check the video for the is). Once they are dry spray your glitter area with a clear sealer. I used Rust-Oleum 2x clear gloss.

    Step 3 – Load the free cutting file into your favorite cutting software and size appropriately. For the tags I did you my Glowforge, however, most cutters can cut thin birch on them or chipboard.

    Step 4 – Weed your vinyl. Then use your transfer tape to apply it to the vinyl. I did the larger wood first. Then I used parchment paper to align and layer the vinyl since I used two colors. I demo this in the video above.

    Step 5 – Now apply your vinyl to the bottle. Lay the bottle on its side. Use your parchment paper to align where you want it to go. Then apply your vinyl. Once the vinyl is laid down carefully remove your transfer tape. If you are doing multiple bottles apply the rest of your vinyl.

    Step 6 – Next take your twine and wrap it around the top of the bottle to cover the neck. Use a little hot glue at the top. Put the twine in it and wrap it around the bottle. When looping around over the tail and glue. Keep wrapping until you have the look you want.

    Step 7 – Now take the greenery and cut it to the size you need. Put some glue on the bottom part of the twine and then put the greenery in it. Then wrap the twine around again to cover those ends. To finish add your berries and a twine bow or knot.

    Step 8 – If you are using tags this is where i added mine. I used twine to tie the ends up. I found it was easier to do the smaller star first and then the larger tag.

    Step 9 – Finally take your wine bottle lights. Feed the lights into the bottle. Turn on and enjoy your beautiful creation!

    How to get your FREE Holiday Sayings and Tags

    To get your FREE file please go to my Freebie Library, sign in (don’t worry if you are not a member yet, sign up and the password will be emailed to you!!! Also, remember I include it in the bottom of the weekly email too! 😉 ) and download Number 41 – Christmas\Holiday sayings and tags The downloaded file will have multiple file options SVG, PNG, DXF (If you have the free version of Silhouette Studio you will need this file) and EPS. 

    I hope you enjoy the FREE files. Thank you again for stopping by and being part of my dream and 12 Paw Designs! Have an absolutely amazing day!!!

    Remember to PIN IT!!! ?

    Christmas Sayings, Holiday Tags, Holiday Sayings, Cricut Silhouette Glowforge, Svg/Dxf/Png/Eps/Sublimation, Digital Download, Cut File
    12PD Holiday Sayings and Tag

    Also, please check out my shop. I am always adding new designs.
    https://12pawdesigns.com/shop/

    If you have any questions or run into an issue please let me know!!!

    Lorri?
    Lorri@12PawDesigns.com

    Let’s Conntect!

    Want to connect more with 12 Paw Designs???:
    • Website: https://12pawdesigns.com
    • FB Page: https://www.facebook.com/12pawdesigns/
    • Instagram: https://www.instagram.com/12pawdesigns/
    • Pinterest: https://www.pinterest.com/12PawDesigns

    DO NOT resell any of the files as digital download or any other form.
    DO NOT claim the files as your own.
    DO NOT modify and resell the files in any form.
  • My Favorite Color is Christmas Lights…

    My Favorite Color is Christmas Lights…

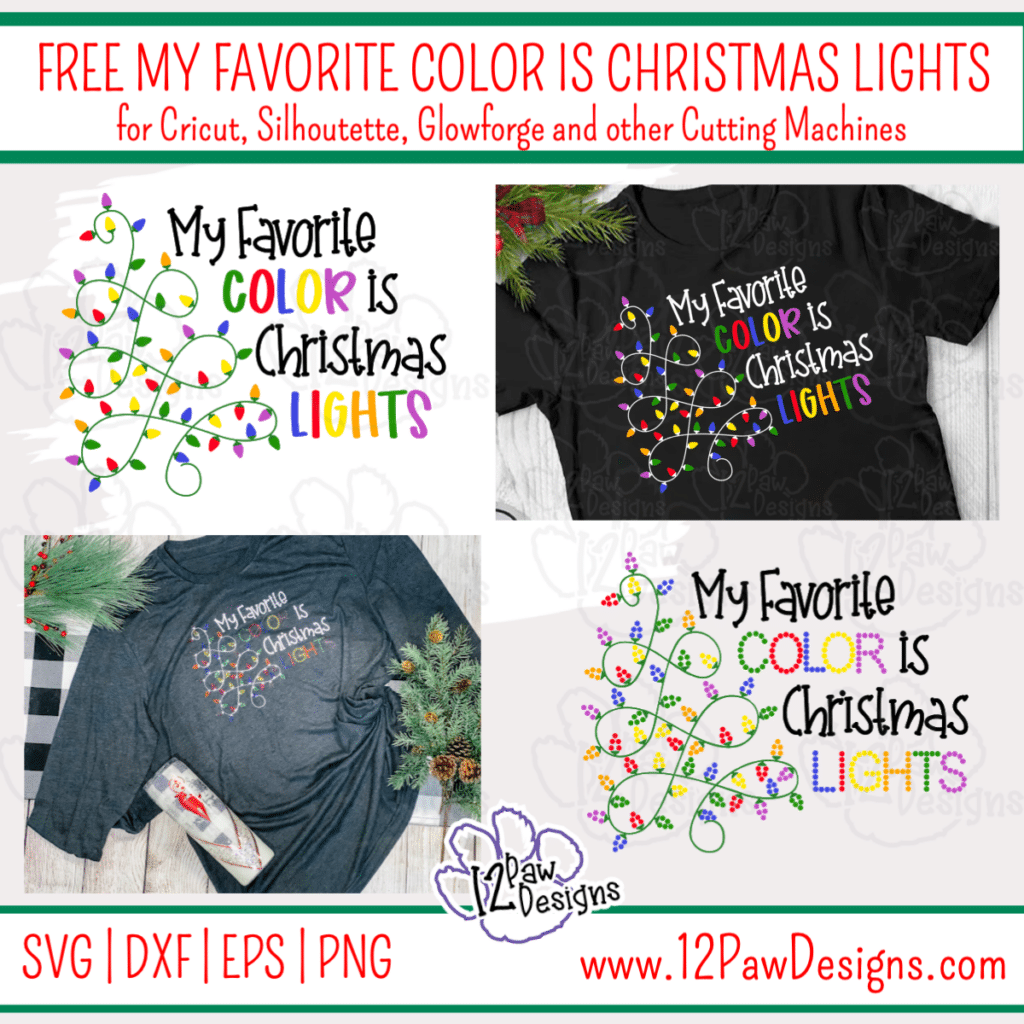
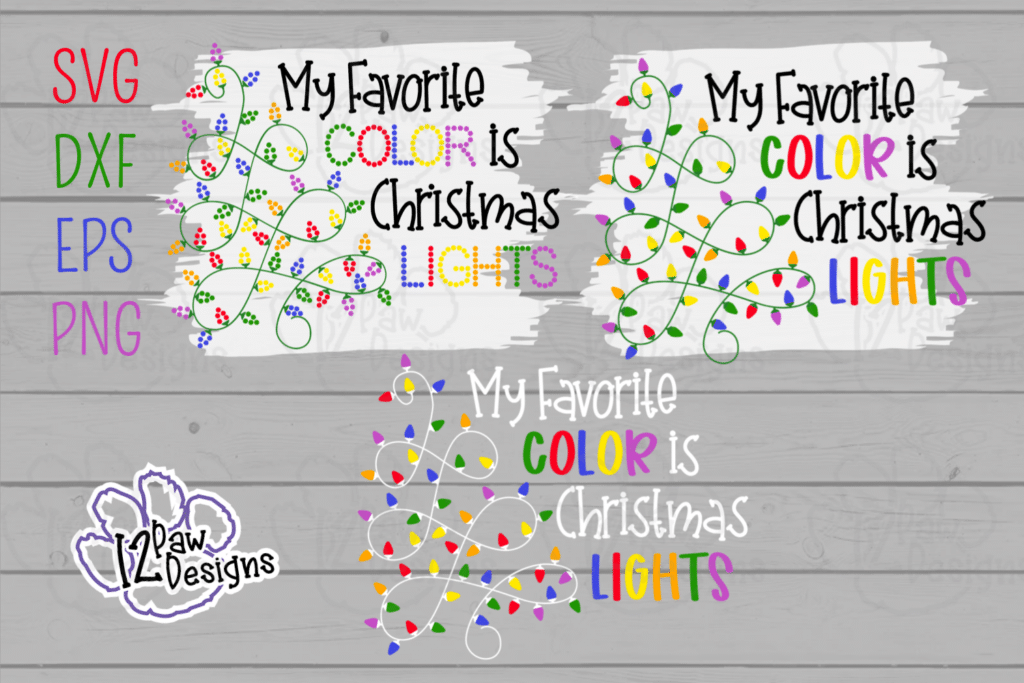
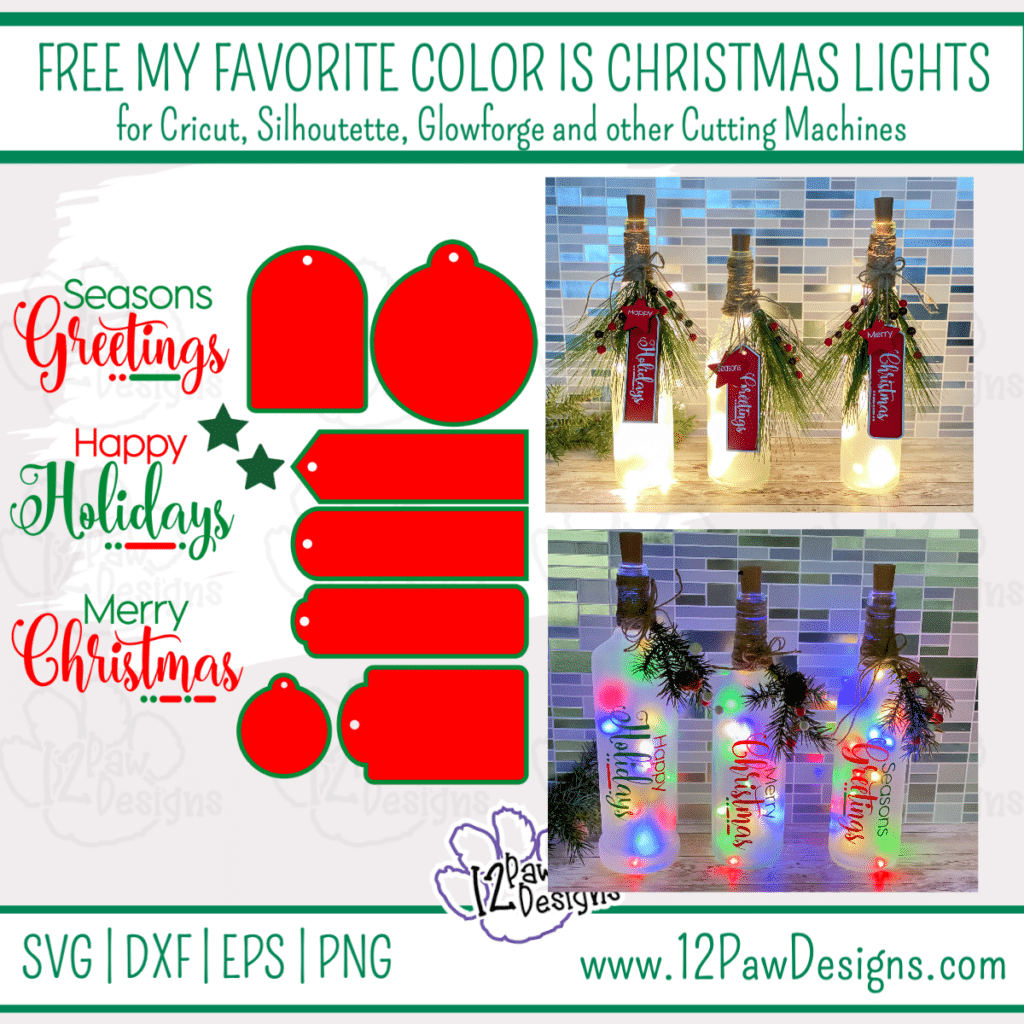
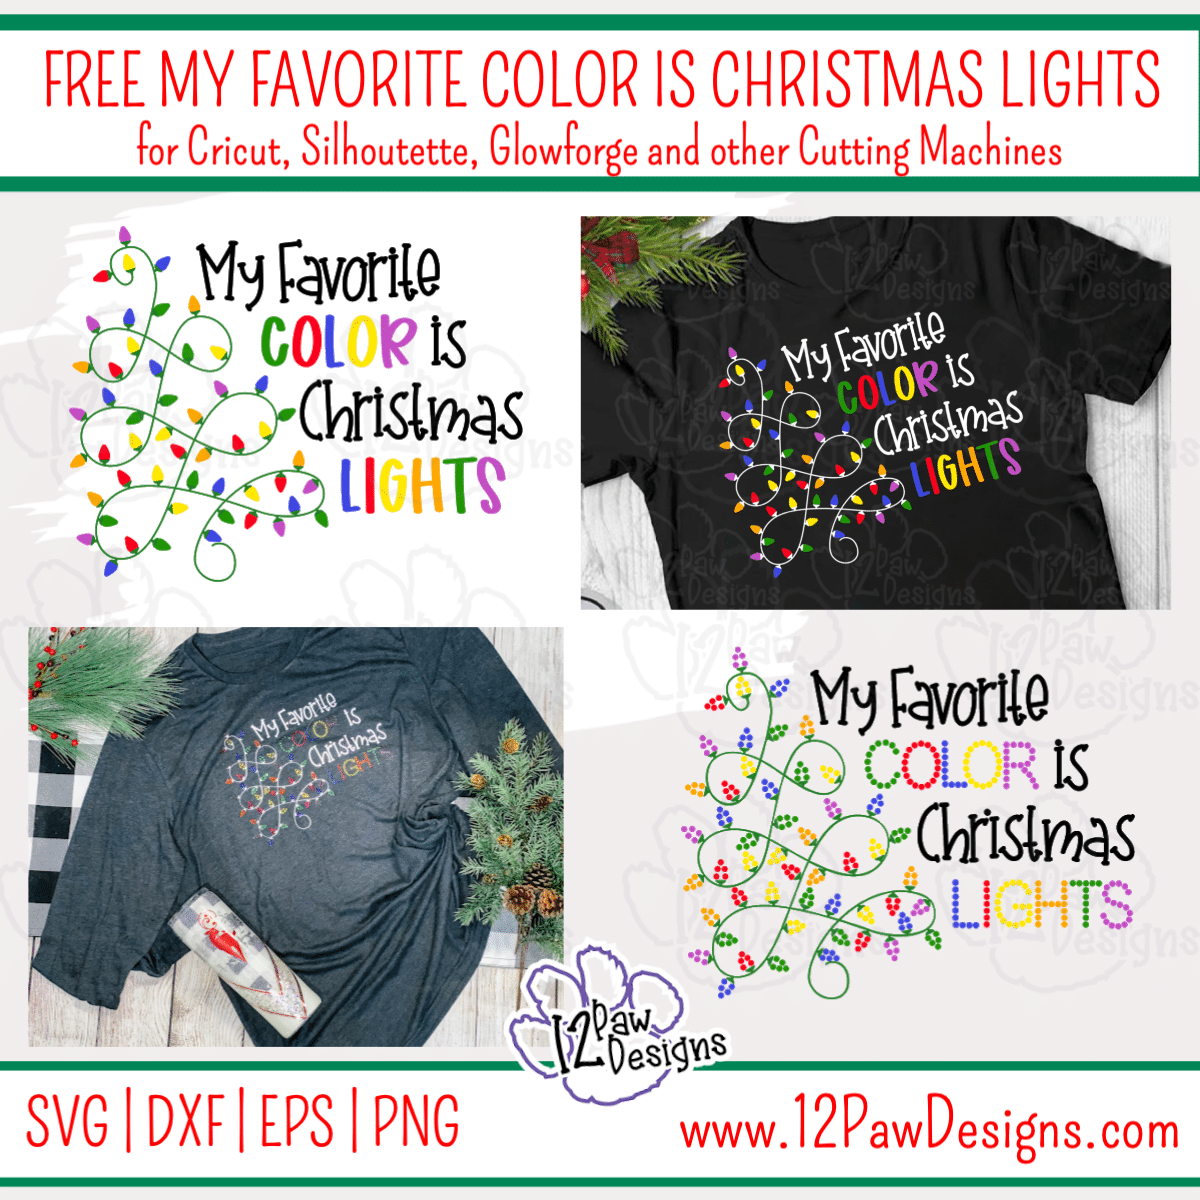
    I’m so excited to bring to you Christmas in July!!! I love giving at Christmas so every week in July there will be a Christmas design!!! This week we are doing My Favorite Color is Christmas Lights. The free files have a regular files and i have setup a Rhinestone template version for you!!! Christmas lights are so bright and beautiful and i love looking at them!!

    My Favorite Color is Christmas Lights, Christmas Lights Svg, Christmas Svg Designs, Cricut Silhouette, Svg/Dxf/Png/Eps/Sublimation, Digital Download, Cut File
    12PD My Favorite Color is Christmas Lights Rhinestones

    This weeks FREE My Favorite Color is Christmas Lights can be used on a shirt, bag, sign, etc and the SVG/Cut files can be found in the Freebie Library. File number is 40. I have also created a video tutorial along with some quick directions below on how I made my shirt and some pointers! Remember to please share what you created! Check me out on Facebook and Instagram and remember a pintrest pin is always appreciated!!

    My Favorite Color is Christmas Lights Supply List

    • Cutting Machine and software
    • My Favorite Color is Christmas Lights (click on the link)
    • Rhinestoines – Hot fix
    • Magic Flock and Rhinestone Transfer – I purchased mine from Rhinestone World
    • Edging painting pad – used with the magic flock to get the Rhinestones into the holes.
    • Heat Transfer Vinyl – for the light strand and the non-rhinestone words
    • Heat press or Easy Press
    • Weeding tools, scissors, cutting knife, etc

    Video TutorialChristmas Lights Rhinestones

    Here are the steps I took to make my Rhinestone Shirt

    Step 1 – Now load your free file into your cutting software and cut out rhinestone templates from the magic flock. Remember not to re-size if you are doing rhinestones because it will affect the template. Make sure your cut settings are appropriate for your cutting machine. Weed your flock. I pulled the template off first. Important thing is that you want to keep the back down on something. So since i didnt have any vinyl backing left I used the backing from the magic flock. So i had to remove all the little dots. They are sticky and it took me a little bit.

    Cutting notes….I used weeding boxes around my lights. So each light color was a separate flock template. For the words I did O O from color in one block and C L R in another. This gave me a great template for lining of my letters and it saved on flock. For LIGHTS I did L G T and I H S in a weeding block. I show this in the video.

    Step 2 – Cut your light strand and words out of heat transfer vinyl. I used white since I was going on a dark grey shirt. Remember when cutting your vinyl that the shiney side down to the mat. Weed your vinyl

    Step 3 – Let’s press our HTV to our shirt. Find the center of your shirt. I like to fold my in half and give a quick few seconds press. Once you have your fold lay the shirt down on the press. Now find the center of your HTV. I like to fold it in half. Once that is done put it on the shirt and press. Make sure you follow the temp and time that the vinyl recommends. Remove your transfer sheet.

    Step 4 – Lets do rhinestones!!! I did this right at the press. I used a piece of parchment paper under the rhinestones and magic flock. It helped to make sure things did not stick where I did not want it to. Pour your stones on the flock and use the pad to move them around to fill the holes. Confirm all holes are filled and that they are going the correct direction. Then take your transfer tape and lay it over the rhinestones and press firmly to make sure all stones adhere. Carefully pull the transfers and stones from the template and put the white back on the transfer tape and rhinestones. I did all of one color at a time. So did red light bulbs and then the letters. Then i put the transfer tape over the letters and set them to the side. Press each color light to the shirt. I used the PNG file as my visual to make sure I had the lights in the correct location. Press. I did not press the full time. Just enough to get the stones to stick t the shirt. I did a full time press at the end. Repeat the process for all other colors.

    Once the lights are all on I then pressed the words to the shirt.

    IMPORTANT note!!! Once you’re done with your rhinestones separate the front and back of your shirt. The stones will try and glue through to all layers!!!

    Enjoy your beautiful shirt!!!

    How to get your FREE Christmas Lights Files

    To get your FREE file please go to my Freebie Library, sign in (don’t worry if you are not a member yet, sign up and the password will be emailed to you!!! Also, remember I include it in the bottom of the weekly email too! 😉 ) and download Number 40 – My Favorite Color is Christmas Lights The downloaded file will have multiple file options SVG, PNG, DXF (If you have the free version of Silhouette Studio you will need this file) and EPS. 

    I hope you enjoy the FREE files. Thank you again for stopping by and being part of my dream and 12 Paw Designs! Have an absolutely amazing day!!!

    Remember to PIN IT!!! ?

    My Favorite Color is Christmas Lights, Christmas Lights Svg, Christmas Svg Designs, Cricut Silhouette, Svg/Dxf/Png/Eps/Sublimation, Digital Download, Cut File
    12PD My Favorite Color is Christmas Lights

    Also, please check out my shop. I am always adding new designs.
    https://12pawdesigns.com/shop/

    If you have any questions or run into an issue please let me know!!!

    Lorri?
    Lorri@12PawDesigns.com

    Let’s Conntect!

    Want to connect more with 12 Paw Designs???:
    • Website: https://12pawdesigns.com
    • FB Page: https://www.facebook.com/12pawdesigns/
    • Instagram: https://www.instagram.com/12pawdesigns/
    • Pinterest: https://www.pinterest.com/12PawDesigns

    DO NOT resell any of the files as digital download or any other form.
    DO NOT claim the files as your own.
    DO NOT modify and resell the files in any form.
  • Wipe Your Paws Welcome Mat!

    Wipe Your Paws Welcome Mat!

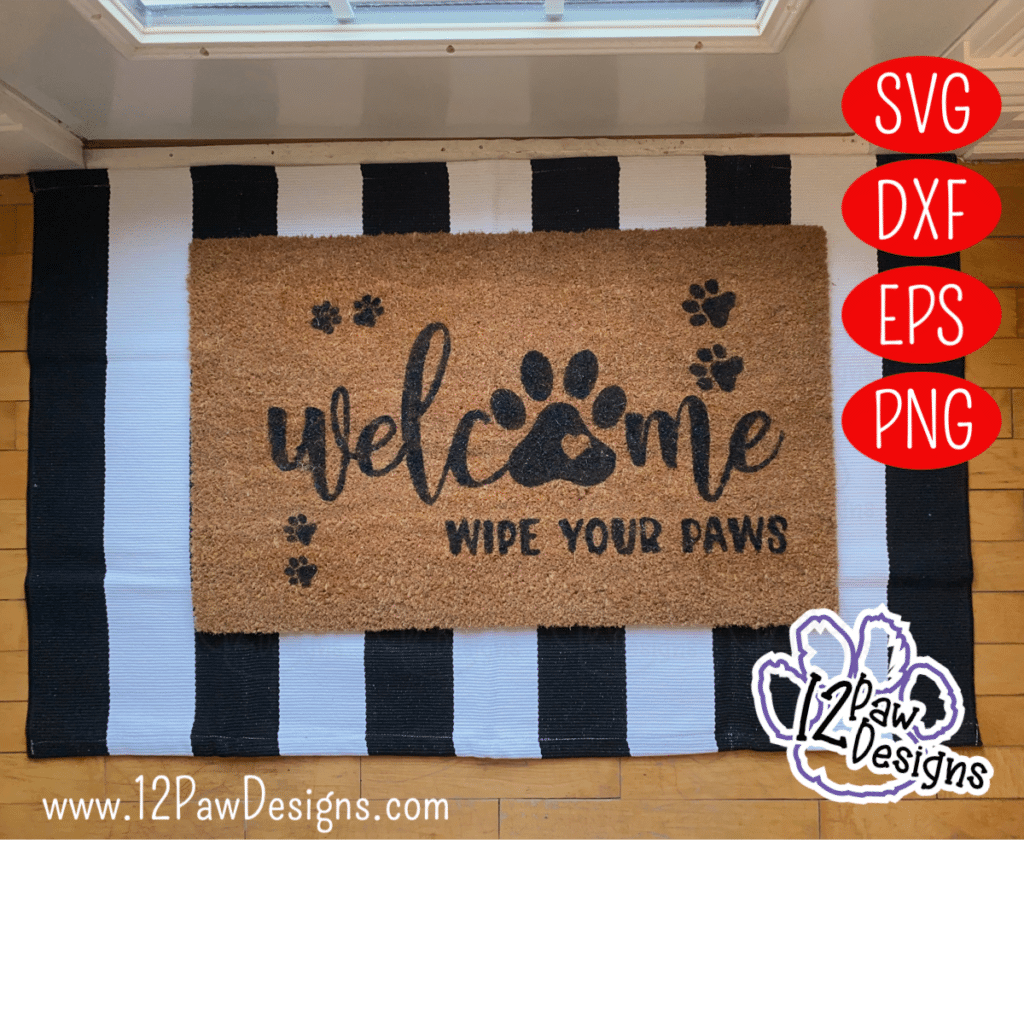
    Welcome Mat, Door Mat, Wipe Your Paws, Cricut Silhouette Glowforge, Svg/Dxf/Png/Eps/Sublimation, Digital Download, Cut File

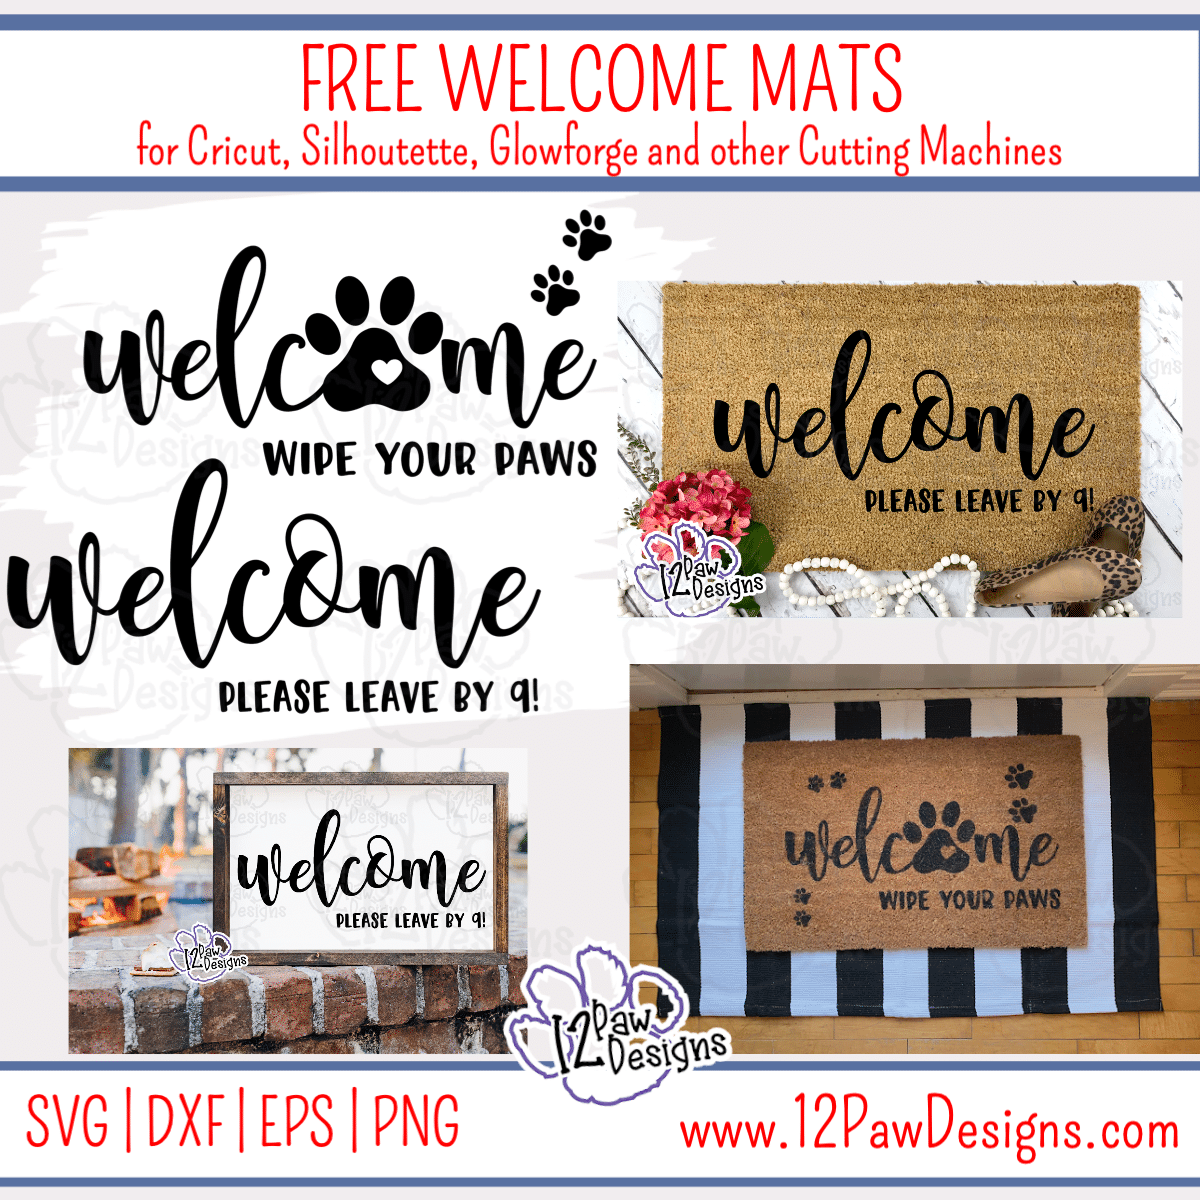
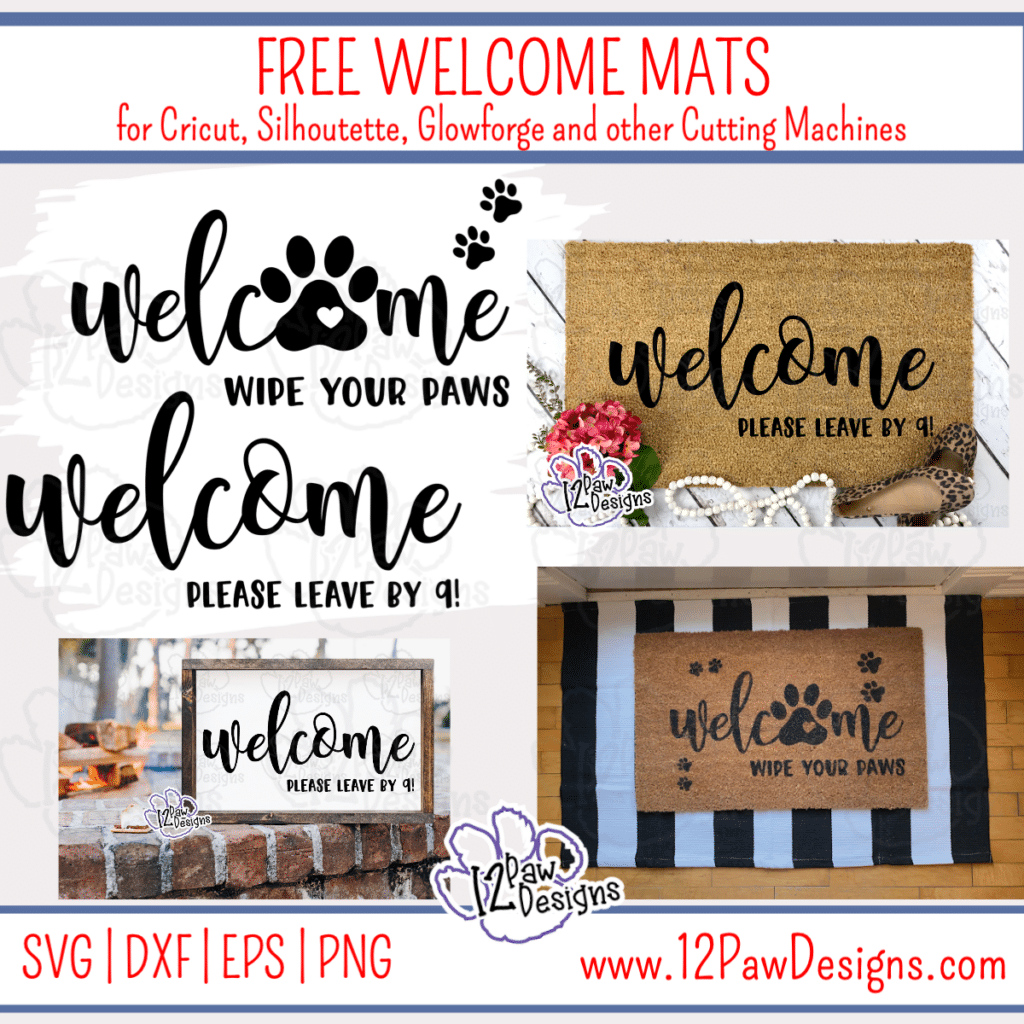
    Wipe your Paws Welcome door mat is a fun addition to any entry way! I have Included 2 fun designs for you. Once is Welcome, wipe your paws and the other is Welcome, Please leave by 9! However, don’t just think welcome mat! You can take Welcome and make signs, etc! there are so many possibilities!!

    This weeks FREE welcome mat and sign SVG/Cut files can be found in the Freebie Library. File number is 39. I have also created a video tutorial along with some quick directions below on how I made my mat and some pointers! Remember to please share what you created! Check me out on Facebook and Instagram and remember a pintrest pin is always appreciated!!

    Wipe Your Paws Supply List

    • Cutting Machine and software
    • Welcome Mat and sign (click on the link)
    • Freezer paper – sorry, you can’t your wax paper
    • Press and Seal
    • Coir Mat – I purchased mine from Home Depot.
    • Outdoor acrylic Paint – I purchased mine from #michaels
    • Paint brush
    • Spray sealer – Seal after you are done painting. I had some clear flexseal on hand
    • Weeding tools, scissors, cutting knife, etc
    • Heat sourse – iron, easy press, etc
    • Push pins if you want – they would be used for the center of the letters.

    Video TutorialWelcome Mat

    Wipe Your Paws

    Here are the steps I took to make the Welcome Mat

    Step 1 – Open the SVG file in your cutting software (note: if you have the free version of Silhouette studio you will need the DFX files). I kept my size to 12×24 cutting mat.

    Step 2 – Prep your mat. Put your freezer paper on the mat wax side down and cut out the design.

    Step 3 – Once the design it cut leave it on the mat and weed out the letters. Remember, this is a stencil so you want to take out the areas where you are going to be applying paint.

    Step 4 – Next, take your press and seal and your squeegee and apply it to the wax paper. I left it on the roll and use the squeegee to adhere and flatten as I go. Once i had it on I flipped the mat over and removed the mat from the freezer paper/press and seal.

    Step 5 – Place the freezer paper\press and seal design on your mat. Position it where you want it to go. I did the paws separately so I placed my design lower on my mat. I then used heat to adhere the freezer paper. I did use a heat press. However, a board under the mat would have helped so that it doesn’t move on you and loosen the freezer paper. Once you have it on the mat where you want it to be. Peel back the press and seal so it will be out of the way of your heat source. I did 315 for a few seconds. Then, move onto the next area. For the centers of your letters you can use push pins or hold while you are painting them. Once everything is pressed down you can move onto painting.

    Step 6 – Now take your outdoor acrylic paint and a brush and dab it into the mat. I was not stingy on paint. Make sure you keep your paint close to the area you are working on. I travel and it dropped. So take note…

    Step 7 – One you are done painting and with the paint wet pull the freezer paper off. Then i did the paws. I did not heat set them since they were small.

    Step 8 – Once your mat is dry i put a spray sealer on it. I had some clear flexiseal and used that.

    Step 9 – Place by your entrance way or give as a gift and enjoy!!!!

    How to get your FREE Files

    To get your FREE file please go to my Freebie Library, sign in (don’t worry if you are not a member yet, sign up and the password will be emailed to you!!! Also, remember I include it in the bottom of the weekly email too! 😉 ) and download Number 39 – Welcome Mat and Sign. The downloaded file will have multiple file options SVG, PNG, DXF (If you have the free version of Silhouette Studio you will need this file) and EPS. 

    I really hope you enjoy my welcome design and the mat we created! Remember a ? Pinterest pin would be so appreciated! I can’t wait to see what you create. Please share with me. You can come back here and add a comment or add one to Facebook too!

    Welcome Mat, Door Mat, Wipe Your Paws, Cricut Silhouette Glowforge, Svg/Dxf/Png/Eps/Sublimation, Digital Download, Cut File
    12PD Welcome Sign and Mat

    Also, please check out my shop. I am always adding new designs. You might also find ready made tumblers or some other goodies in there in the future!!!
    https://12pawdesigns.com/shop/

    If you have any questions or run into an issue please let me know!!!

    Lorri?
    Lorri@12PawDesigns.com

    Let’s Conntect!

    Want to connect more with 12 Paw Designs???:
    • Website: https://12pawdesigns.com
    • FB Page: https://www.facebook.com/12pawdesigns/
    • Instagram: https://www.instagram.com/12pawdesigns/
    • Pinterest: https://www.pinterest.com/12PawDesigns

    DO NOT resell any of the files as digital download or any other form.
    DO NOT claim the files as your own.
    DO NOT modify and resell the files in any form.
  • Welcome Summer Sign Gives Your Porch A Citrus Burst!

    Welcome Summer Sign Gives Your Porch A Citrus Burst!

    Part 2 – This is the reverse side to Hello Spring!

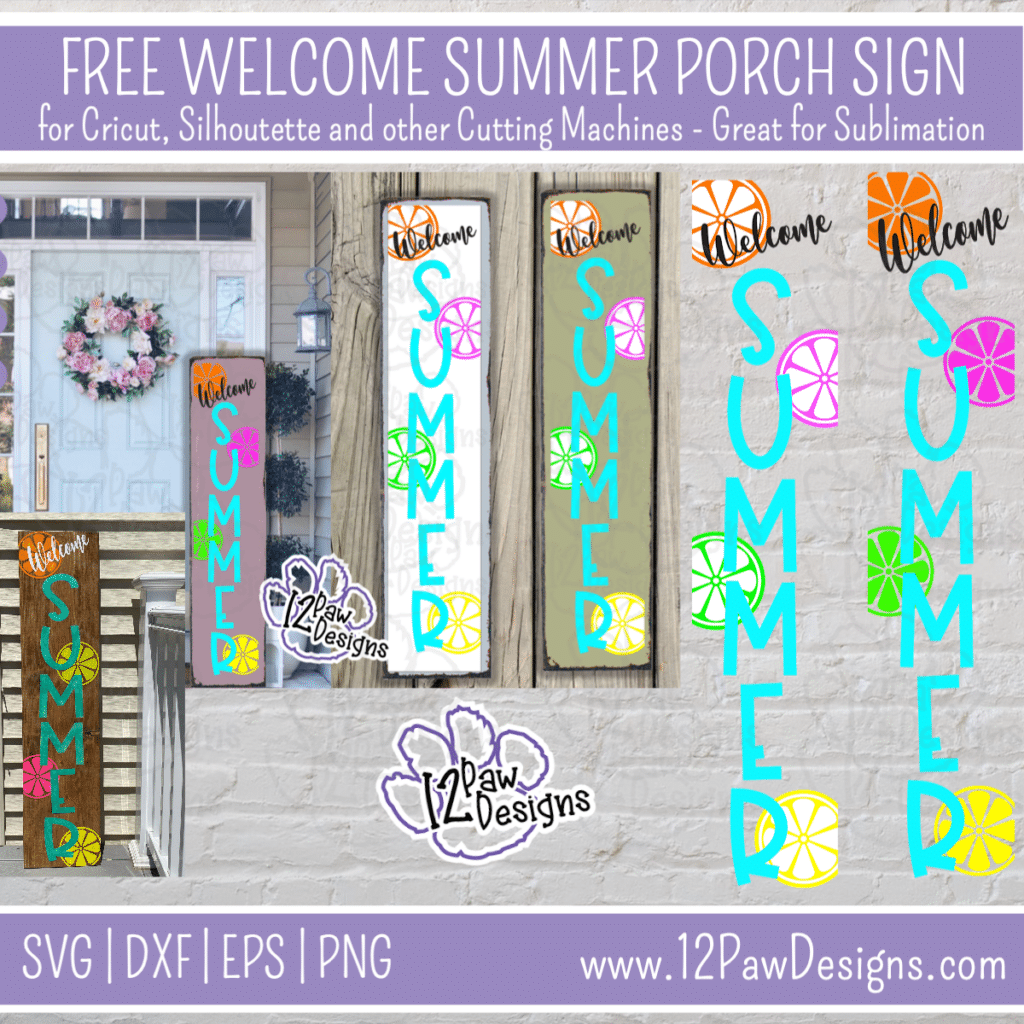
    Welcome Summer Sign, Summer Porch Sign, Porch Sign, Cricut Silhouette, Svg/Dxf/Png/Eps/Sublimation, Digital Download, Cut File

    Welcome Summer Sign Gives Your Porch A Citrus Burst! This is part 2 of the reversible porch sign we did earlier. If you missed it i have it linked above for you.

    Welcome Summer\Hello Spring is made with a stained common\pine board. Then I used masking vinyl and painted this side. You could also paint this side of your board white or any color of your choosing!! The file is setup for 12″ x 60″. However, size it to the size you need. I ended up with 12″x48″ Have fun with the colors!

    This weeks FREE Summer Porch Sign SVG/Cut files can be found in the Freebie Library. File number is 38. I have also created a video tutorial along with some quick directions below on how I made this FUN Welcome Summer Sign. I would love to see the color choices you used!

    Welcome Summer Sign Supply List

    • Cutting Machine and software
    • Welcome Summer (click on the link)
    • Masking Vinyl – I use Starmask from 143vinyl.com
    • Pine\Common Board – Mine was 12″x48″I used the reverse side from Hello spring
    • Stain color of Choice – only needed if you are going to stain or if you have not done Hello Spring
    • Sand paper or sanding block
    • Staining rag
    • Paint color of choice
    • Make-up sponges – get my from the Dollar Tree
    • Spray sealer – Seal after you are done painting
    • Weeding tools, scissors, cutting knife, transfer tape, etc

    Video TutorialLet’s make a Summer Porch Sign!

    Here are the steps I took to make the Welcome Summer Sign

    Step 1 – Prep your board. If you are doing the reverse you should be set to go. However, if you decided you wanted paint vs stain you would do that now.

    Step 2 – While everything is drying(if needed). Open the SVG file in your cutting software (note: if you have the free version of Silhouette studio you will need the DFX files). Size the sign according to the board you will be working with. Use your masking vinyl to cut out your design.

    Step 3 – Once your stencil is cut weed your vinyl. Remember you ware weeding the parts you will be painting.

    Step 4 – Arrange your pieces on your board. Remember that Summer will be down a little more more since Welcome goes at the top. You can make and apply as may citrus slices as you like!

    Step 5 – Now to stencil paint your board. Since I stained my board I need white under the everything. So I did to coats of white and then stenciled my citrus slices in my colors. I found I needed to coats of that as well. Pull your stencils mask and clean up your slices.

    Step 6 – Now apply Summer and welcome to the sign and repeat the paint process. Again, i needed white under summer. I used a color shifting paint for Summer. That took 4 coats before i felt I had good coverage. Once you have your last layer applied pull your stencil vinyl. Clean up any edges you might have.

    Step 6 – Once your sign is completely dry spay it was a clear sealer of choice.

    Step 7 – If you so desired you could add strips around the sign to give it an extra touch.

    How to get your FREE Files

    To get your FREE file please go to my Freebie Library, sign in (don’t worry if you are not a member yet, sign up and the password will be emailed to you!!! Also, remember I include it in the bottom of the weekly email too! 😉 ) and download Number 30 – Hello Spring Parch sign. The downloaded file will have multiple file options SVG, PNG, DXF (If you have the free version of Silhouette Studio you will need this file) and EPS. 

    I really hope you enjoy part 2 or our reverse spring/summer porch sign. Remember a ? Pinterest pin would be so appreciated! I can’t wait to see what you create. Please share with me. You can come back here and add a comment or add one to Facebook too!

    Welcome Summer Sign, Summer Porch Sign, Porch Sign, Cricut Silhouette, Svg/Dxf/Png/Eps/Sublimation, Digital Download, Cut File
    12PD Welcome Summer Citrus

    Also, please check out my shop. I am always adding new designs. You might also find ready made tumblers or some other goodies in there in the future!!!
    https://12pawdesigns.com/shop/

    If you have any questions or run into an issue please let me know!!!

    Lorri?
    Lorri@12PawDesigns.com

    Let’s Conntect!

    Want to connect more with 12 Paw Designs???:
    • Website: https://12pawdesigns.com
    • FB Page: https://www.facebook.com/12pawdesigns/
    • Instagram: https://www.instagram.com/12pawdesigns/
    • Pinterest: https://www.pinterest.com/12PawDesigns

    DO NOT resell any of the files as digital download or any other form.
    DO NOT claim the files as your own.
    DO NOT modify and resell the files in any form.