Tag: free file

  • Happy Christmas in July with a Christmas Tiered Tray

    Happy Christmas in July with a Christmas Tiered Tray

    Christmas Tiered Tray, Tiered Tray, Christmas Svg, Cricut Silhouette Glowforge, Svg/Dxf/Png/Eps, Digital Download, Cut File

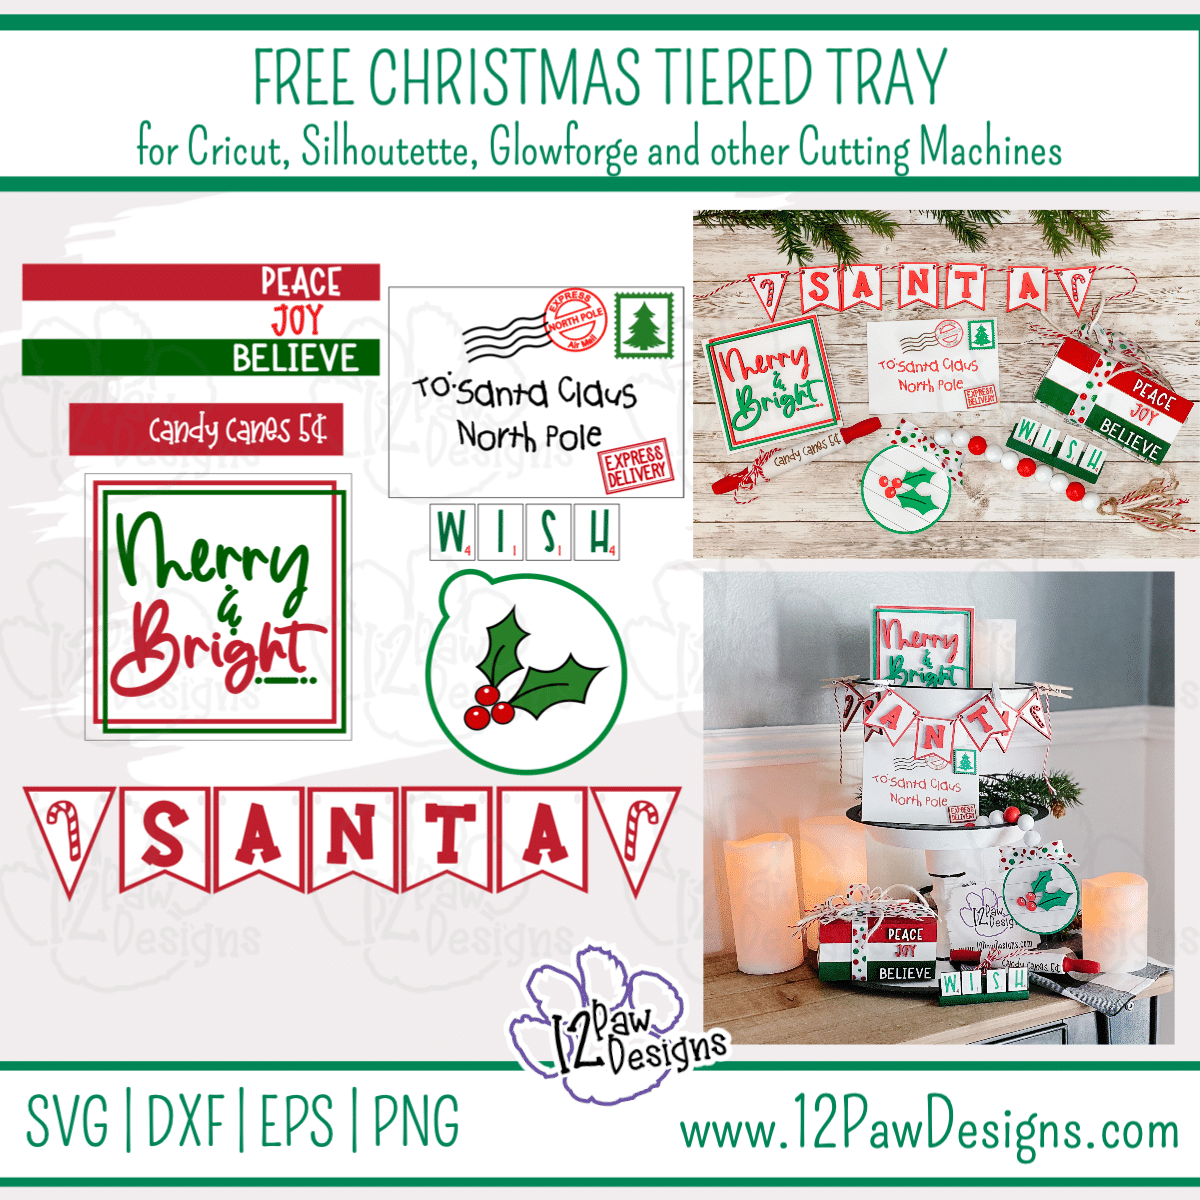
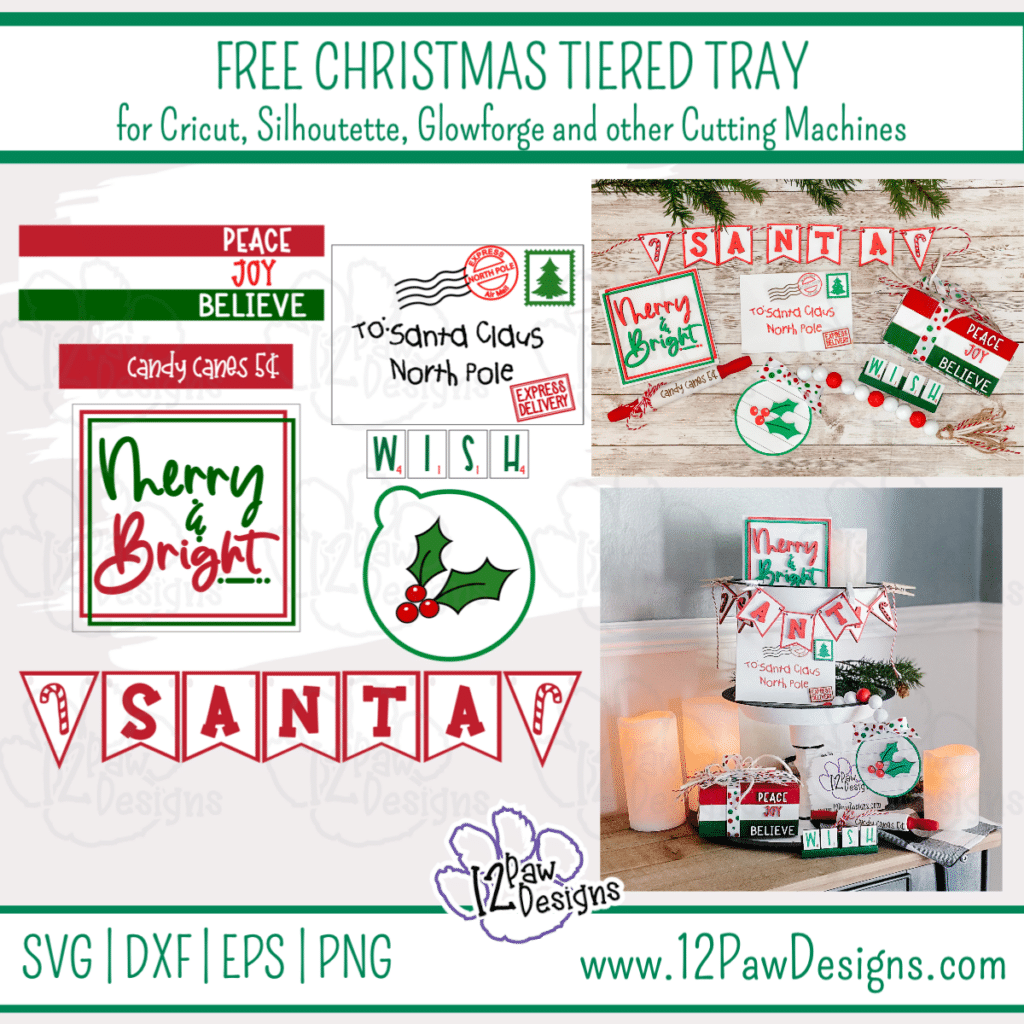
    Happy Christmas in July with this cute Christmas Tiered Tray! Let’s finish our Christmas in July with some really cute items for our tiered trays. This week our Christmas Svg include items to make stacked books (I did “faux book”), rolling pin, Santa Banner, Letter to Santa, WISH Scrabble tiles, and a holly berry tag to add to your bead garland.

    This weeks FREE Christmas Tiered Tray can be found in the Freebie Library. File number is 43. I have also created a video tutorial along with some directions on how I made my items and some pointers! Remember to please share what you created! Check me out on Facebook and Instagram and remember a pintrest pin is always appreciated!!

    Christmas Tiered Tray Supply List

    • Cutting Machine or Glowforge and software
    • Christmas Tiered Tray (click on the link)
    • Wood or blanks. For blanks Dollar tree has some great options. Repurpose a 6×6 sign, wood blanks, etc. For the Banner you could use chipboard, cardstock, etc
    • 4 Tumble Tower block from the Dollar Tree (Scrabble Tile tray)
    • 4 Scrabble Tiles – You can use the Dollar Tree 3 in 1 game or purchase tiles from Walmart
    • Mini Rolling Pin – I purchased from Amazon
    • Wood for the Glowforge that is prepped (masked) if you are using a Glowforge
    • Adhesive Vinyl in your color choice if you are doing vinyl
    • Gorilla Super Glue Gel
    • Hot Glue Gun and Glue
    • Paint and brush – I used White, Red and Green
    • Paint Pens – I used Posca and/or Arteza
    • Ribbon
    • Beads – I found mine painted at Hobby Lobby during a sale. You can also buy some from Amaozon
    • Twine\Jute
    • Weeding tools, scissors, cutting knife, transfer tape etc

    Video Tutorial – Christmas Tiered Tray – Christmas SVG

    Here are the steps I took to make the Christmas Ornaments

    Step 1 – Load the free cutting file into your favorite cutting software. For Cricut and Silhouette I set mine to 12×12. I used the Glowforge, however, most cutters can cut thin birch or chipboard (check your cutting machine). In the video I show some options for blank ideas as well!!!

    Step 2 – Cut your wood or vinyl. On the Glowforge you need to mask your wood with paper transfer tape to protect from scorching. Also, you can paint your board ahead of time to save on painting later!!!

    Step 3 – Once you have your wood or vinyl cut do your weeding. For the Glowforge that means removing the mask from the wood. I found the Gorilla duct tape works amazing!!! You can also use weeding tools, pin pen, etc

    Step 4 – Paint your items. I use the Posca paint pens for the small items. They are quick and easy!! Tweezer helps hold it as well while you paint. For the larger items I used acrylic paint. For the scrabble tray glue 2 tiles together end to end. Do this for the other 2 tiles also. Then glue them together to form your tray. Then I painted mine green. For the stacked books, i made a box with a fake front to look like books. However, you can use a mini crate for the dollar tree or their mini bibles and wrap with cardstock or vinyl!

    Step 5 – Time to glue our items together. I use Gel super glue. However, they make 3m tape that you can place on the back of the board to make it super easy to put on your wood. I followed the PNG file that is included in your file download for placement, etc. I also show all of this in the video.

    Step 6 – Finishing touches….

    Tag\beads – I used twine to thread my beads onto my tag. Then made a tassel to hang from the other end. Again, please check out the video for the demo. Then I glued a bow onto the front.

    Scrabble tray – Glue your tiles onto your scrable tray

    Letter to Santa – Attach your letters, stamp and sign. If the letters are to small for you to weed make a sticker!!! Or print on cardstock and glue on!!

    Banner – I used red and white twine from hobby lobby and strung my little banners onto that.

    Rolling pin – I wrapped that with a piece of twine to add that extra touch.

    Step 9 – How cute did your pieces turn out!?!?! Please share on on my social media so I can see!!!

    How to get your FREE Christmas Tiered Tray File

    To get your FREE file please go to my Freebie Library, sign in (don’t worry if you are not a member yet, sign up and the password will be emailed to you!!! Also, remember I include it in the bottom of the weekly email too! 😉 ) and download Number 43 – Christmas Tiered Tray The downloaded file will have multiple file options SVG, PNG, DXF (If you have the free version of Silhouette Studio you will need this file) and EPS. 

    I hope you enjoy the FREE files. Thank you again for stopping by and being part of my dream and 12 Paw Designs! Have an absolutely amazing day!!!

    Remember to PIN IT!!! ?
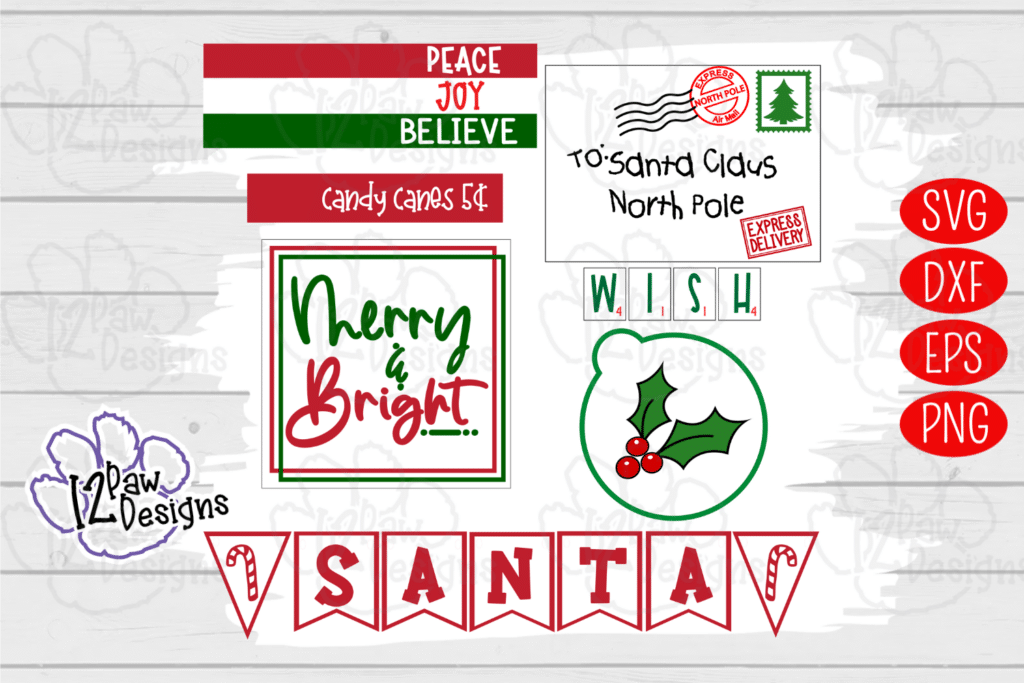
    Christmas Tiered Tray, Tiered Tray, Christmas Svg, Cricut Silhouette Glowforge, Svg/Dxf/Png/Eps, Digital Download, Cut File
    12PD North Pole Tiered Tray

    Also, please check out my shop. I am always adding new designs.
    https://12pawdesigns.com/shop/

    If you have any questions or run into an issue please let me know!!!

    Lorri?
    Lorri@12PawDesigns.com

    Let’s Conntect!

    Want to connect more with 12 Paw Designs???:
    • Website: https://12pawdesigns.com
    • FB Page: https://www.facebook.com/12pawdesigns/
    • Instagram: https://www.instagram.com/12pawdesigns/
    • Pinterest: https://www.pinterest.com/12PawDesigns

    DO NOT resell any of the files as digital download or any other form.
    DO NOT claim the files as your own.
    DO NOT modify and resell the files in any form.

  • Time to Deck the Halls Christmas Ornaments

    Time to Deck the Halls Christmas Ornaments

    Christmas Ornaments, Wood Slice Ornaments, Christmas Decorations, Cricut Silhouette Glowforge, Svg/Dxf/Png/Eps/Sublimation, Digital Download, Cut File

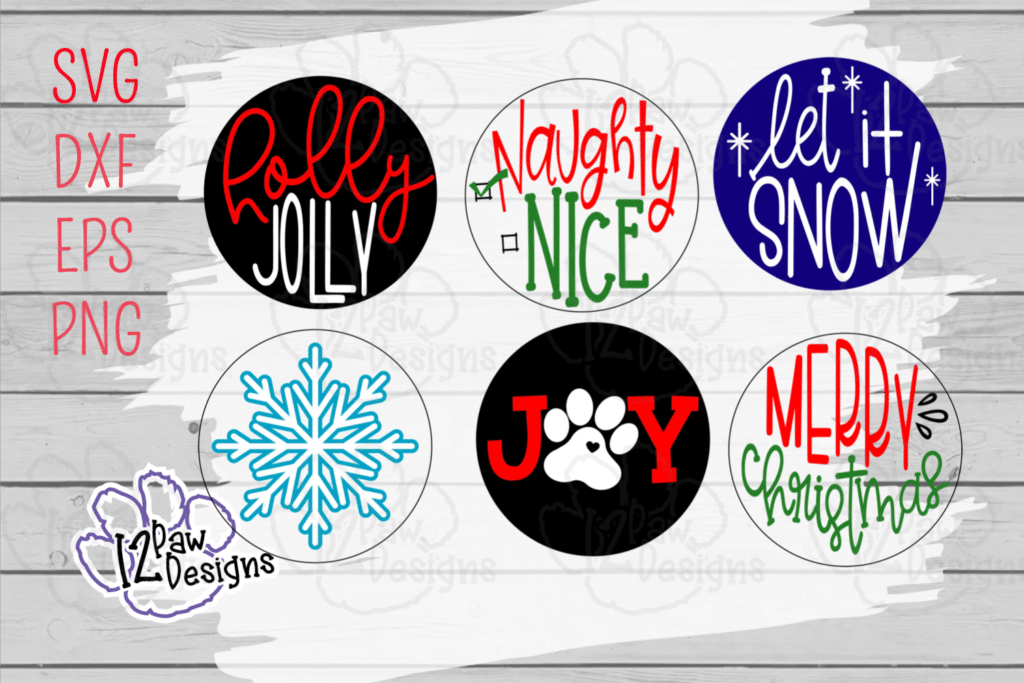
    Merry Christmas in July!!! So that means it’s time to Deck the Halls with some new Christmas Ornaments!!! I took some Wood Slice Ornaments and add some fun sayings and accents. They are sure to spruce up your Christmas Decorations!

    I did my project with my Glowforge (if you would like more information on this please let me know). However, you can totally use vinyl. Also, with the proper blades you can also cut chipboard or wood on some of the cutters (please check your machine options for this).

    This weeks FREE Christmas Ornaments can be found in the Freebie Library. File number is 42. I have also created a video tutorial along with some directions on how I made my ornaments and some pointers! Remember to please share what you created! Check me out on Facebook and Instagram and remember a pintrest pin is always appreciated!!

    Christmas Ornaments Supply List

    • Cutting Machine or Glowforge and software
    • Christmas Ornaments\Wood Slice Ornaments (click on the link)
    • Wood Slices
    • Wood for the Glowforge that is prepped (masked) if you are using a Glowforge
    • Adhesive Vinyl in your color choice if you are doing vinyl
    • Gorilla Super Glue Gel
    • Hot Glue Gun and Glue
    • Paint and brush – I used White and Black
    • Paint Pens – I used Posca and/or Arteza
    • Ribbon
    • Beads – I bought mine off of amazon
    • Twine\Jute
    • Weeding tools, scissors, cutting knife, transfer tape etc

    Video Tutorial – Christmas Decorations – Wood Slice Ornaments

    Here are the steps I took to make the Christmas Ornaments

    Step 1 – Load the free cutting file into your favorite cutting software and size appropriately. I used the Glowforge, however, most cutters can cut thin birch or chipboard (check your cutting machine). In the video I show how i load it into the Glowforge app and send it to the Glowforge. I actually show a video of it cutting.

    Step 2 – Cut your wood or vinyl. On the glow forge you need to mask your wood with paper transfer tape to protect from scorching. Also, you can paint your board ahead of time to save on painting later!!!

    Step 3 – Once you have your wood or vinyl cut do your weeding. For the Glowforge that means removing the mask from the wood. I found the Gorilla duct tape works amazing!!! You can also use weeding tools, pin pen, etc

    Step 4 – Paint your letters. I use the paint pens. They are quick and easy!! I can move pretty fast if I leave them in the board. However, tweezer helps hold it as well while you paint.

    Step 5 – Once I painted my letters I then decided what l colors I wanted on my wood disks. I then painted those and set aside to dry. You can do this earlier if you know what color are going to be or if you follow my images!

    Step 6 – Glue your letters to the wood. I use Gel super glue. However, they make 3m tape that you can place on the back of the board to make it super easy to put on your wood.

    Step 7 – Once everything is attached now we can finish off our ornaments. I used some ribbon that I folded to form the bow and then wrapped twine around them. Pull tight and knot on the back side. Then add a drop of glue to the back of the knot.

    Step 8 – Add some beads. I using twine put it through the hole of the disk. I found that using a piece of floral wire works wonders. I you can get a spool from the Dollar Tree. I use the wire like a needle threader. I bend a piece in half. Put my twine in it and then you it to put through the hole of the wood and the beads. When i put the last bead on I put a little drop of hot glue on the twine where the bead will be and then slide the bead over it and held for a second. Tie a knot at the top.

    Step 9 – Glue your bow on. You are all done!!!

    How to get your FREE Christmas Ornaments File

    To get your FREE file please go to my Freebie Library, sign in (don’t worry if you are not a member yet, sign up and the password will be emailed to you!!! Also, remember I include it in the bottom of the weekly email too! 😉 ) and download Number 42 – Christmas Ornaments\Wood Slices The downloaded file will have multiple file options SVG, PNG, DXF (If you have the free version of Silhouette Studio you will need this file) and EPS. 

    I hope you enjoy the FREE files. Thank you again for stopping by and being part of my dream and 12 Paw Designs! Have an absolutely amazing day!!!

    Remember to PIN IT!!! ?

    Christmas Ornaments, Wood Slice Ornaments, Christmas Decorations, Cricut Silhouette Glowforge, Svg/Dxf/Png/Eps/Sublimation, Digital Download, Cut File
    12PD Christmas Ornaments Rounds

    Also, please check out my shop. I am always adding new designs.
    https://12pawdesigns.com/shop/

    If you have any questions or run into an issue please let me know!!!

    Lorri?
    Lorri@12PawDesigns.com

    Let’s Conntect!

    Want to connect more with 12 Paw Designs???:
    • Website: https://12pawdesigns.com
    • FB Page: https://www.facebook.com/12pawdesigns/
    • Instagram: https://www.instagram.com/12pawdesigns/
    • Pinterest: https://www.pinterest.com/12PawDesigns

    DO NOT resell any of the files as digital download or any other form.
    DO NOT claim the files as your own.
    DO NOT modify and resell the files in any form.

  • FREE Heart Subway Tile Cutting File

    FREE Heart Subway Tile Cutting File

    Heart Subway Tile
    Heart Subway Tile

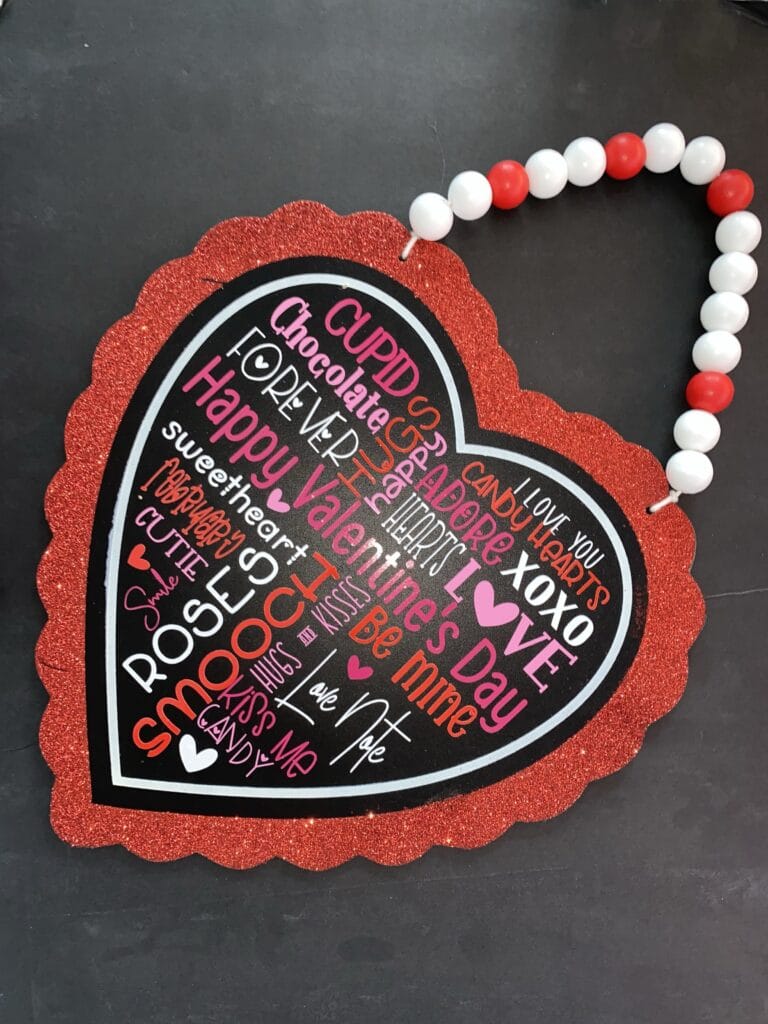
    Happy Sunday Everyone!! We are snowy here in Wisconsin so it’s a perfect day to do some crafting! Today I am sharing with you my FREE Heart Subway Tile Cutting File.  I designed it to be use a Dollar Tree Heart. This helps keep the costs down and a perfect use for that chalk board center! To get your file head over to the Freebie Library, sign in (don’t worry if you are not a member yet, sign up and the password will be emailed to you!!!) and download Number 8! In the zip file you download will be 4 files.  They are SVG, PNG, DXF (If you have the free version of Silhouette Studio you will need this file) and EPS.  Also, before you go and download your file I would appreciate the Pinterest save on this blog post! That helps me so that I can keep sharing free files!! You can also follow me on Instagram, Facebook and Pinterest! Again, I am small business and this support is HUGE!!!  Thank you!

    I have also uploaded to my shop some really cute Valentine’s files. There is some cute gnomes, leopard and other animal prints, etc.  Also, keep on the watch for a pink gnome valentine truck design that would be great as a print and cut or sublimation!!!

    Now, back to the Heart Subway Tile….
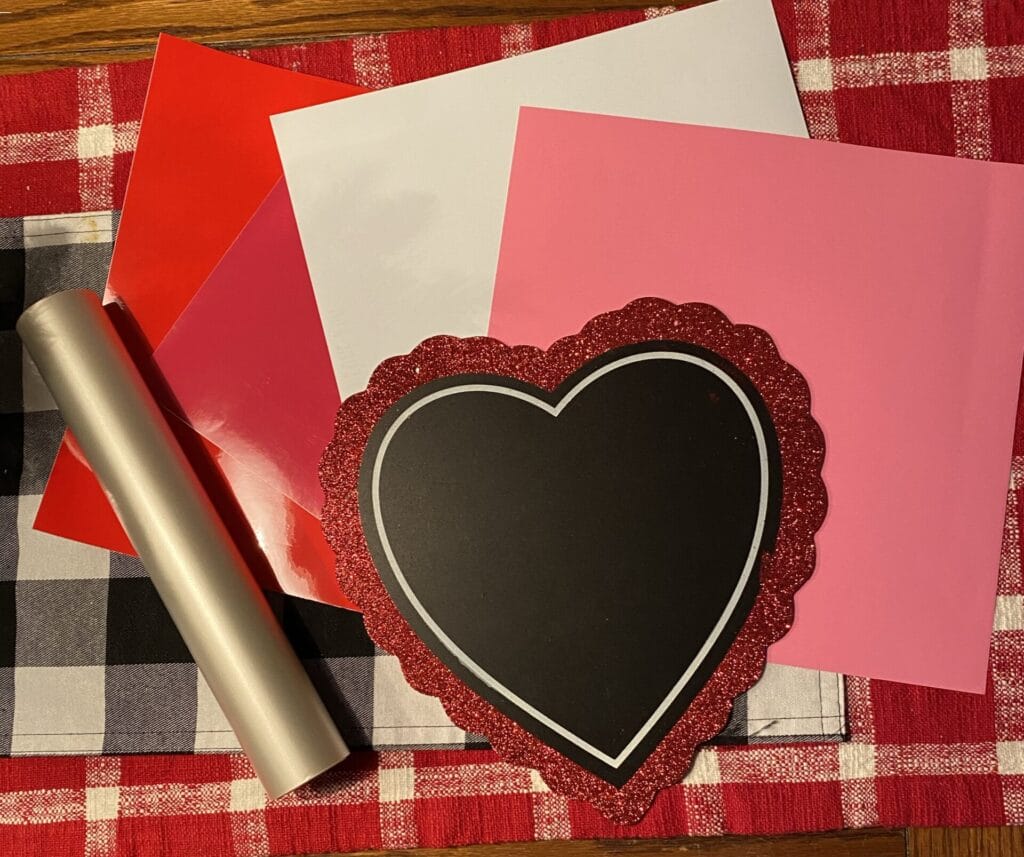
    Here is the list of supplies that used to make it:
    – Dollar Tree Chalkboard Heart
    – 4 Different colors of vinyl.  I used Red, White, Dark Pink and a light pink. 
    – Transfer Tape
    – Scrapping tool
    – Cutting Machine and software
    – Heart Subway Tile File from the Freebie library

    Heart Subway Tile - Supplies
    Heart Subway Tile – Supplies

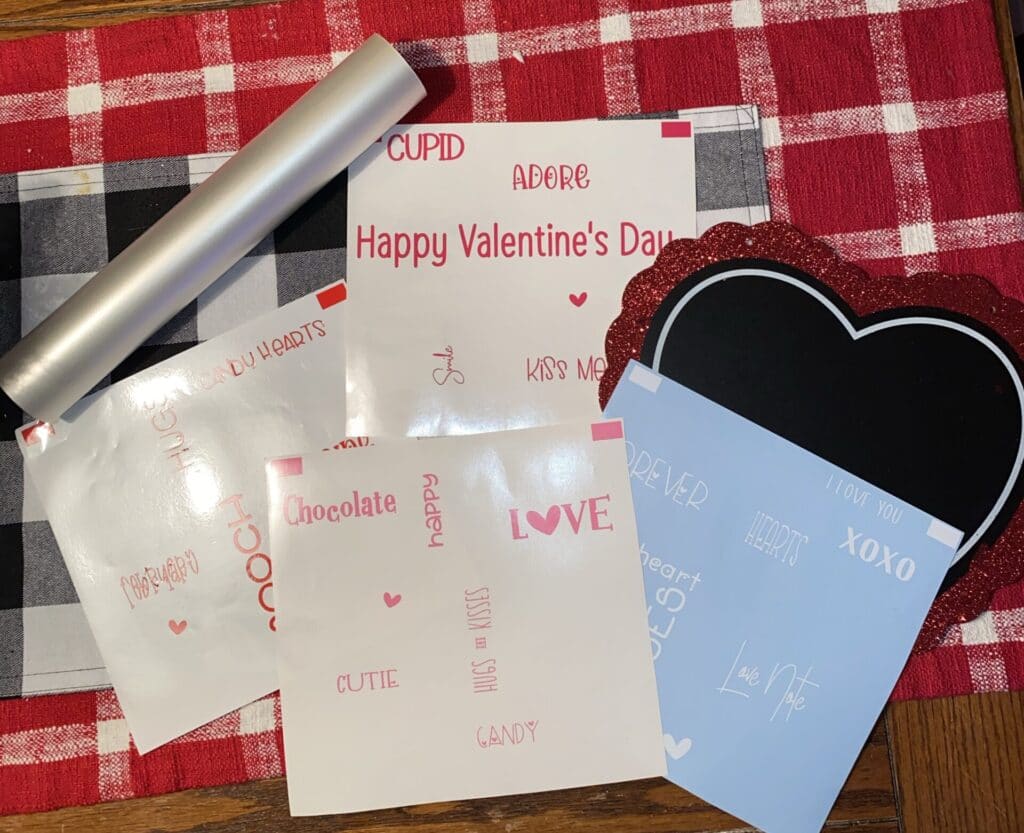
    Load the file into your cutting software.  I have designed and grouped the file for you into the four different colors.  When I uploaded the SVG to my cutting software I did add registration marks on the top to help me line things up. I also added a cut box around the image.  This helps save on vinyl so you know where the perimeter area is.  I then cut all four pieces of my vinyl. One thing I also like to do before pulling my mat out of the cutting machine is confirm that everything is cut.  I normally will weed out the center of a few letters to confirm this.  This way if something didn’t cut all the way I can send it back through without wasting any vinyl!

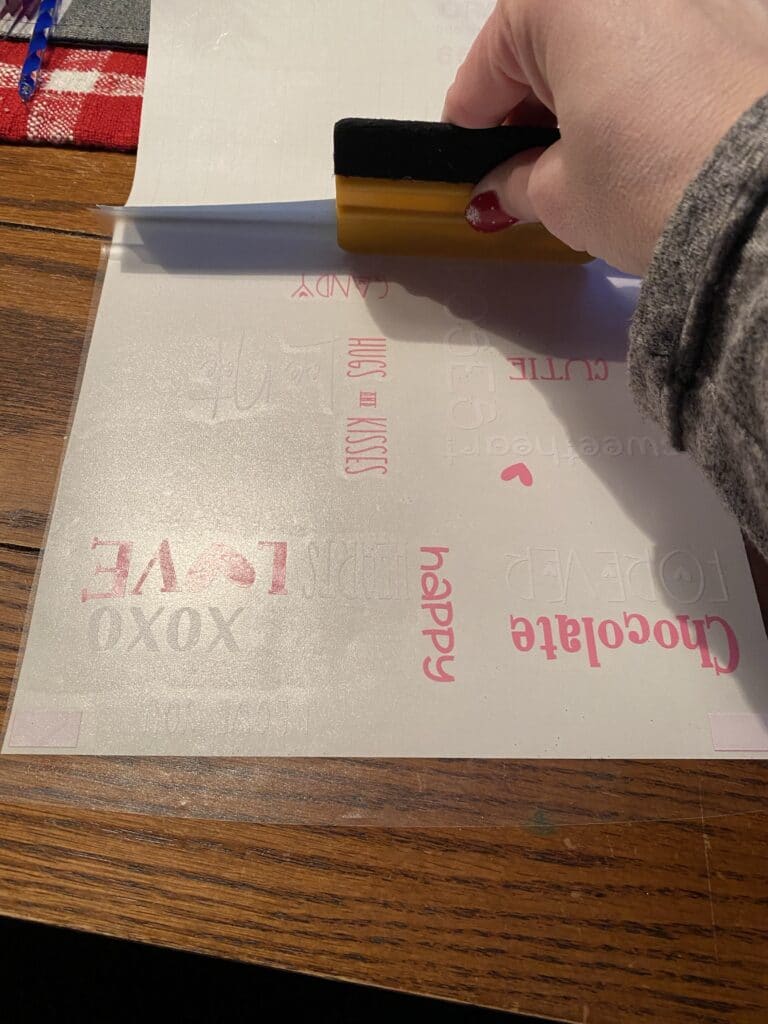
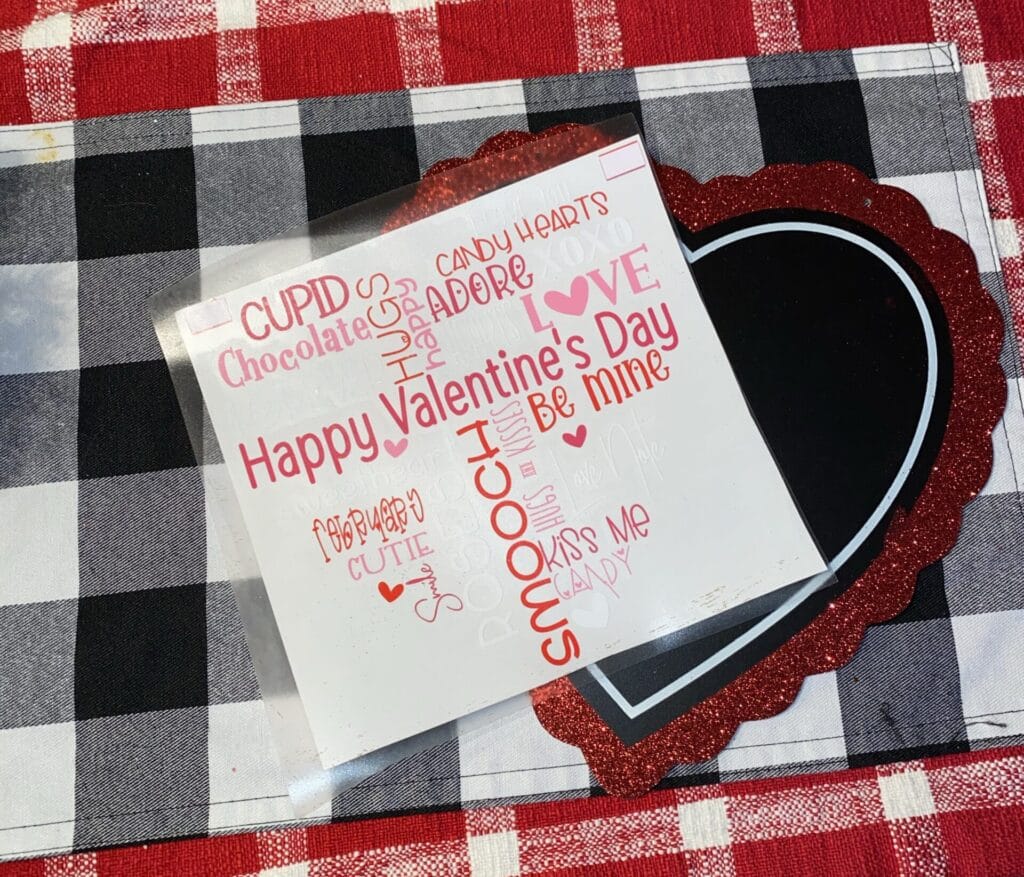
    I then weed all 4 pieces of vinyl. Next up, I take my transfer tape and lay it over the biggest area.  I do this so I have the back I can put back on the weeded design.  I use my scrapping tool and rub the transfer tape onto the vinyl.  I pull the back off from the vinyl.  Expose the registration marks and then put the backing back on the rest of the design.  I then take the next piece of weeded vinyl, line up the registration marks.  Once that is done I then start pulling the backing away and rubbing the transfer tape over the new piece.  I continue this process for all 4 pieces.  Once that is done I pull the registration marks from the transfer tape and apply the design to the heart. Using my scrapper I rub everything well.  I then I pull the transfer tape.  I keep the transfer tape close to the design as I peel it off so it comes off easily.

    Now you can add your own finishing touches!!!  I added a messy bow of ribbon and jute (all from the dollar tree) and then add some beads that I had on hand.  I actually had all items on hand in my stash.  This was a great project to use what I had!!!! 

    I would love to see your creations. Please come back and share in the comments.  I truly love seeing what people have made with my designs.  It is like watching kids grow up.  So please share with me.  AGAIN, I would also love a pin share! Yes, I do happy dances for this.  Small business owners do love these connections. I would share the happy dance I make…but nobody needs to see that.  HEHEHE!  Just know it happens.

    Thank you again for stopping by and being part of my dream and 12 Paw Designs! Have an absolutely amazing day!!!

    https://12pawdesigns.com/shop/

    If you have any questions or run into an issue please let me know!!!

    Lorri

    Lorri@12PawDesigns.com

    Want to connect more with 12 Paw Designs???:
    • Website: https://12pawdesigns.com
    • FB Page: https://www.facebook.com/12pawdesigns/
    • Instagram: https://www.instagram.com/12pawdesigns/
    • Pinterest: https://www.pinterest.com/12PawDesigns

    DO NOT resell any of the files as digital download or any other form.
    DO NOT claim the files as your own.
    DO NOT modify and resell the files in any form.
  • Sunday Funday Heart Lines Free File

    Sunday Funday Heart Lines Free File

    FREEBIE FILE

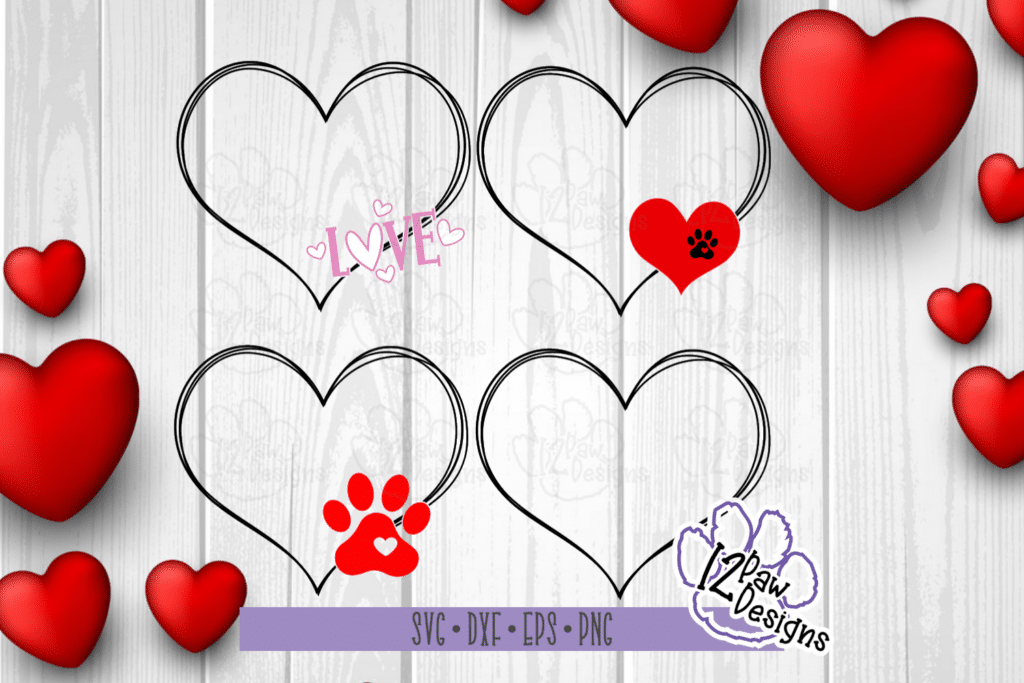
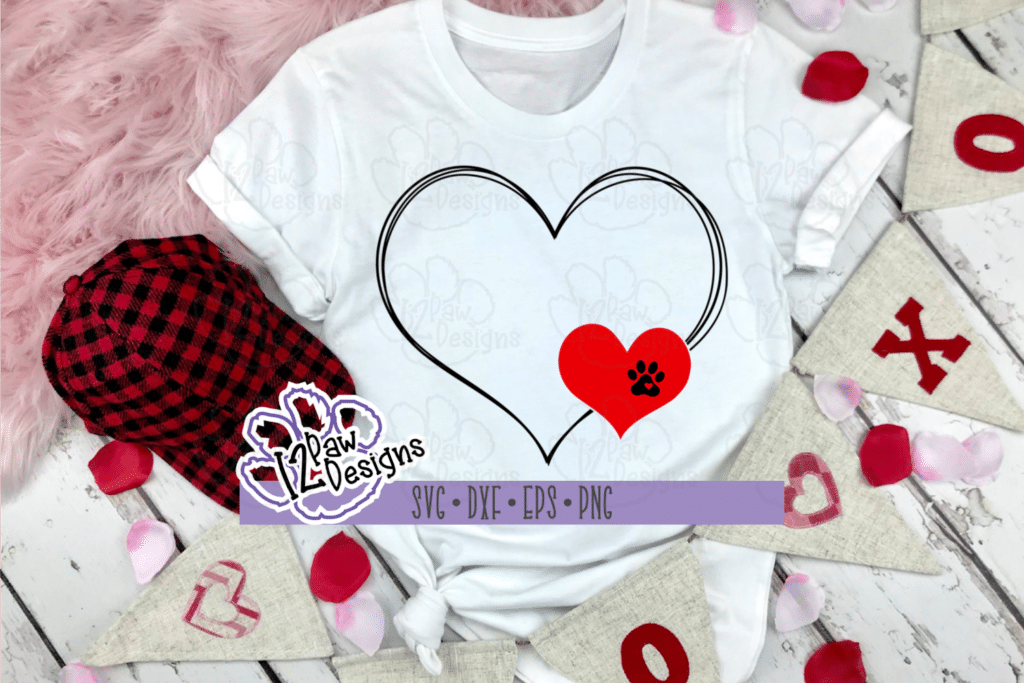
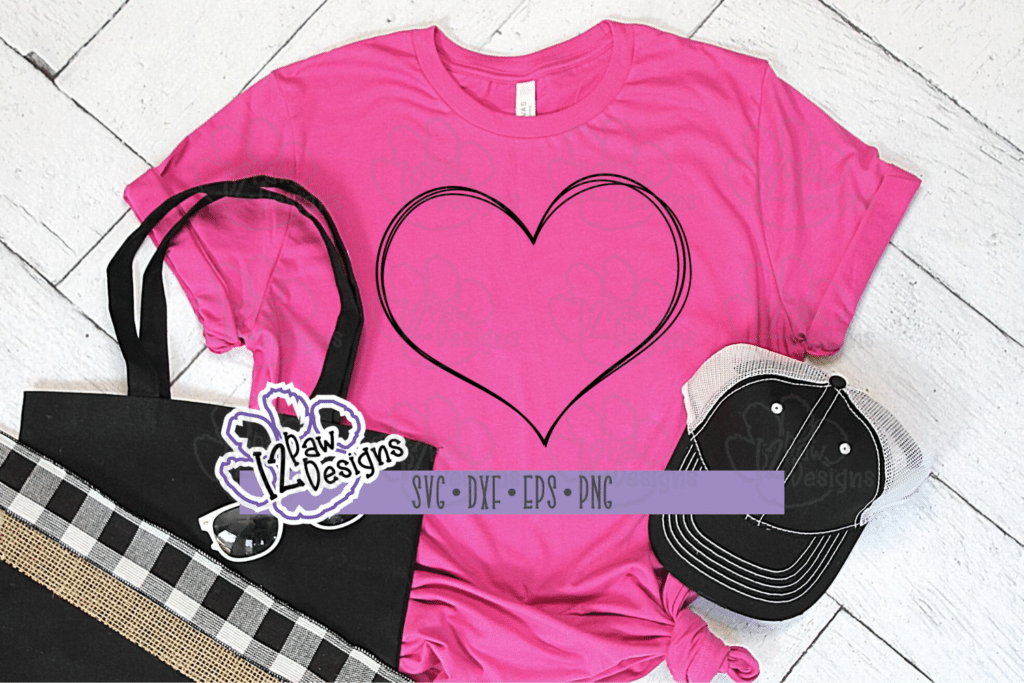
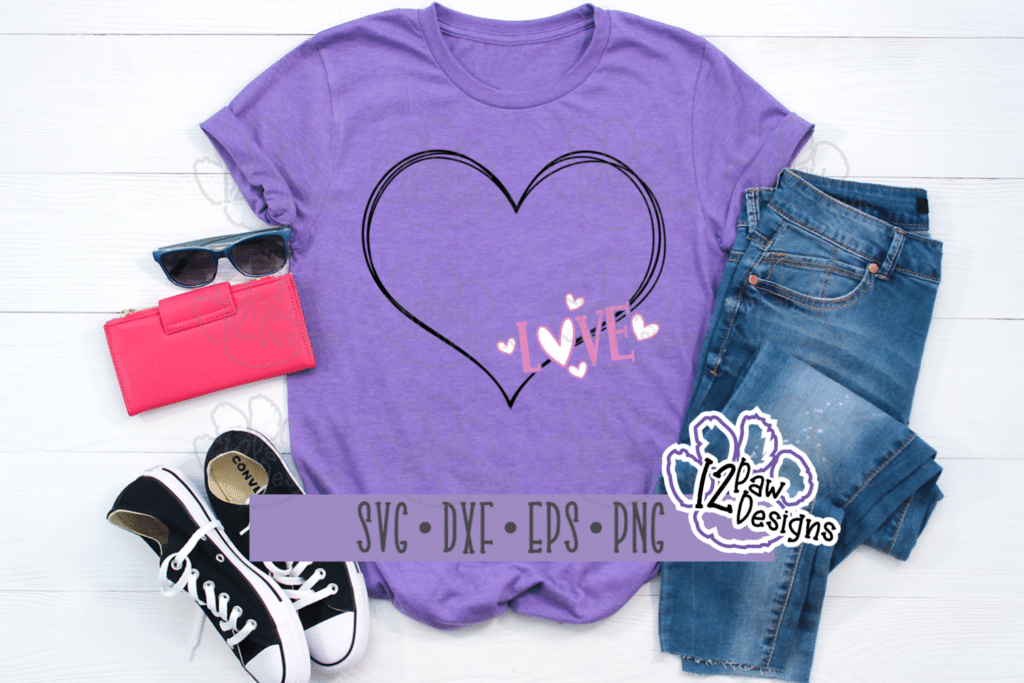
    Happy Sunday Funday! So let’s have some fun with these Heart Lines Freebie File cutting file to start our week off! I have designed 4 cut files for you in this bundle. The design is Heart Lines that I then added either the word Love with hearts, a Heart with a paw print (you can leave the paw off too!), a paw print or plain. Let your creativity go!!! You will also see the project I made with the Love cut file and the steps I took to create it. To get your file head over to the Freebie Library, sign in (don’t worry if you are not a member yet, sign up and the password will be emailed to you!!!) and download Number 7! Also, I would appreciate the Pinterest save! That helps me so that I can keep sharing free files!! You can also follow me on Instagram, Facebook and Pinterest!

    12PD Heart Lines Bundle
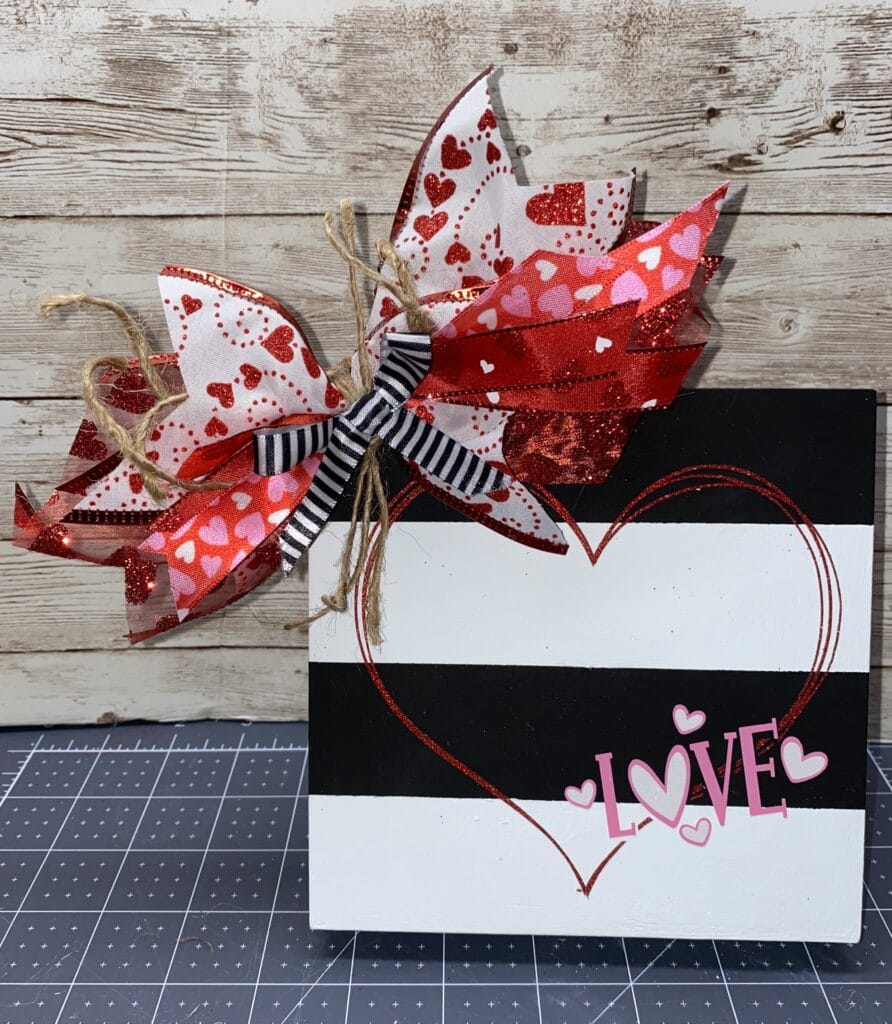
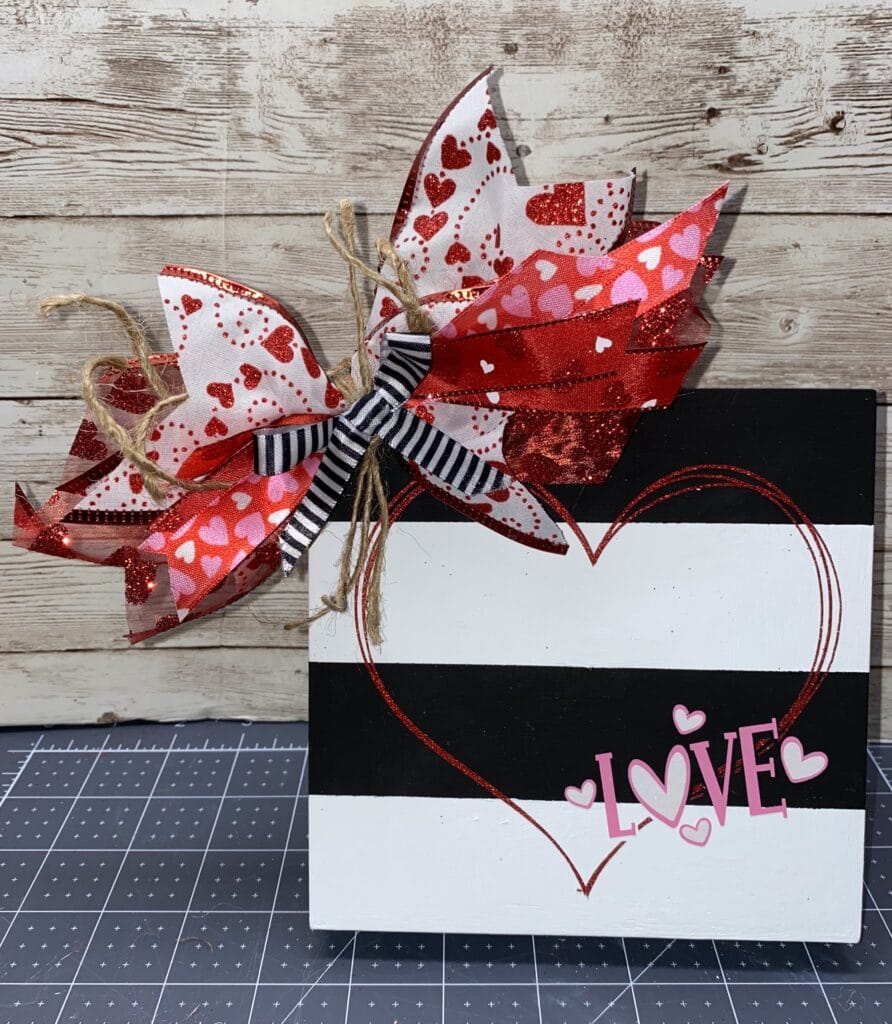
    Here is the cute sign I made with the Love

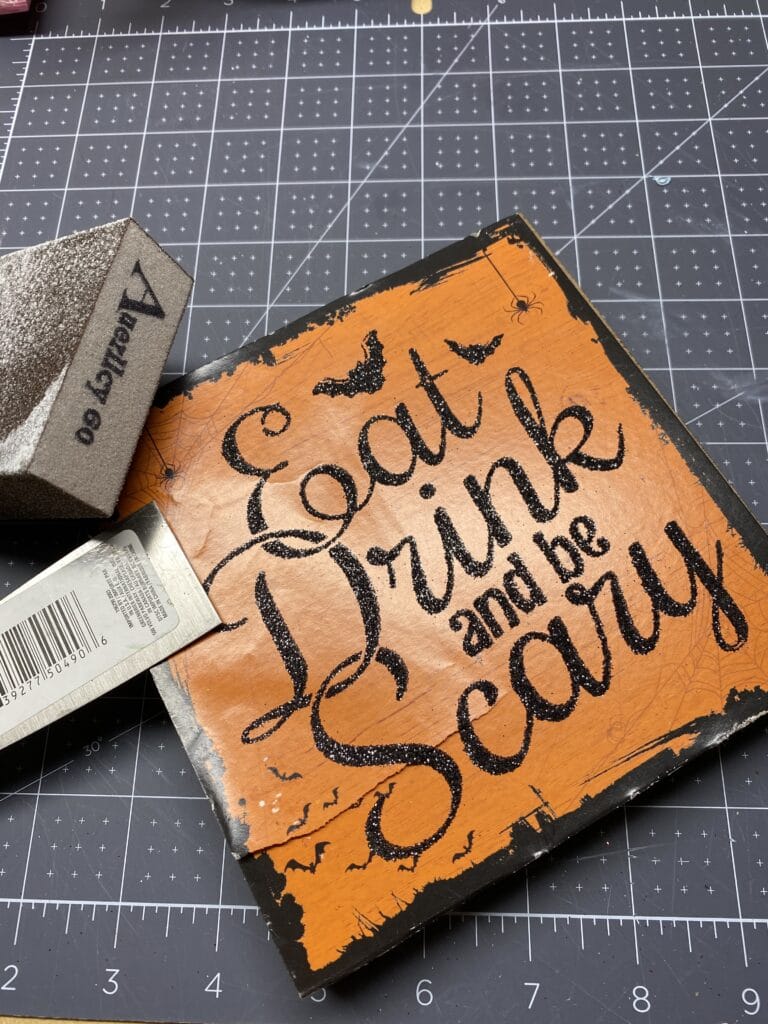
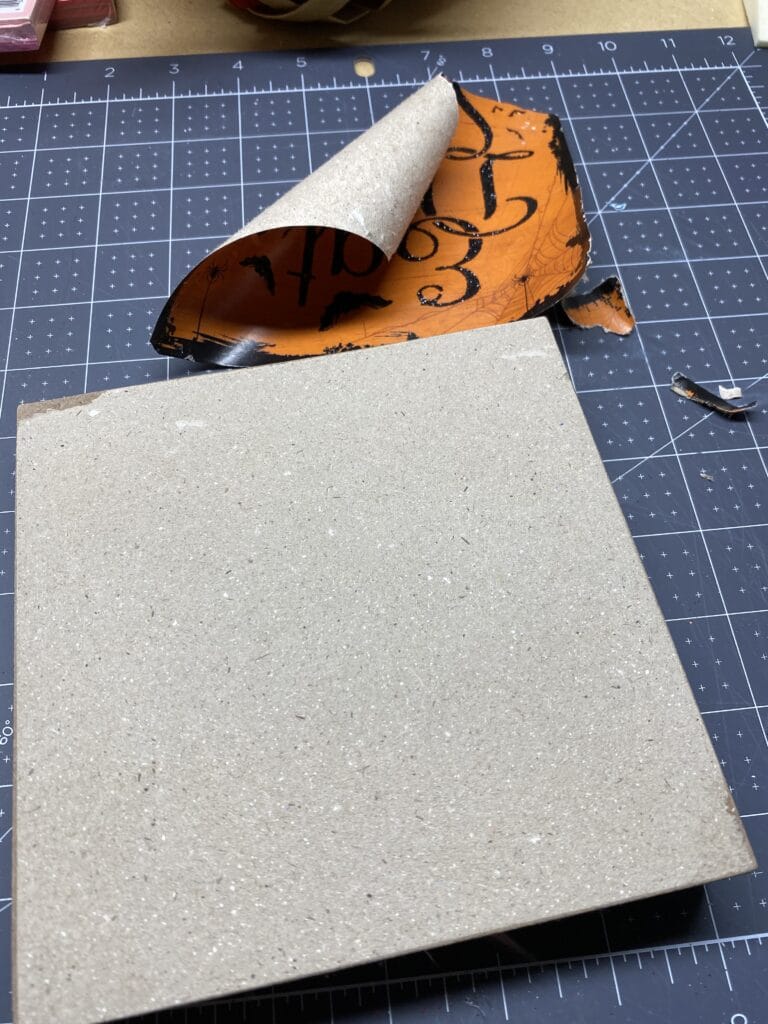
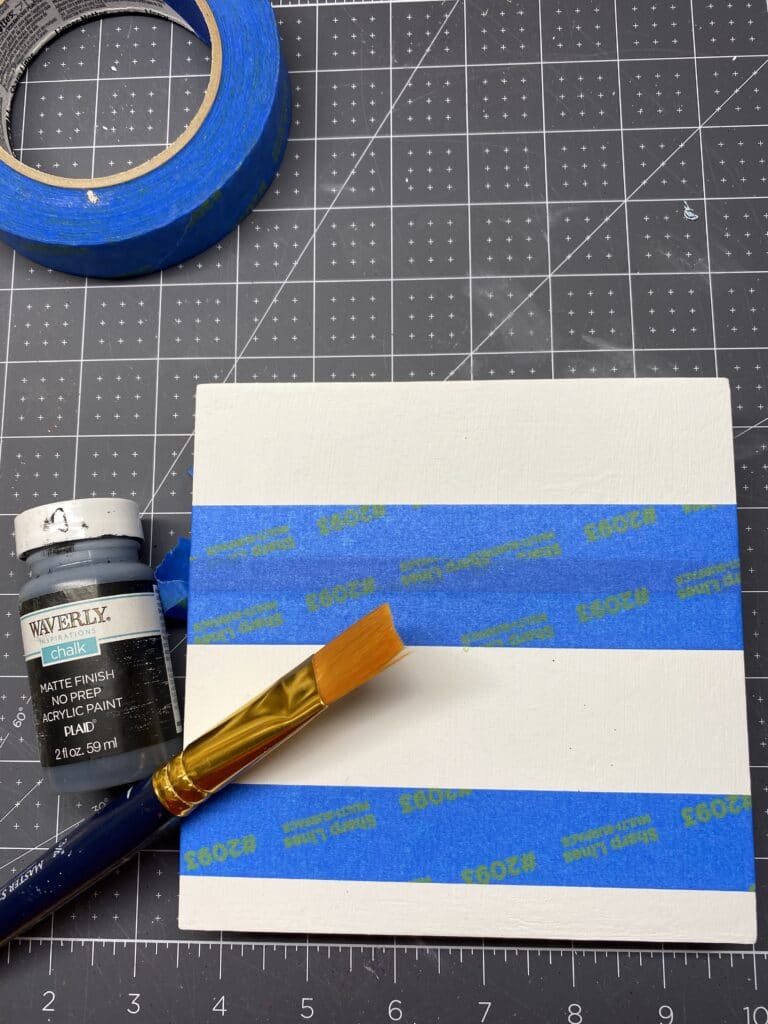
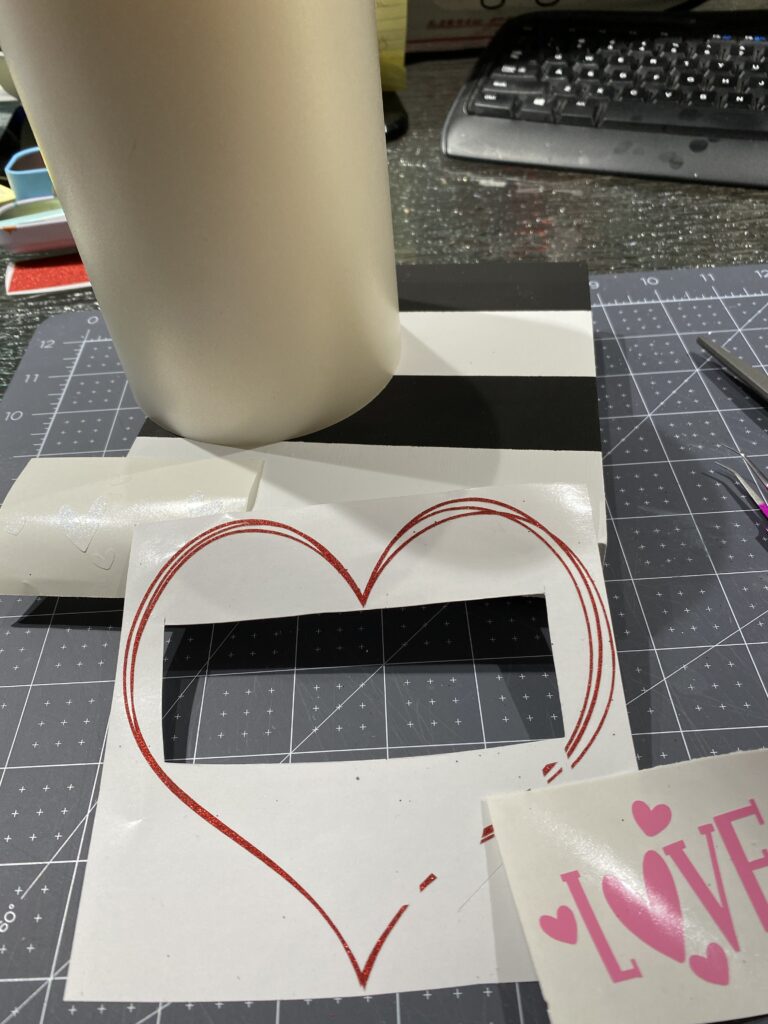
    To start with I use a Dollar Tree sign I bought at halloween time. It is 6″x6″ in size. I pealed the paper word part off and then gave it a good sanding to get everything off. Next I used chalk paint and applied 2 coats on it. You can use acrylic paint as well or whatever you have at home. I did do a light sanding between coats. Next I took some painters tape and placed it on the board about 1 ½” apart and painted those stripes black. It also would have been cute in grey! Again, let the creativity go!!! While the black was still wet I peeled the tape off to make sure to help eliminate bleed. Below i have my initial steps.

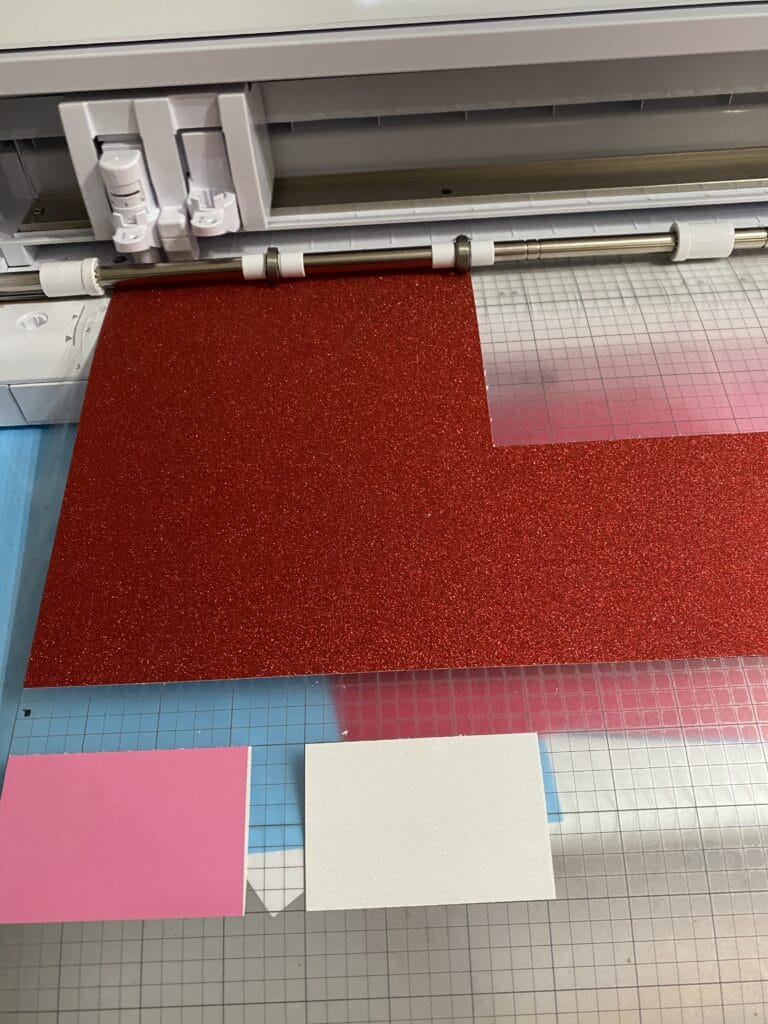
    Next I uploaded my file into my favorite cutting software. I ungrouped the heart i was going to use and then picked my colors. I used red glitter for the heart, pink for LOVE and the heart base and then white glitter vinyl for the hearts on top. I like to save time and cut my 2 glitter vinyls together and then cut my glossy vinyl. Cut out your vinyl and then weed out the pieces you don’t want. If you noticed on the red glitter, I cut out the extra before weeding so i could save some for a future project. Once I had everything weeded I then needed to grab a stickier transfer paper for the glitter vinyl. I then applied my vinyl to the sign. You want to make sure your sign is nice and dry. I will let mine sit over night. However, I am normally impatient and I will use a heat gun, hair dryer or put it in front of the heater or fireplace (I live in Wisconsin). I applied the heart first, then Love and then the white glitter hearts on top.

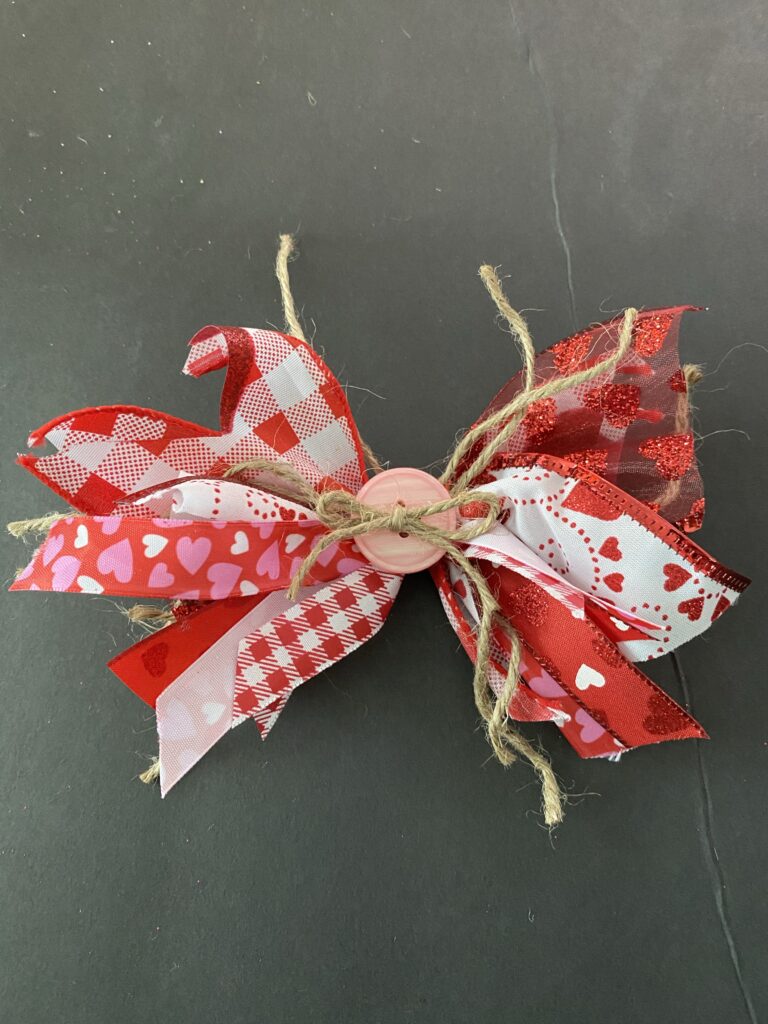
    Then to finish it off I added a messy bow. A mess bow is layered cut ribbon on top of each other and tie in the center. I then glued it onto the sign.

    Please share what you make with these files! I love to see the creativity!!!

    Here are some other ideas for you!

    Happy Sunday!

    Also, check out the shop for other fun design files. I upload some great new Valentine designs. Have a suggestion for a design??? Let me know!

    https://12pawdesigns.com/shop/

    If you have any questions or run into an issue please let me know!!!

    Lorri

    Want to connect more with 12 Paw Designs???:
    • Website: https://12pawdesigns.com
    • FB Page: https://www.facebook.com/12pawdesigns/
    • Instagram: https://www.instagram.com/12pawdesigns/
    • Pinterest: https://www.pinterest.com/12PawDesigns

    DO NOT resell any of the files as digital download or any other form.
    DO NOT claim the files as your own.
    DO NOT modify and resell the files in any form.

  • FREE “You’re on Mute” File

    FREE “You’re on Mute” File

    New FREEBIE file

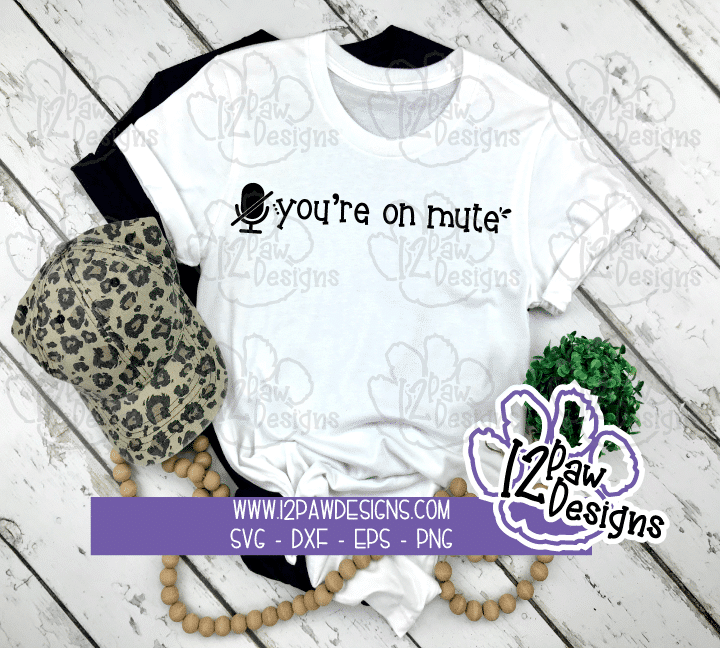
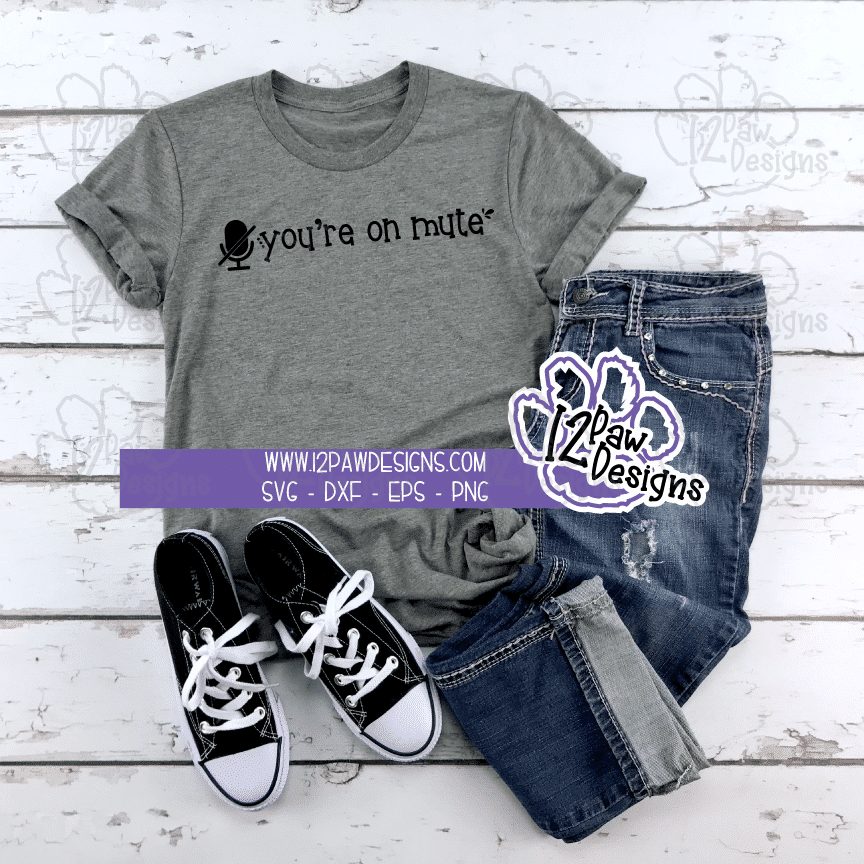
    Who hasn’t heard that in a meeting? With returning to work I find that in every meeting I am saying “You’re on Mute” to people. So, I thought I would design a fun design to wear on a shirt! This year I am THRILLED to announce that I have put in a FREEBIE Library! You will need to register and then the password will be sent to you. Also, don’t worry I will send a reminder of the password when I send out Paw Prints. Don’t worry I will not spam you with a lot of email. I respect your time and privacy. Paw Prints will be a scoop on what is going on with 12 Paw Designs, some new designs and of course FREEBIES. Just for signing up you will find some extra free files in there for your cutting machine, sublimation, etc.

    Go to the Library here. You can sign up and then watch your email. You will see a list of other free files in there for you to as well!

    You're on mute - Line
    You’re on mute – Line
    You're on mute - Line
    You’re on mute – Line

    I hope you enjoy! I do ask that you leave a review and pin my designs to pinterest. It helps me to keep designing free files for you! The best way to help a small business and it doesn’t cost you anything. Thank you for your support on that!

    Also, check out the shop for other fun design files that are available for purchase…….

    https://12pawdesigns.com/shop/

    If you have any questions or run into an issue please let me know!!!

    Lorri

    Want to connect more with 12 Paw Designs???:
    • Website: https://12pawdesigns.com
    • FB Page: https://www.facebook.com/12pawdesigns/
    • Instagram: https://www.instagram.com/12pawdesigns/
    • Pinterest: https://www.pinterest.com/12PawDesigns

    DO NOT resell any of the files as digital download or any other form.
    DO NOT claim the files as your own.
    DO NOT modify and resell the files in any form.