Tag: SVG

  • Time to Shake Your Bunny Tail!

    Time to Shake Your Bunny Tail!

    Shake your bunny Tail SVG- Shake your bunny Tail Cut File - Cricut Silhouette - svg/dxf/png/eps - Digital Download
    Shake your bunny Tail SVG- Shake your bunny Tail Cut File – Cricut Silhouette – svg/dxf/png/eps – Digital Download

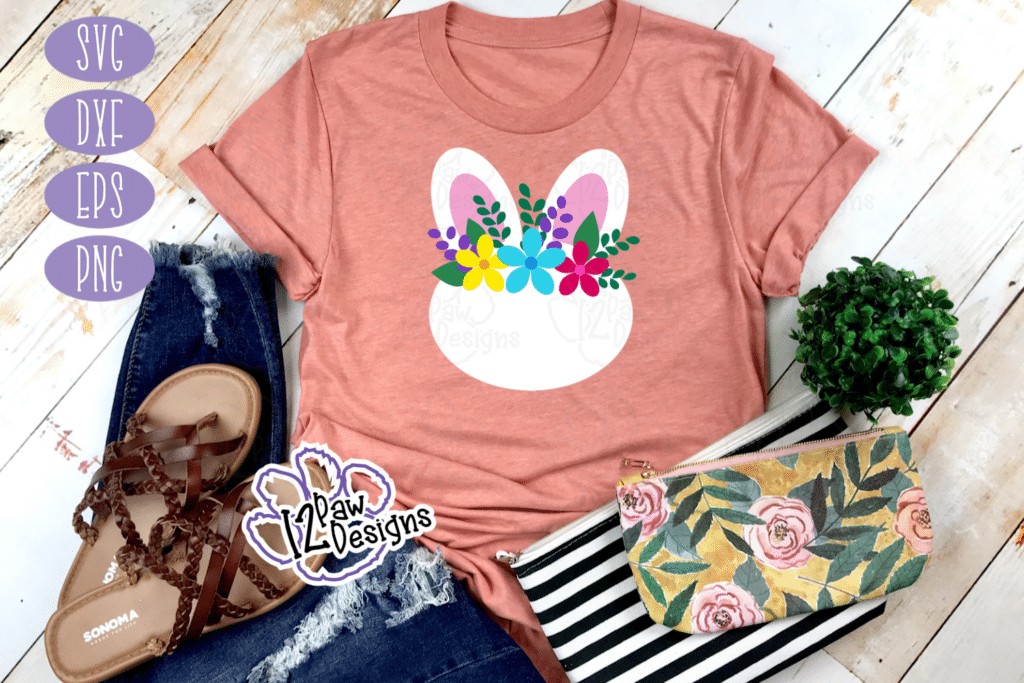
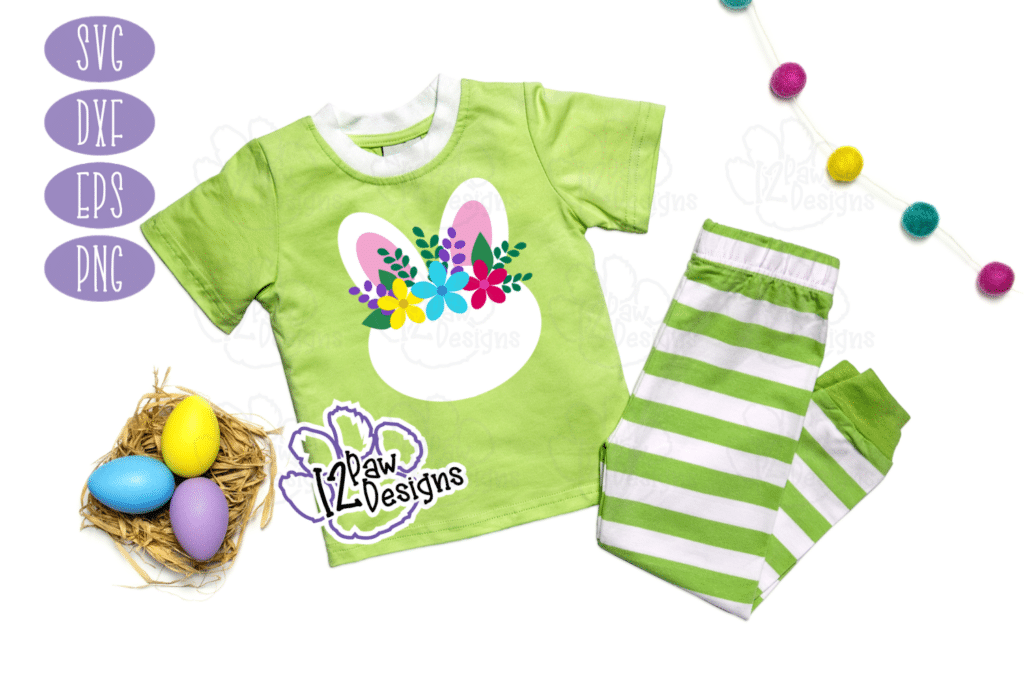
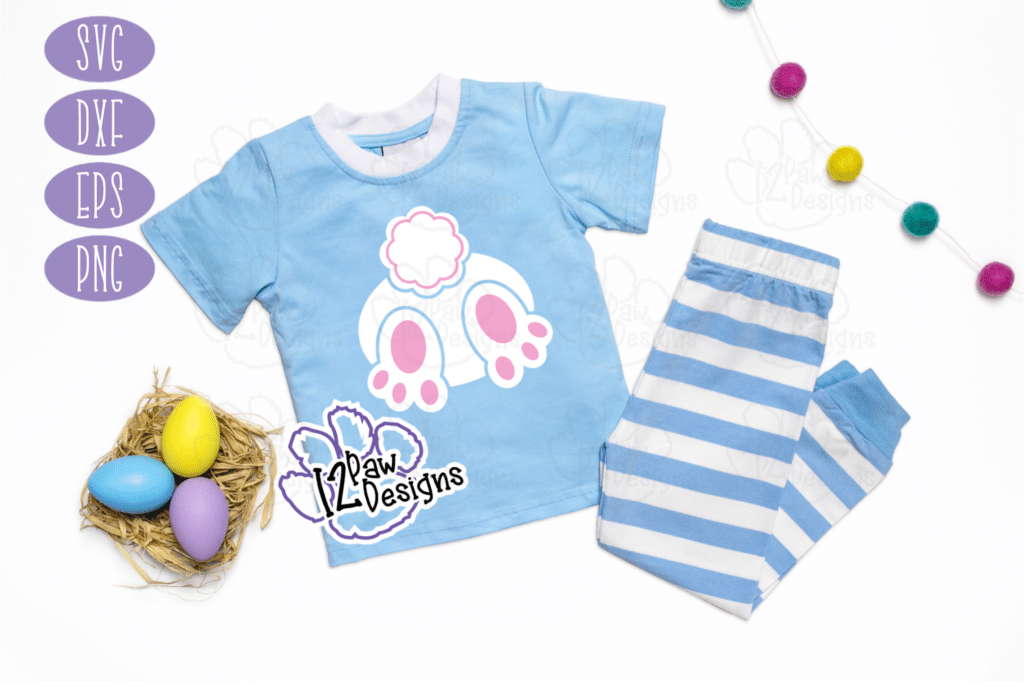
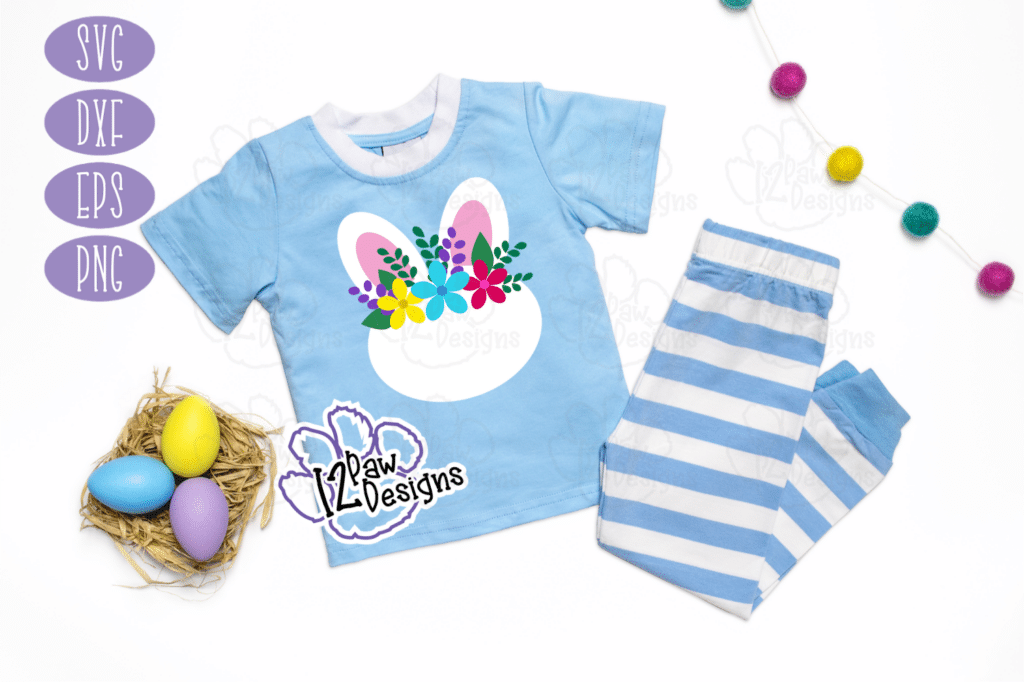
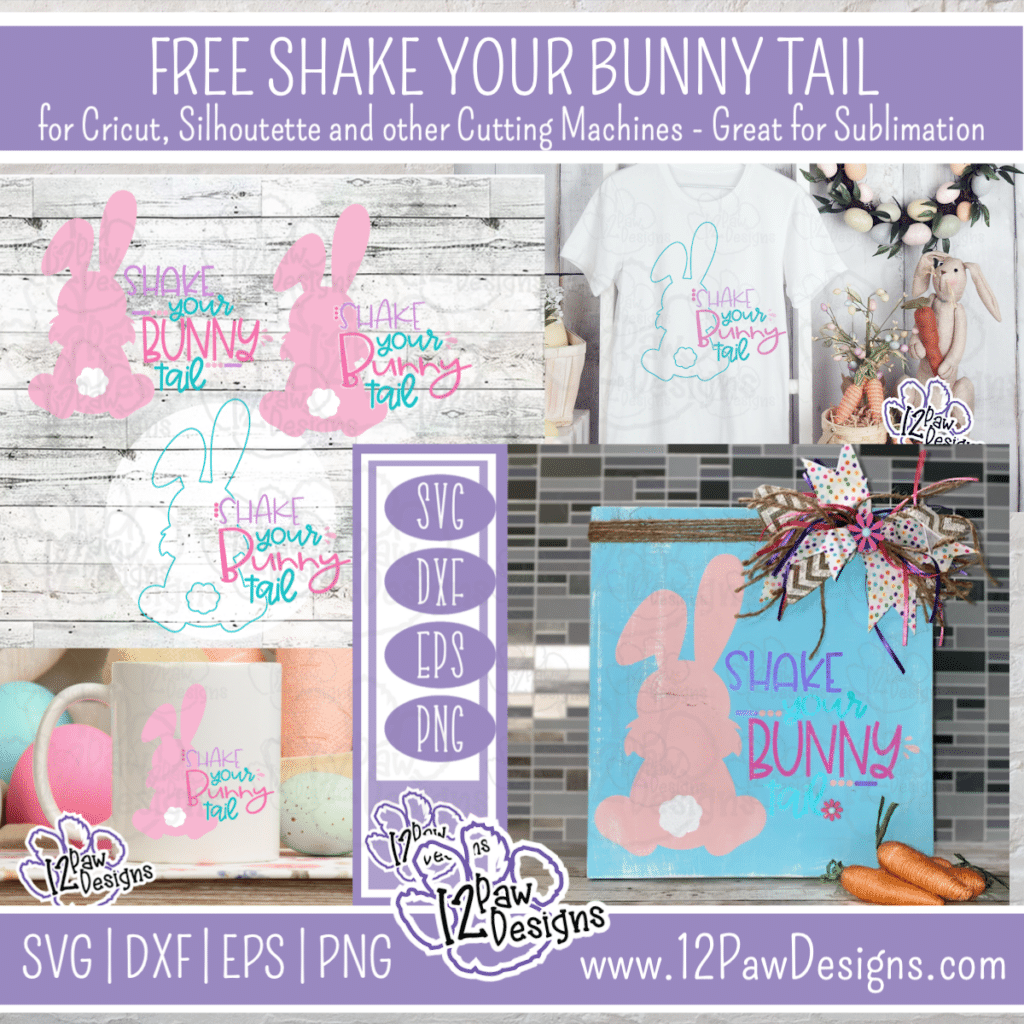
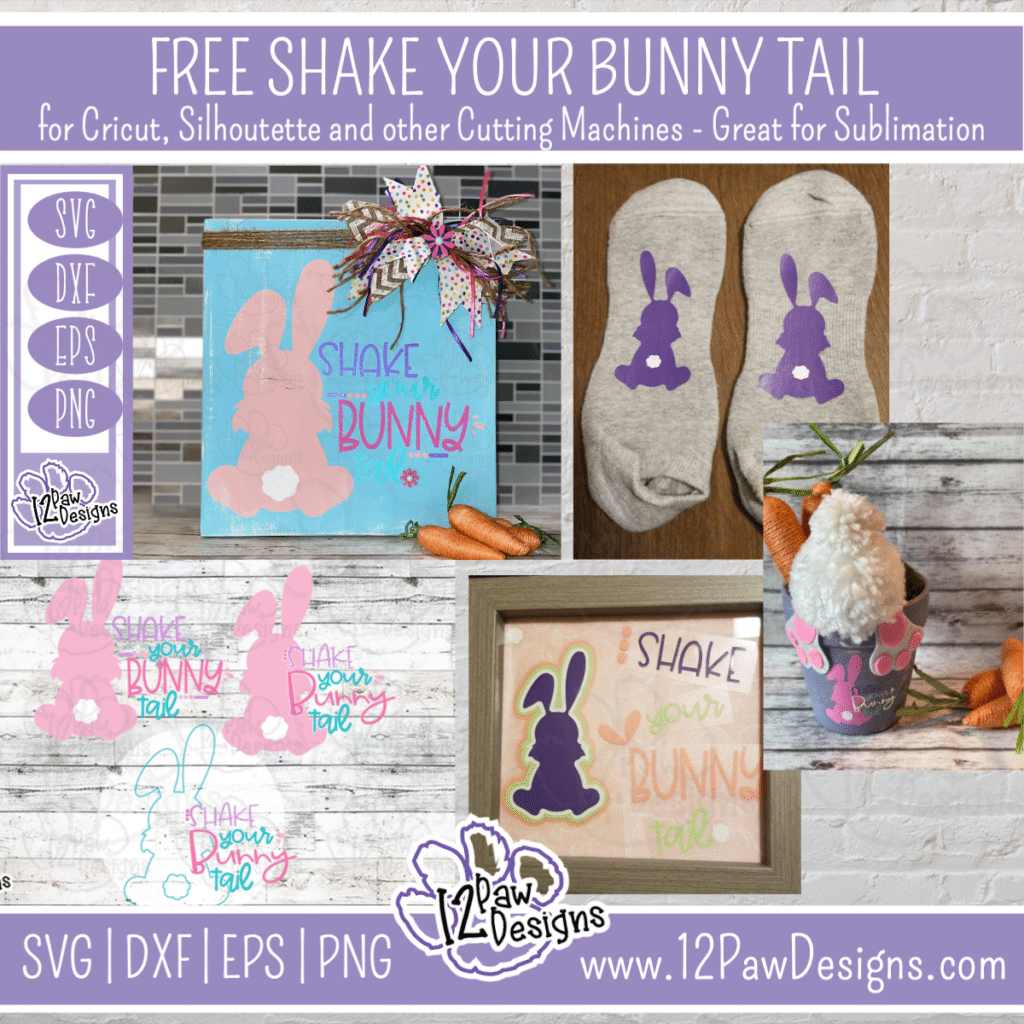
    I am so excited you are here!!! That you are participating in the 123 Alumni Showcase!!! I hope you are enjoying the showcase so far and that you are excited to learn how to design your own SVG\Cut files. Today I am sharing with you Shake Your Bunny Tail! There are 3 files for you to choose from. All with little twists to it. The project will be a cute sign where we will stencil the image on. I would also love to give a shout out to two other previous alumni that played with these files and came out with some other cute ideas!!! Angie Champagne made the cute little bunny in the in the pail1 Then Leslie Neuner made 2 projects. One is the cute sign and the other is the socks!! How cute are they!! Thank you so much ladies for help me! You did an amazing job!!!

    I can not say enough about the 123-SVG Class. It is so amazing. Michelle does an amazing job building your skills with our amazing step by step process and the the projects really are so much fun. You use the skills you learned and make fun trendy projects. I also want to mention the 123 Community. Fellow students cheering everyone one, the coaches in the course that are the to help and assist and then after the course there is an amazing alumni group that keep in contact and are there for questions and to help! I am also excited to be a coach for this round of class too!! I love helping other learn and grow their skills. Watching everyone progress is so amazing!!! Are you ready for change???

    Here are some other ideas!
    Shake your bunny Tail SVG- Shake your bunny Tail Cut File - Cricut Silhouette - svg/dxf/png/eps - Digital Download
    Shake your bunny Tail SVG- Shake your bunny Tail Cut File – Cricut Silhouette – svg/dxf/png/eps – Digital Download

    Supply List

    • Cutting Machine and software
    • Shake your Bunny Tail File (click on the link)
    • Vinyl– I used Starmask by starcraft, however, oramask 813 works well too! I also used a small piece of HTV white glitter for the tail
    • Weeding tools, scissors, cutting knife, and transfer tape
    • Wood board – mine was a scrap piece of 12×12
    • Sand paper, paint brush, sponges and glue gun (to glue the bow on)
    • Mini Heat Iron – I used the Cricut mini press and a teflon sheet
    • Paint – I used a mix of chalk and acrylic. Use what you have on hand. I even mixed some because it was either too dark or too light. Have fun with it. I used Blue, pink, white, purple and a dark pink
    • Items to finish it off sign – I used jute, ribbon and a really cute daisy button

    Now, lets get on to the fun part…making our sign! Check out the video tutorial for the step by step process. Below I have typed of the steps for you too!!!

    Shake your Bunny Tail – Video Tutorial


    Step 1 Sand your board. It will help with the stencil process
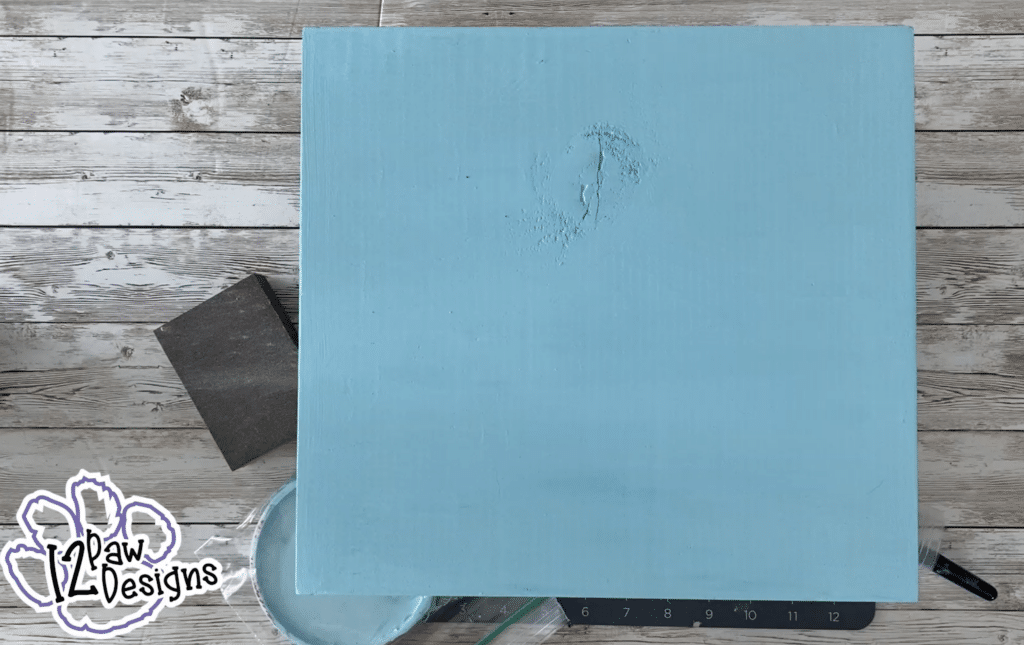
    Step 2 Paint your board the color you like. I mixed my paint I used white and a blueish teal color. I also did 2 coats.
    Shake your bunny
    Shake your bunny


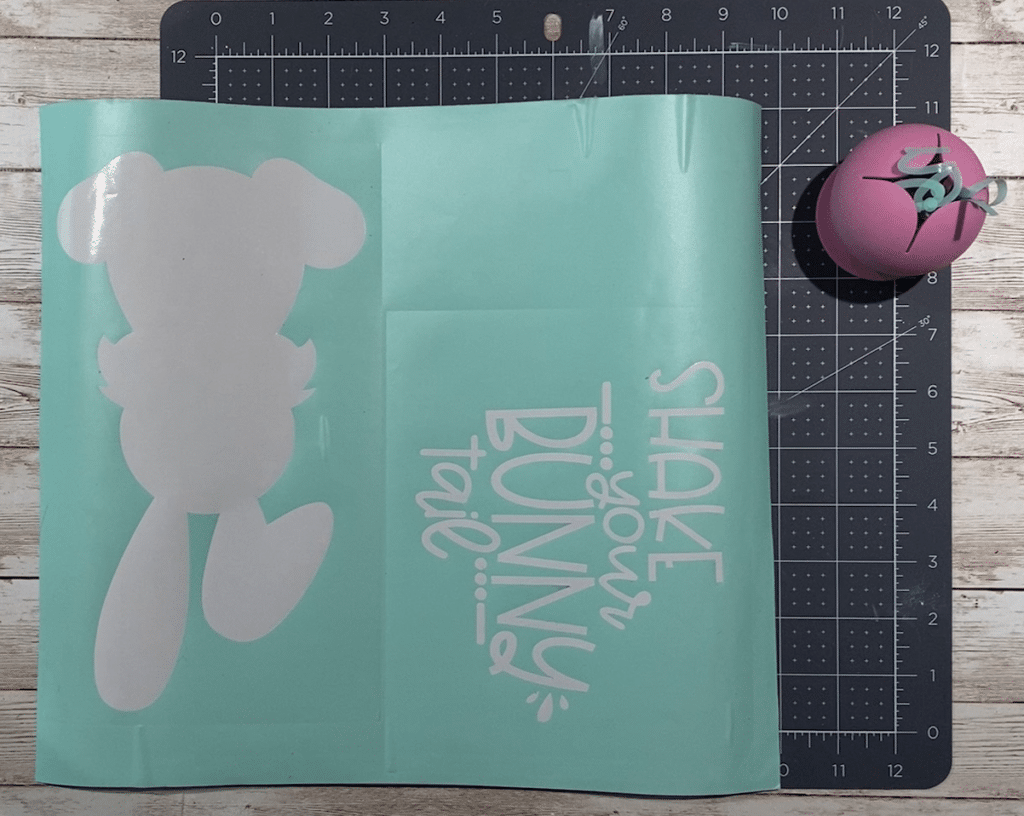
    Step 3 While my paint was drying I cut my stencil material. I cut 2 pieces. One piece was the bunny and then the second piece I cut the words out. I also put a weeding box around my items to make sure i had enough room around them.

    Shake your bunny - Weeding Box
    Shake your bunny – Weeding Box


    Step 4 Next weed your stencil vinyl. REMEMBER…this is a stencil so we are take the parts out we want paint. So the bunny comes out and the letter of the words come out.
    Shake your bunny - Weed your Stencil
    Shake your bunny – Weed your Stencil


    Step 5 Now to apply the stencil to the board. Use your transfer tape. Some times your transfer tape can be a little to sticky so i will stick it to my cloths one to help take some of the stick off. Lay your transfer tape on the bunny and remove the backing. Now apply the bunny to the board. Use your words to make sure you are spacing properly. I also moved down everything down to the bottom of the board due to my finishing items. Once you have the bunny on the board make sure you press the stencil down really good and then remove your transfer tape.
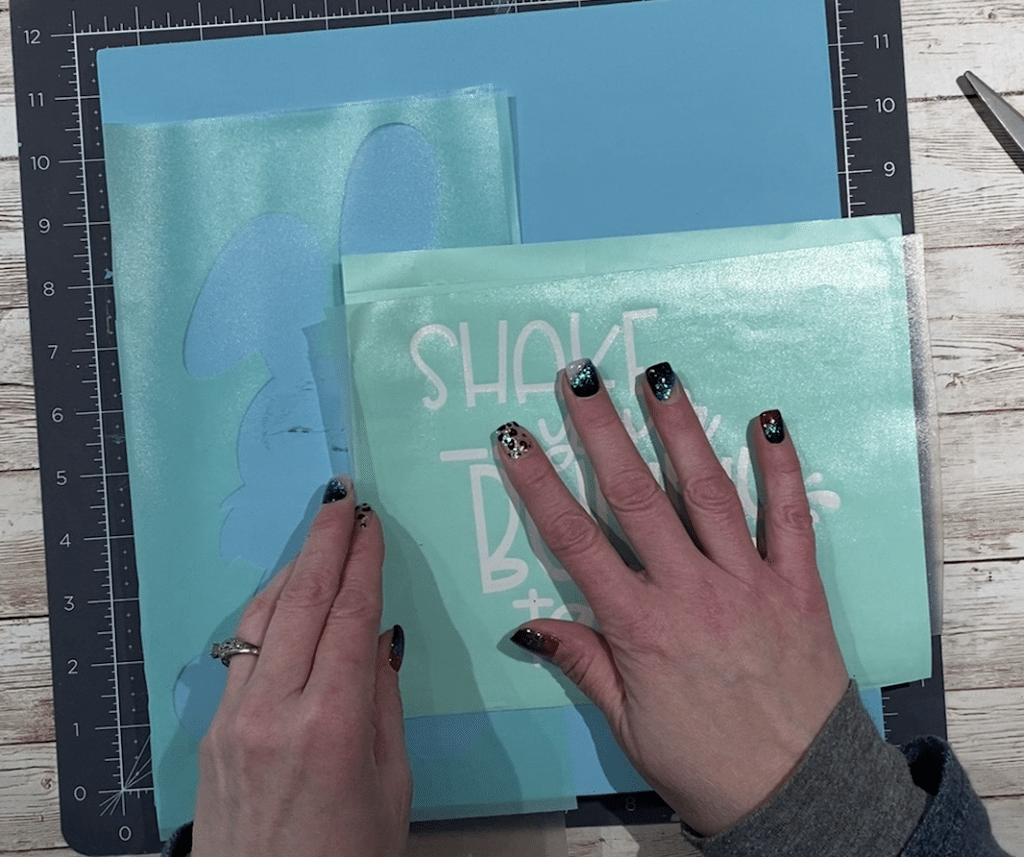
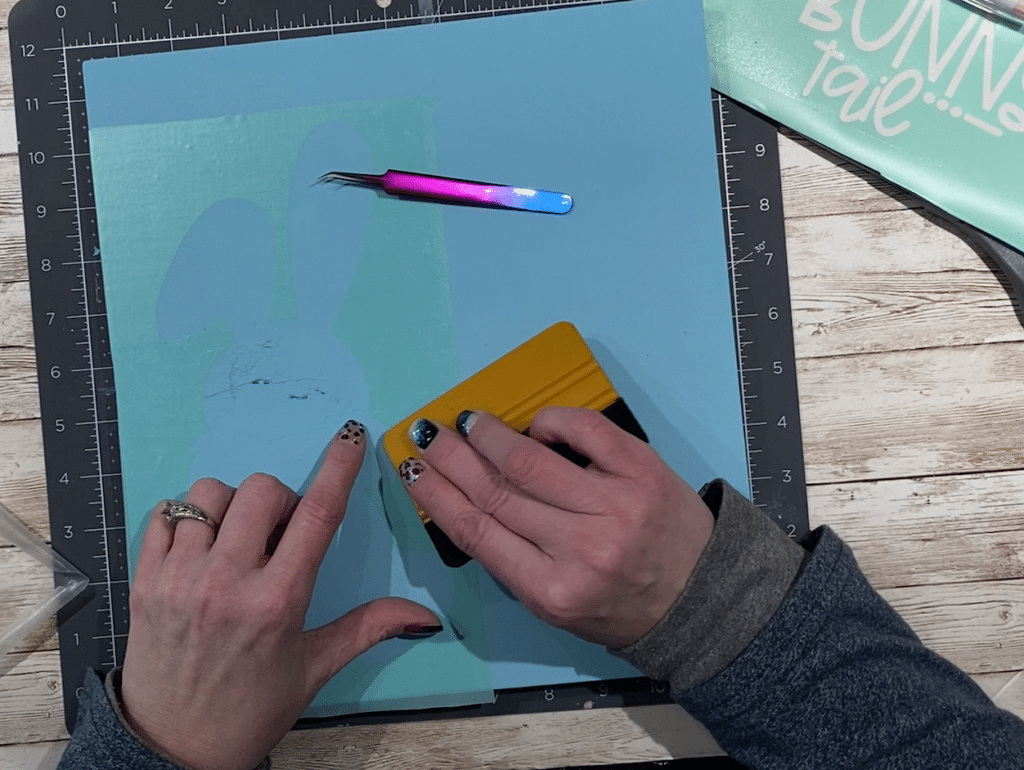
    Shake your bunny tail - Apply Stencil Material and space
    Shake your bunny tail – Apply Stencil Material and space
    Shake your bunny - Apply Stencil Material
    Shake your bunny tail – Apply Stencil Material


    Step 6 Now again, press down your stencil material. Get those edges really good!!!! Now let’s paint the bunny. I like to use make up sponges from the Dollar Tree. I can control the paint well. I mixed my pink because I didn’t have the exact color. Once the bunny is painted pull your stencil off.
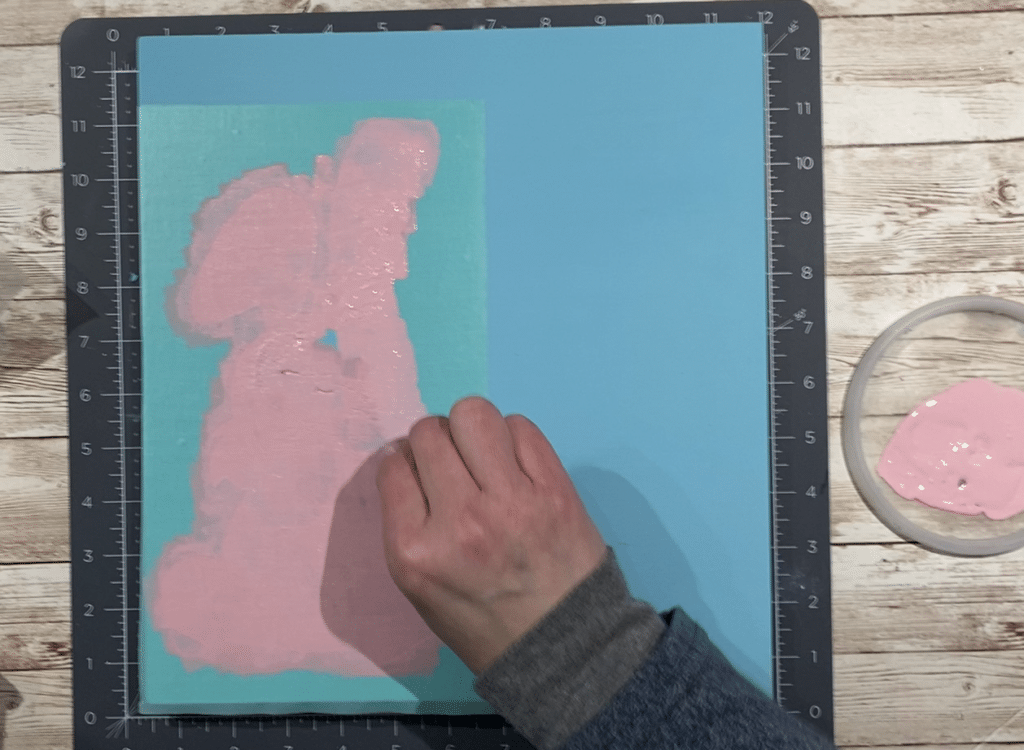
    Shake your bunny - Paint Bunny
    Shake your bunny tail – Paint Bunny

    Step 7 Let your bunny dry. A heat gun or hair dryer will help with this if you are in a hurry. Next apply your words the same way you did the bunny. Again, make sure you have all your edges pressed down really good.
    Step 8 Paint your words. Again I used my sponges and painted them. The acrylic paint needed a couple of passes vs the chalk paint. Once you have everything painted pull your vinyl off.
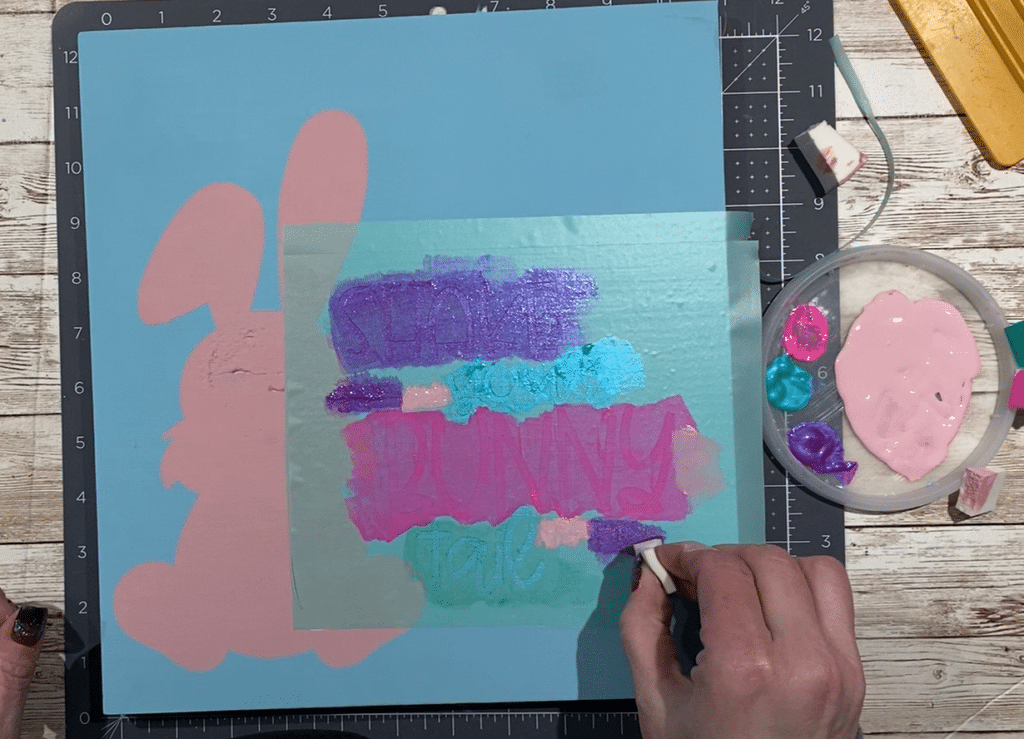
    Shake your bunny - Paint Words
    Shake your bunny tail- Paint Words

    Step 9 If you had any leaks you can fix with a small paint brush.
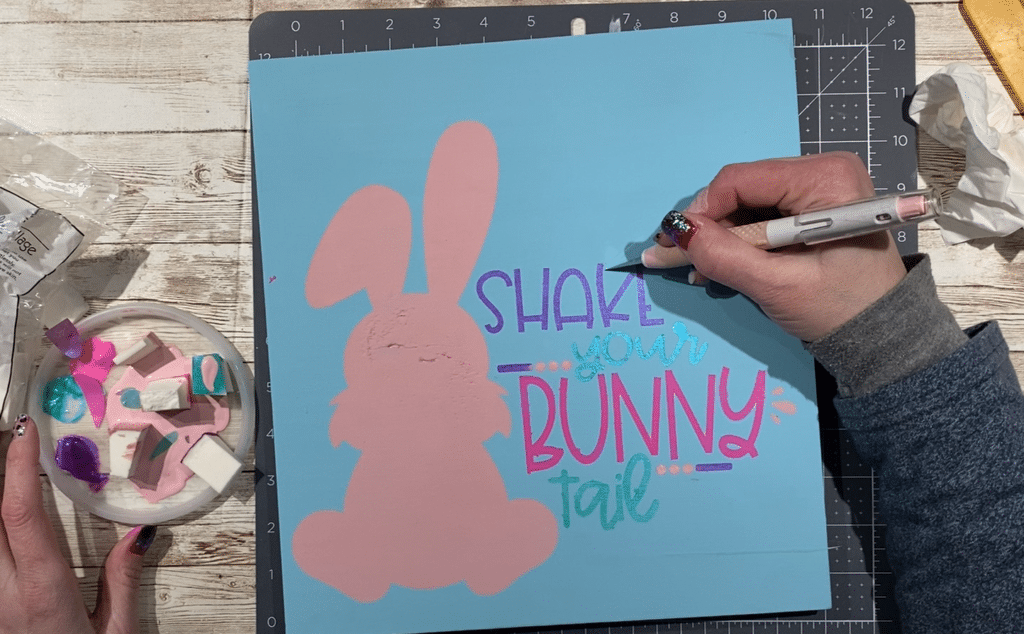
    Shake your bunny - Remove Stencil and clean up
    Shake your bunny tail – Remove Stencil and clean up


    Step 10 Now we need to apply the bunny tail. I cut mine out of Heat Transfer Vinyl Glitter. Then used my Cricut Mini Heat press to apply. Be careful to not apply too much heat.
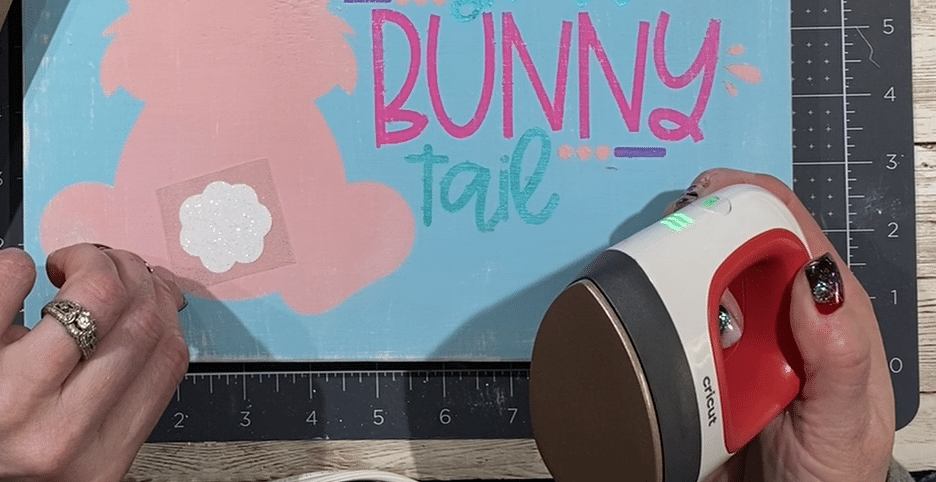
    Shake your bunny - Iron on tail
    Shake your bunny tail – Iron on HTV Glitter tail


    Step 11 Then finish your board. I used jute and wrapped it many times around the top.
    Step 12 Next i made a mess bow(directions in the video) and glued that to the top. I then glued on a cute flower button to the center and then an extra one to the board.
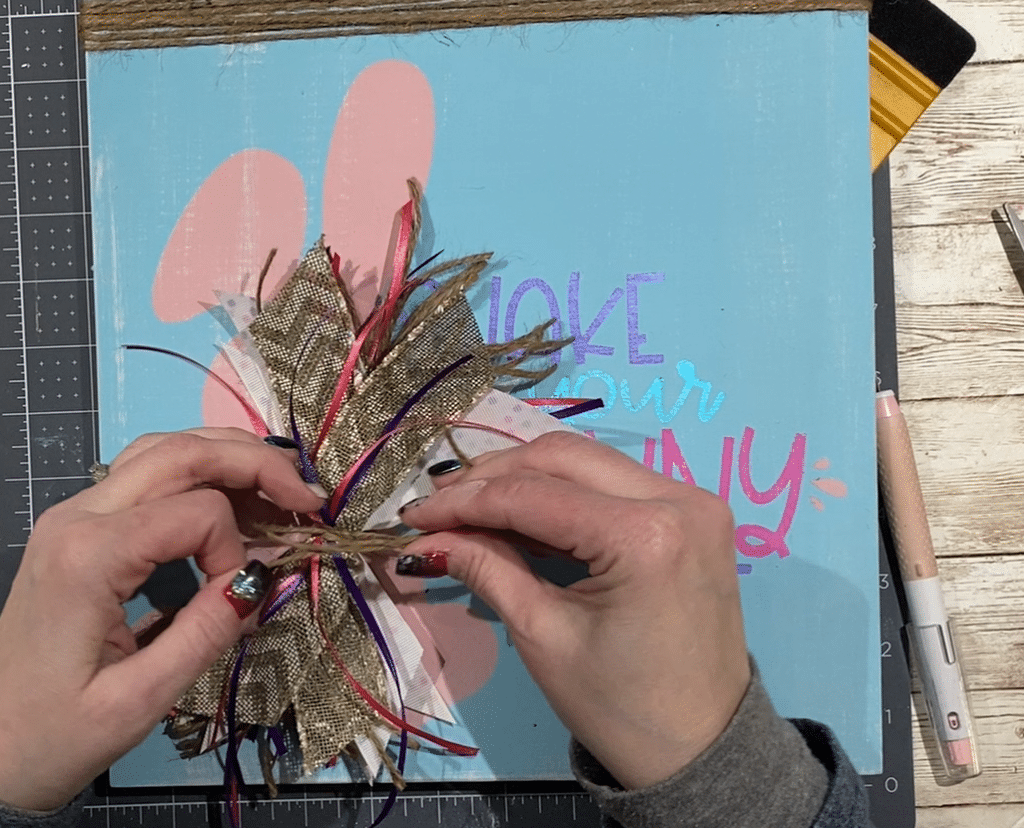
    Shake your bunny - Messy Bow
    Shake your bunny tail – Messy Bow


    Step 13 Most importantly HAVE FUN! MAKE IT YOURS. Then come back and share!!! I love to see it.

    To get your FREE file please go to my Freebie Library, sign in (don’t worry if you are not a member yet, sign up and the password will be emailed to you!!!) and download Number 21 Shake your Bunny Tail. This download file will have multiple file options SVG, PNG, DXF (If you have the free version of Silhouette Studio you will need this file) and EPS. 

    Want to learn more???

    I hope you enjoy the FREE Shake your Bunny Tail Tutorial and files and that you are enjoying the 123 Alumni Showcase! The journey and truly been amazing!!! If you want to learn more about the class i took please check out the link here. If you have any questions at all please feel free to reach out and ask! I am here to help!

    https://my-designs-in-the-chaos.mykajabi.com/123-svg-2021

    Thank you again for stopping by and being part of my dream and 12 Paw Designs! I hope I can be part of your dream when you sign up and take the 123-SVG class!!! Have an absolutely amazing day!!! Remember a ? Pintrest pin would be so appreciated! I can’t wait to see what you create. Please share with me. You can come back here and add a comment or add one to Facebook too!

    Also, please check out my shop. I am always adding new designs. You might also find ready made tumblers in there in the future!!!
    https://12pawdesigns.com/shop/

    If you have any questions or run into an issue please let me know!!!

    Lorri?
    Lorri@12PawDesigns.com

    Let’s Conntect!

    Want to connect more with 12 Paw Designs???:
    • Website: https://12pawdesigns.com
    • FB Page: https://www.facebook.com/12pawdesigns/
    • Instagram: https://www.instagram.com/12pawdesigns/
    • Pinterest: https://www.pinterest.com/12PawDesigns

    DO NOT resell any of the files as digital download or any other form.
    DO NOT claim the files as your own.
    DO NOT modify and resell the files in any form.
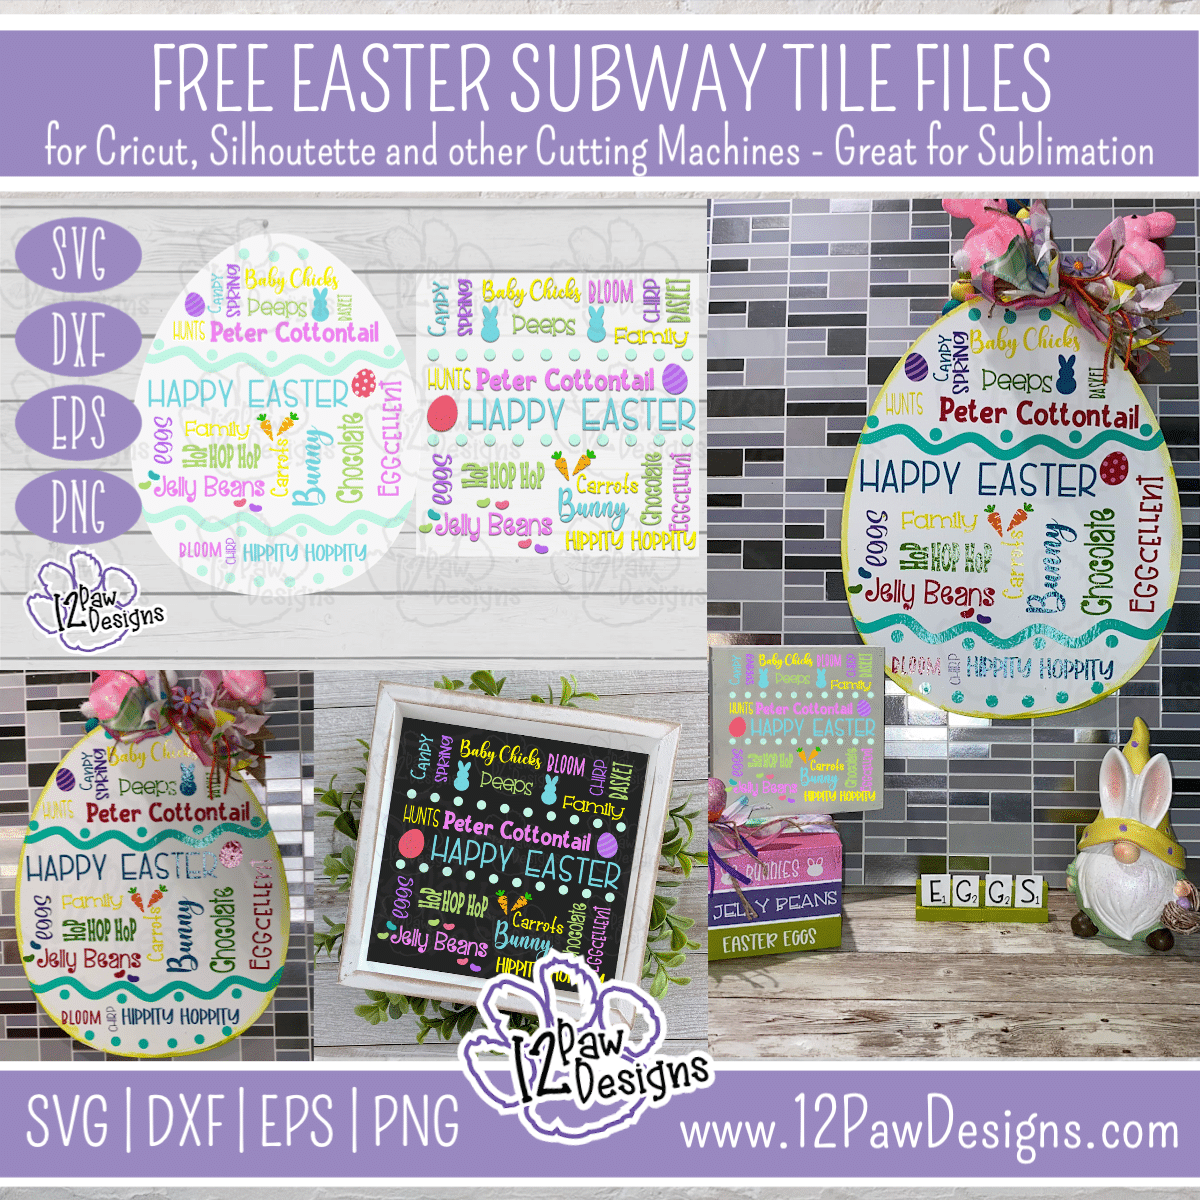
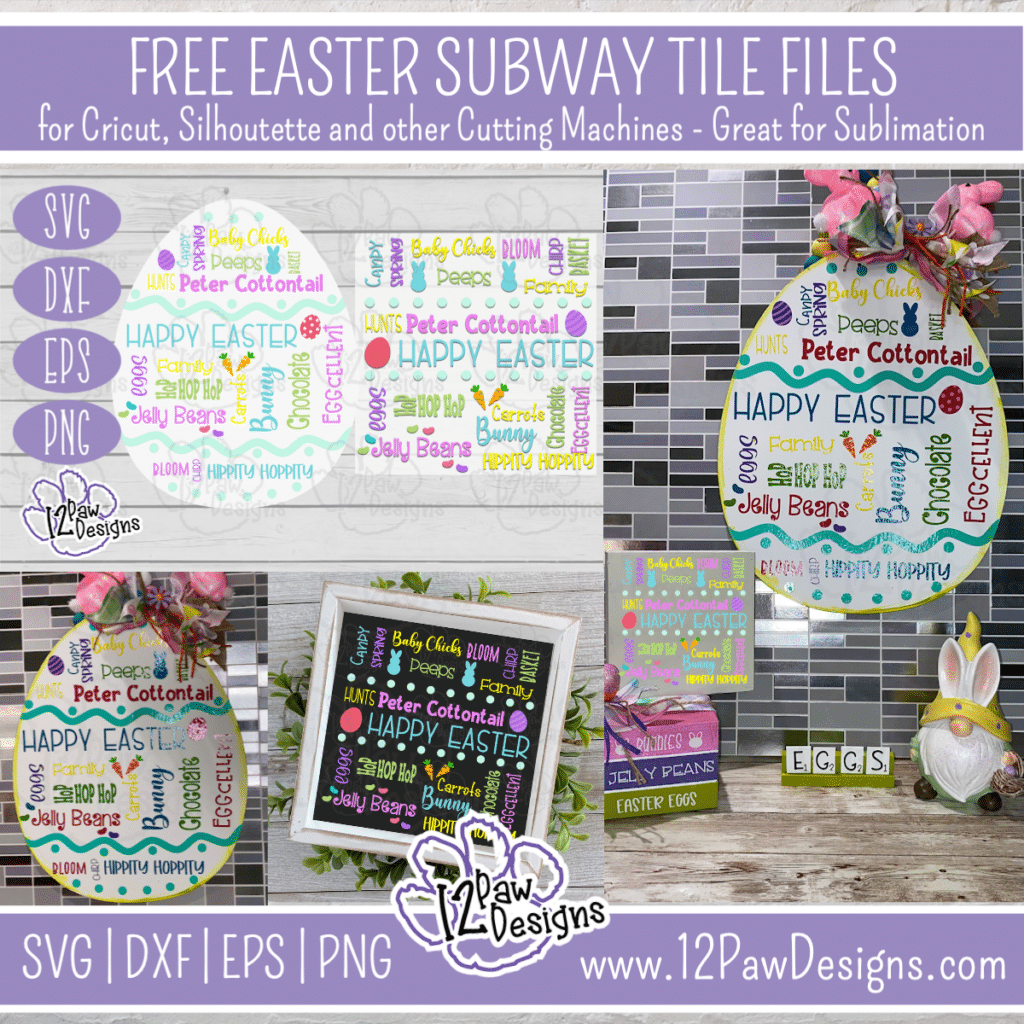
  • Easter Subway Tile that are Eggcellent

    Easter Subway Tile that are Eggcellent

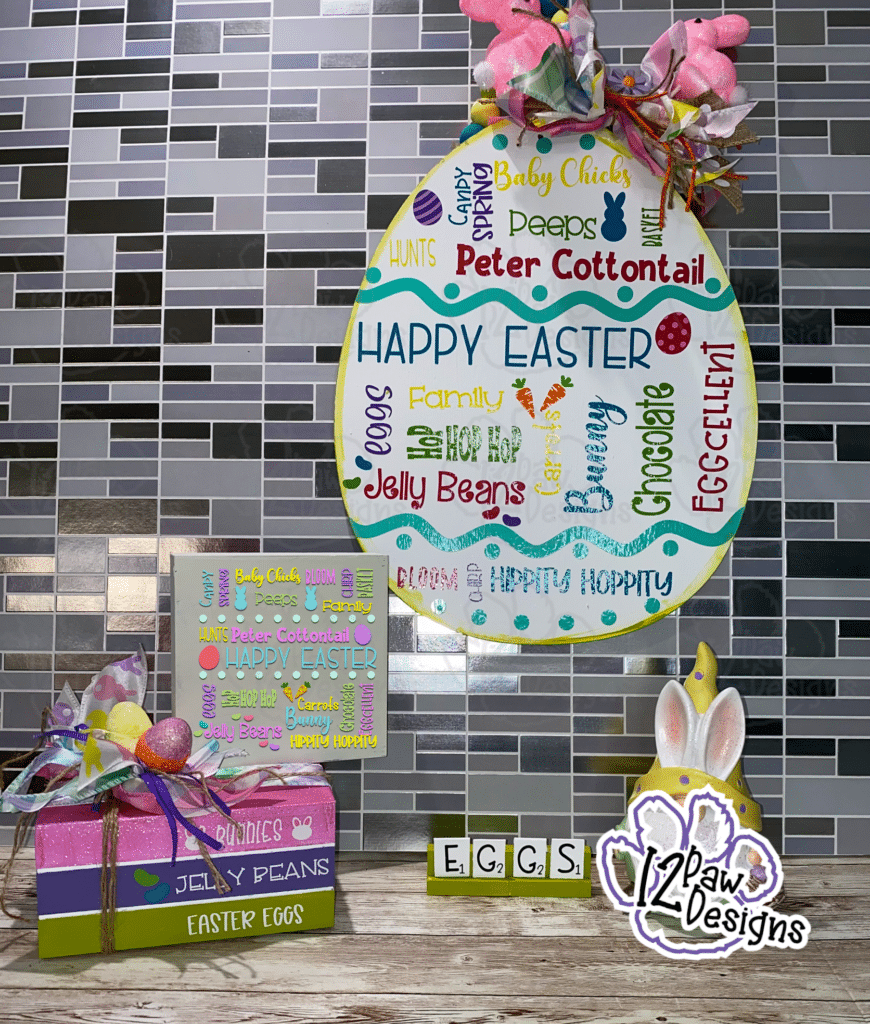
    Easter Subway Tile SVG- Easter Subway Tile Cut File - Cricut Silhouette - svg/dxf/png/eps - Digital Download
    Easter Subway Tile SVG- Easter Subway Tile Cut File – Cricut Silhouette – svg/dxf/png/eps – Digital Download

    This weeks Freebie file is and Eggcellent Easter Subway Tile. There are two file option one that you can use the egg form from the Dollar Tree and one that is a square that you can use on anything! The choice is yours! We will also be using the parchment paper technique to layer the vinyl.

    Also remember that I am still doing the give away of the keychains from last week and a super cute Welcome Peeps Sign!!! One or maybe two to my Facebook followers and one and maybe two to my IG followers. This drawing will happen on Friday!!!

    Also, I case you missed this really cool news I will be taking part in participating in our first ever 123-SVG Alumni Showcase.  What is this you asked???  This is the kick off for the next class of how to design your own SVG\cut files.  Just like what you see me sharing every week!!! So during the showcase that will begin on March 23rd each day one designer from the previous courses will be featured.   There will be free files, free tutorials, etc!!  I am so excited!  I will be featured on Thursday, March 25th. I have the cutest file and project for you. SIGN UP FOR THE WEEK OF FREE CRAFTING FUN HERE: https://mydesignsinthechaos.ck.page/e0aeaf3c19 and come and check out the blog on Thursday!!!

    Easter Subway Tile SVG- Easter Subway Tile Cut File - Cricut Silhouette - svg/dxf/png/eps - Digital Download
    Easter Subway Tile SVG- Easter Subway Tile Cut File – Cricut Silhouette – svg/dxf/png/eps – Digital Download

    Supply List

    Cutting Machine and software
    Easter Subway Tile File (click on the link)
    Vinyl– I used Starcraft brand and I used white, black, orange, 2 colors green, purple, 2 colors of pink, teal, Yellow and blue
    Weeding tool, scissors, cutting knife, and transfer tape
    Parchment Paper
    Egg Sign from the Dollar Tree
    Ribbon, jute, beads, picks to finish the project
    Paint – I used celery from Waverly, however, you can use any coordinating color of your choice
    Sponge – I like to use the make up sponges from the Dollar tree.

    The video shows you all steps i used to make my egg sign but let me touch on the steps here.
    1. Lightly sand the back side of your egg sign. I then applied 2 coats of acrylic paint. You can use any light color. Acrylic or chalk, use what you have on hand!
    2. While my paint is drying I cut all my vinyl. The file is grouped by color for you to make it easier to cut. I also added a cut box around the words to help with good clean cuts and to make it easier to weed.
    3. Once every thing is cut you can then go through and weed your vinyl. When weeding i like to use a sharp point tweezers. Also, as I am pulling my vinyl off i like to keep it close to the project so it weeds easier.
    4. Once everything is weeded I trim everything down to the size of the weeding box.
    5. Now its time to layer our vinyl. I started out with the teal which is my egg decoration. I used my transfer tape and applied it to the vinyl to pick it up. Make sure you have extra transfer tape on onside to do a hinge with it.
    6. Next, take your egg and put it down, then lay your parchment paper on top. Put your vinyl\transfer on top and slide it around until you have it placed where you want it. Take that extra transfer tape you have on the one side and attach it your work surface. This is your hinge. Pick up your transfer tape, pull out your parchment paper and lay down your vinyl. Use your squeegee and rub it on. Then pull off your transfer tape. Again, staying close to the egg.
    7. Next i picked the blue which is the Happy Easter. It goes right below the decoration pieces. Repeat the same steps as about. Lay your transfer tape down on the vinyl (used the same transfer tape for the whole project). Remember to leave extra on the one side, pull the vinyl and transfer tape away from the backing. Lay your parchment paper down on the egg, put the Vinyl\tape down and move it around to get your position. Don’t be afraid to look at the PNG file to see your placement. Once you have your spot, hinge it down, pull out your parchment paper and lay your vinyl down.
    8. Repeat for all other colors.
    9. Then take your paint and sponge and dry sponge a little bit of paint around the edge of the egg to get it a little extra.
    10. Decorate as you wish.
    11. ENJOY!!!

    To get your FREE file please go to my Freebie Library, sign in (don’t worry if you are not a member yet, sign up and the password will be emailed to you!!!) and download Number 19 Easter Egg Subway Tile and/or 20 Easter Subway Tile. This download file will have multiple file options SVG, PNG, DXF (If you have the free version of Silhouette Studio you will need this file) and EPS. 

    Have and amazing day and enjoy these free files. Remember to check out the Alumni Showcase that will be happening this week and make sure you follow me for you chance to win! Remember a ? Pintrest pin would be so appreciated! I can’t wait to see what you create. Please share with me. You can come back here and add a comment or add one to Facebook too!

    Also, please check out my shop. I am always adding new designs. You might also find ready made tumblers in there in the future!!!
    https://12pawdesigns.com/shop/

    If you have any questions or run into an issue please let me know!!!

    Lorri?
    Lorri@12PawDesigns.com

    Let’s Conntect!

    Want to connect more with 12 Paw Designs???:
    • Website: https://12pawdesigns.com
    • FB Page: https://www.facebook.com/12pawdesigns/
    • Instagram: https://www.instagram.com/12pawdesigns/
    • Pinterest: https://www.pinterest.com/12PawDesigns

    DO NOT resell any of the files as digital download or any other form.
    DO NOT claim the files as your own.
    DO NOT modify and resell the files in any form.
  • Need a Cute Bunny Keychain and Wristlet?

    Need a Cute Bunny Keychain and Wristlet?

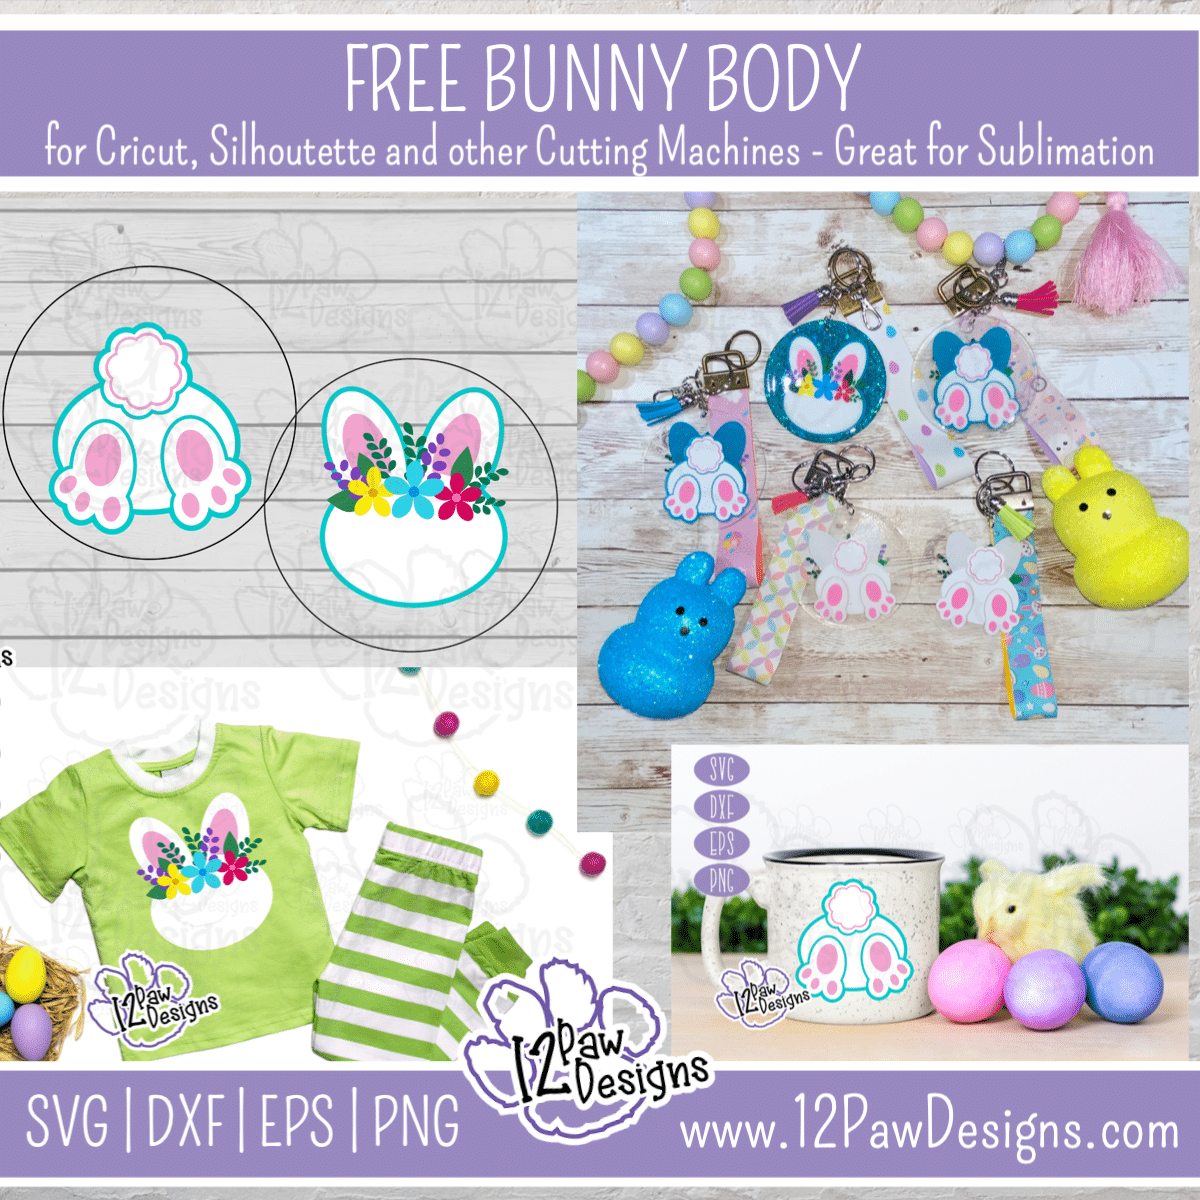
    Bunny body Keychain Tray SVG- Bunny Tag Cut File - Cricut Silhouette - svg/dxf/png/eps - Digital Download
    Bunny body Keychain Tray SVG- Bunny Tag Cut File – Cricut Silhouette – svg/dxf/png/eps – Digital Download

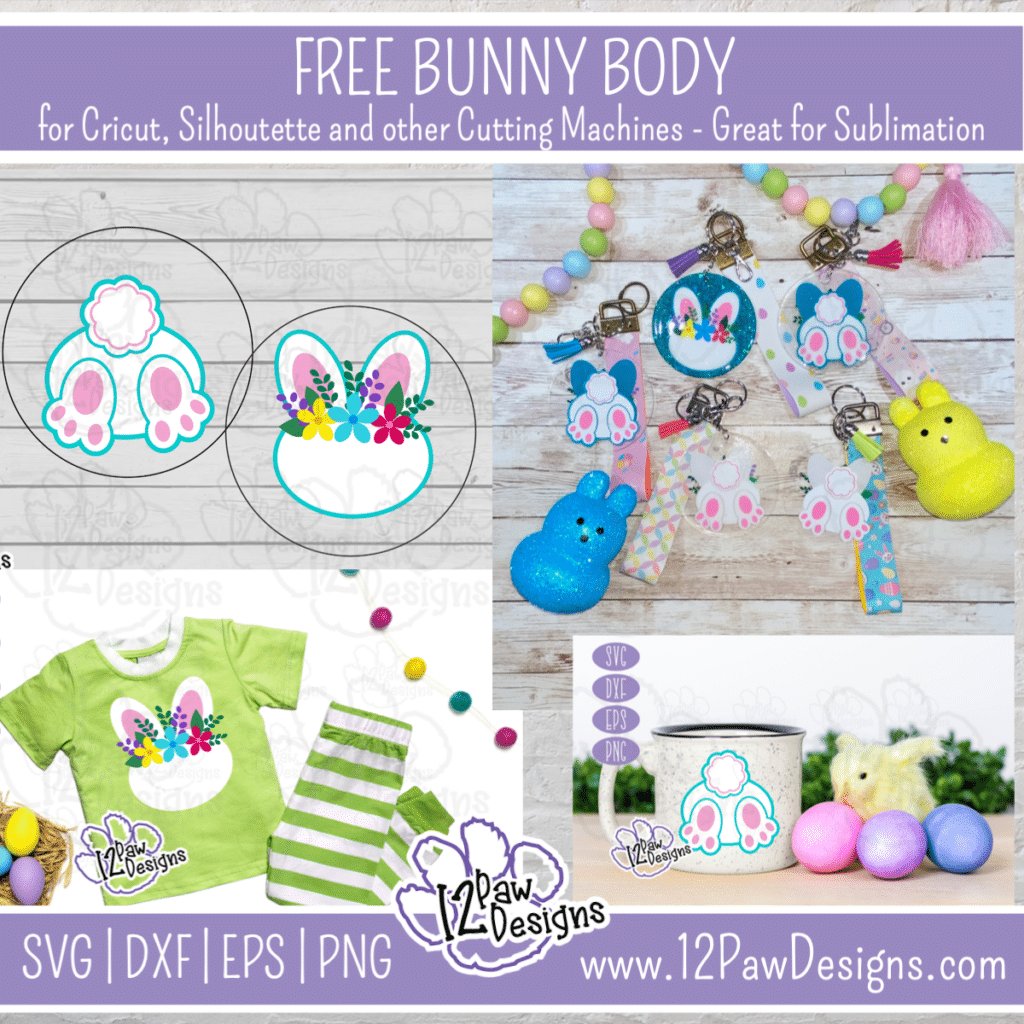
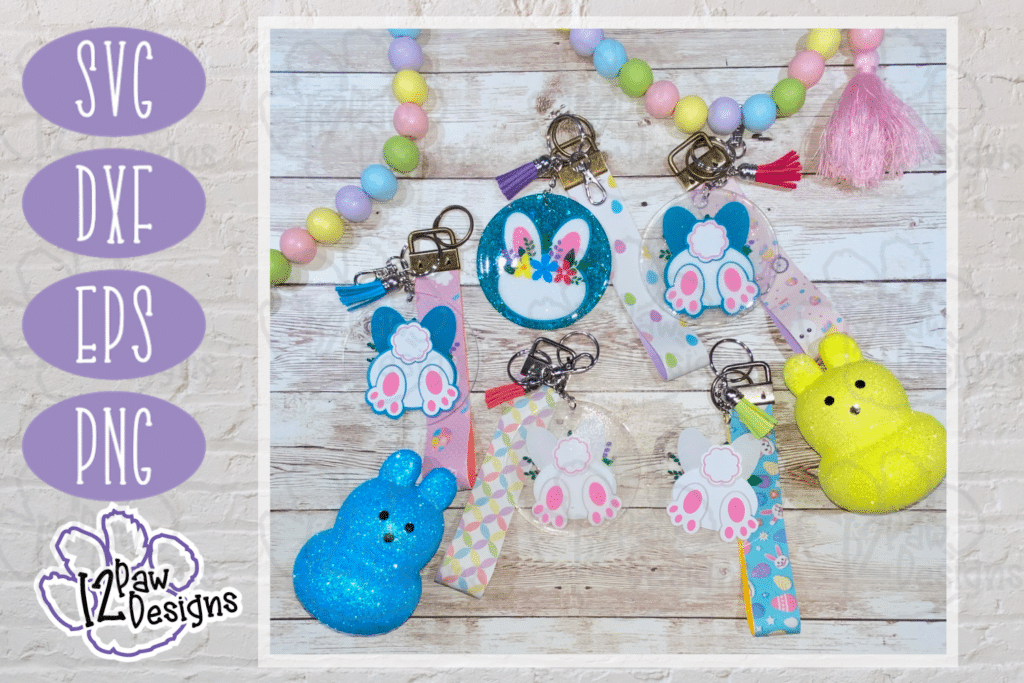
    Yes you do NEED a cute Bunny Keychain and Wristlet! This project is for anyone!!! ALSO, I am going to be giving one away!! One to my Facebook followers and one to my IG followers. Check out social media for more information and for an extra surprise give away!!! You can do a simple layering of vinyl on an acrylic blank or you if you have the stuff or are looking to get into resin or epoxy you can take it to the next level. I will also be showing you how I made the FOBs\Wristlet. This was a really fun project and so versatile. You can even take cutting files and use them mugs, tumblers, shirts, totes etc. Just have fun!!!

    Bunny body Keychain Tray SVG- Bunny Tag Cut File - Cricut Silhouette - svg/dxf/png/eps - Digital Download
    Bunny body Keychain Tray SVG- Bunny Tag Cut File – Cricut Silhouette – svg/dxf/png/eps – Digital Download

    Here are some other things you can make!

    • Bunny body Keychain Tray SVG- Bunny Tag Cut File - Cricut Silhouette - svg/dxf/png/eps - Digital Download
    • Bunny body Keychain Tray SVG- Bunny Tag Cut File - Cricut Silhouette - svg/dxf/png/eps - Digital Download
    • Bunny body Keychain Tray SVG- Bunny Tag Cut File - Cricut Silhouette - svg/dxf/png/eps - Digital Download
    • Bunny body Keychain Tray SVG- Bunny Tag Cut File - Cricut Silhouette - svg/dxf/png/eps - Digital Download
    • Bunny body Keychain Tray SVG- Bunny Tag Cut File - Cricut Silhouette - svg/dxf/png/eps - Digital Download
    • Bunny body Keychain Tray SVG- Bunny Tag Cut File - Cricut Silhouette - svg/dxf/png/eps - Digital Download
    • Bunny body Keychain Tray SVG- Bunny Tag Cut File - Cricut Silhouette - svg/dxf/png/eps - Digital Download

    Supply List

    Cutting Machine and software
    Bunny Body File(click on the link)
    Vinyl– Todays vinyl is from https://www.143vinyl.com/ it is the Starcraft brand and I used white, black, orange,2 colors green, purple, 2 colors of pink, teal, Yellow
    White, teal and pink cardstock
    Weeding tool, scissors, cutting knife, and transfer tape
    Acrylic blanks – the ones i used are from Amazon
    Glitter – to add a little glitz to your UV Resin if you would like.
    UV Resin and silicon brush or metal stir stick
    Faux Leather
    HTV that matches the Faux Leather
    Fob hardware – I bought this from Amazon
    Keychain hardware and tassels to accessories

    To get your FREE file please go to my Freebie Library, sign in (don’t worry if you are not a member yet, sign up and the password will be emailed to you!!!) and download Number 18 Bunny Body Keychain or Shirt. This download file will have multiple file options SVG, PNG, DXF (If you have the free version of Silhouette Studio you will need this file) and EPS. 

    I hope you enjoy the FREE Bunny file. Thank you again for stopping by and being part of my dream and 12 Paw Designs! Have an absolutely amazing day!!! Remember a ? Pintrest pin would be so appreciated! I can’t wait to see what you create. Please share with me. You can come back here and add a comment or add one to Facebook too!

    Also, please check out my shop. I am always adding new designs. You might also find ready made tumblers in there in the future!!!
    https://12pawdesigns.com/shop/

    As a special thank you use code BDAY20 to take 20% off anything in the shop right now! It is my birthday month and I want to share it with you!!!

    If you have any questions or run into an issue please let me know!!!

    Lorri?
    Lorri@12PawDesigns.com

    Let’s Conntect!

    Want to connect more with 12 Paw Designs???:
    • Website: https://12pawdesigns.com
    • FB Page: https://www.facebook.com/12pawdesigns/
    • Instagram: https://www.instagram.com/12pawdesigns/
    • Pinterest: https://www.pinterest.com/12PawDesigns

    DO NOT resell any of the files as digital download or any other form.
    DO NOT claim the files as your own.
    DO NOT modify and resell the files in any form.

  • A TIERED TRAY A BUNNY WOULD LOVE!

    A TIERED TRAY A BUNNY WOULD LOVE!

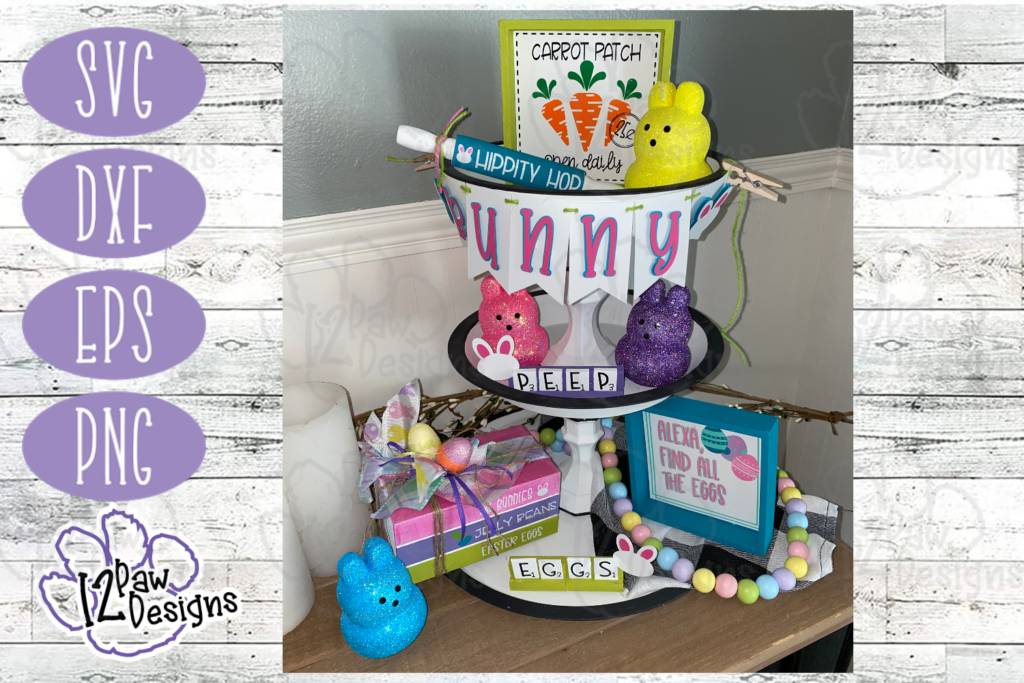
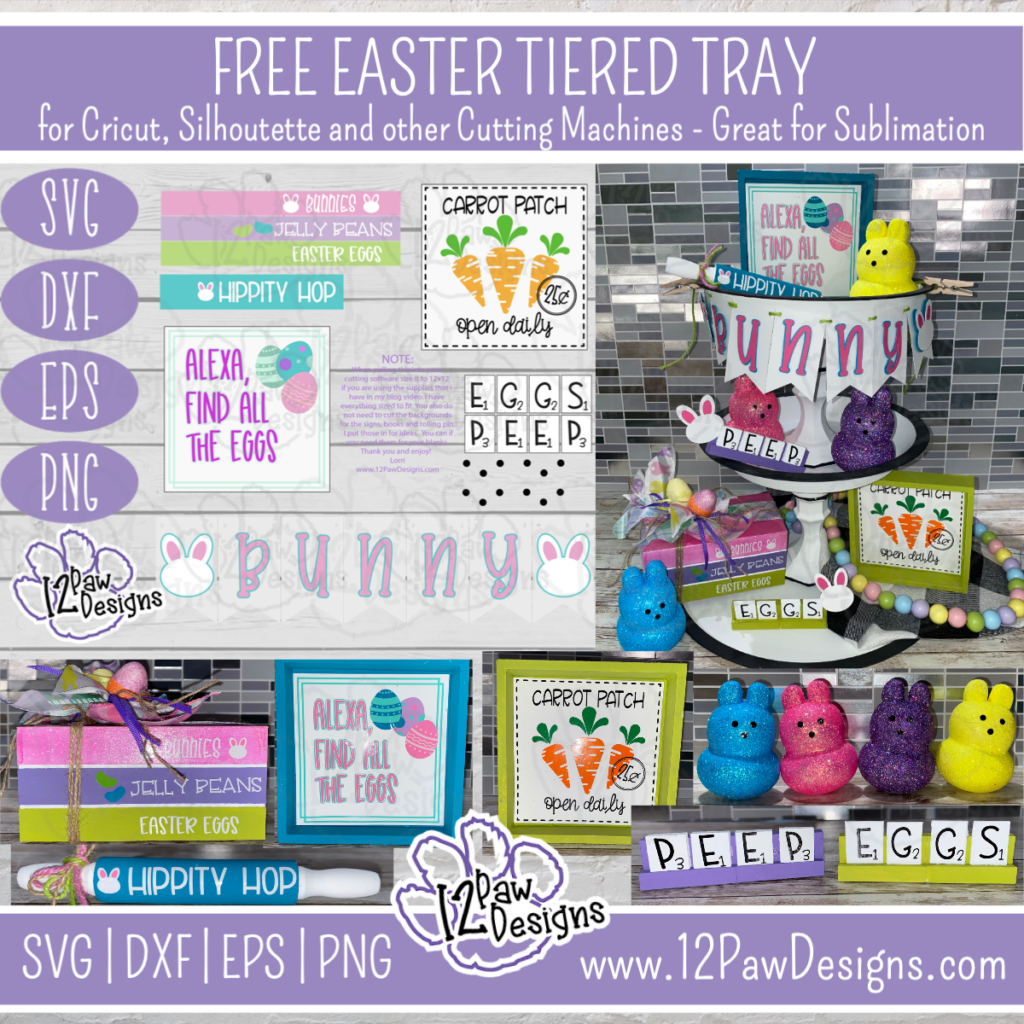
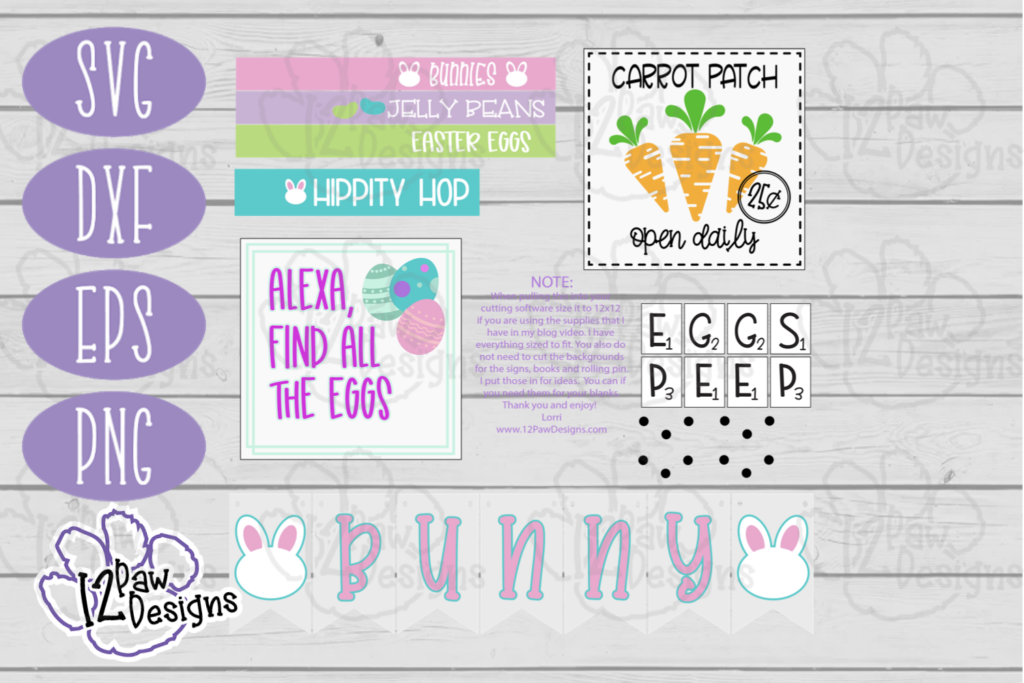
    Happy Sunday Funday Freebie! Today we are making a Tiered Tray a Bunny Would Love! Tiered trays are so popular and absolutely love mine so much I actually have two!. We are making books, rolling pin, signs, banner, scrabble trays and glitter peeps. So yes, any BUNNY would love this! Here are some pictures of my finished project. Below is a supply list and video tutorial along with the link to the FREE files.

    Easter Tiered Tray SVG- Tiered Tray Cut File - Cricut Silhouette - svg/dxf/png/eps - Digital Download
    Easter Tiered Tray SVG- Tiered Tray Cut File – Cricut Silhouette – svg/dxf/png/eps – Digital Download

    Supply List

    Cutting Machine and software
    Vinyl– Todays vinyl is from https://www.143vinyl.com/ it is the Starcraft brand and I used white, black, orange, green, 2 colors of purple, 2 colors of pink, 2 colors of teal
    White, teal and pink cardstock
    Weeding tool, scissors, cutting knife, glue gun, paint brushes, foam tape and transfer tape
    Dollar tree – tumble tower blocks, 3 in 1 game (for the scrabble pieces or you can purchase them from walmart), small wood crate for the books (you can also cut 3.5×5″ wood blocks)
    Wooden rolling pin
    Blanks for signs
    Modge Podge
    Glitter
    Plaster Bunnies from the Dollar Tree
    Ribbon of choice and jute

    To get your FREE file please go to my Freebie Library, sign in (don’t worry if you are not a member yet, sign up and the password will be emailed to you!!!) and download Number 17 Easter Tiered Tray. There are file options SVG, PNG, DXF (If you have the free version of Silhouette Studio you will need this file) and EPS. 

    I hope you enjoy the FREE tiered tray file. Thank you again for stopping by and being part of my dream and 12 Paw Designs! Have an absolutely amazing day!!! Remember a ? Pintrest pin would be so appreciated!

    Also, please check out my shop. I am always adding new designs. You might also find ready made tumblers in there in the future!!!
    https://12pawdesigns.com/shop/

    As a special thank you use code BDAY20 to take 20% off anything in the shop right now! It is my birthday month and I want to share it with you!!!

    If you have any questions or run into an issue please let me know!!!

    Lorri?
    Lorri@12PawDesigns.com

    Let’s Conntect!

    Want to connect more with 12 Paw Designs???:
    • Website: https://12pawdesigns.com
    • FB Page: https://www.facebook.com/12pawdesigns/
    • Instagram: https://www.instagram.com/12pawdesigns/
    • Pinterest: https://www.pinterest.com/12PawDesigns

    DO NOT resell any of the files as digital download or any other form.
    DO NOT claim the files as your own.
    DO NOT modify and resell the files in any form.

  • OH MY LUCKY CHARMS SUBWAY TILE SIGN FOR YOU

    OH MY LUCKY CHARMS SUBWAY TILE SIGN FOR YOU

    St Patricks Day Subway Tile SVG- St Pat Subway Tile Shamrock Cut File - Cricut Silhouette - svg/dxf/png/eps - Digital Download
    St Patricks Day Subway Tile SVG- St Pat Subway Tile Shamrock Cut File – Cricut Silhouette – svg/dxf/png/eps – Digital Download

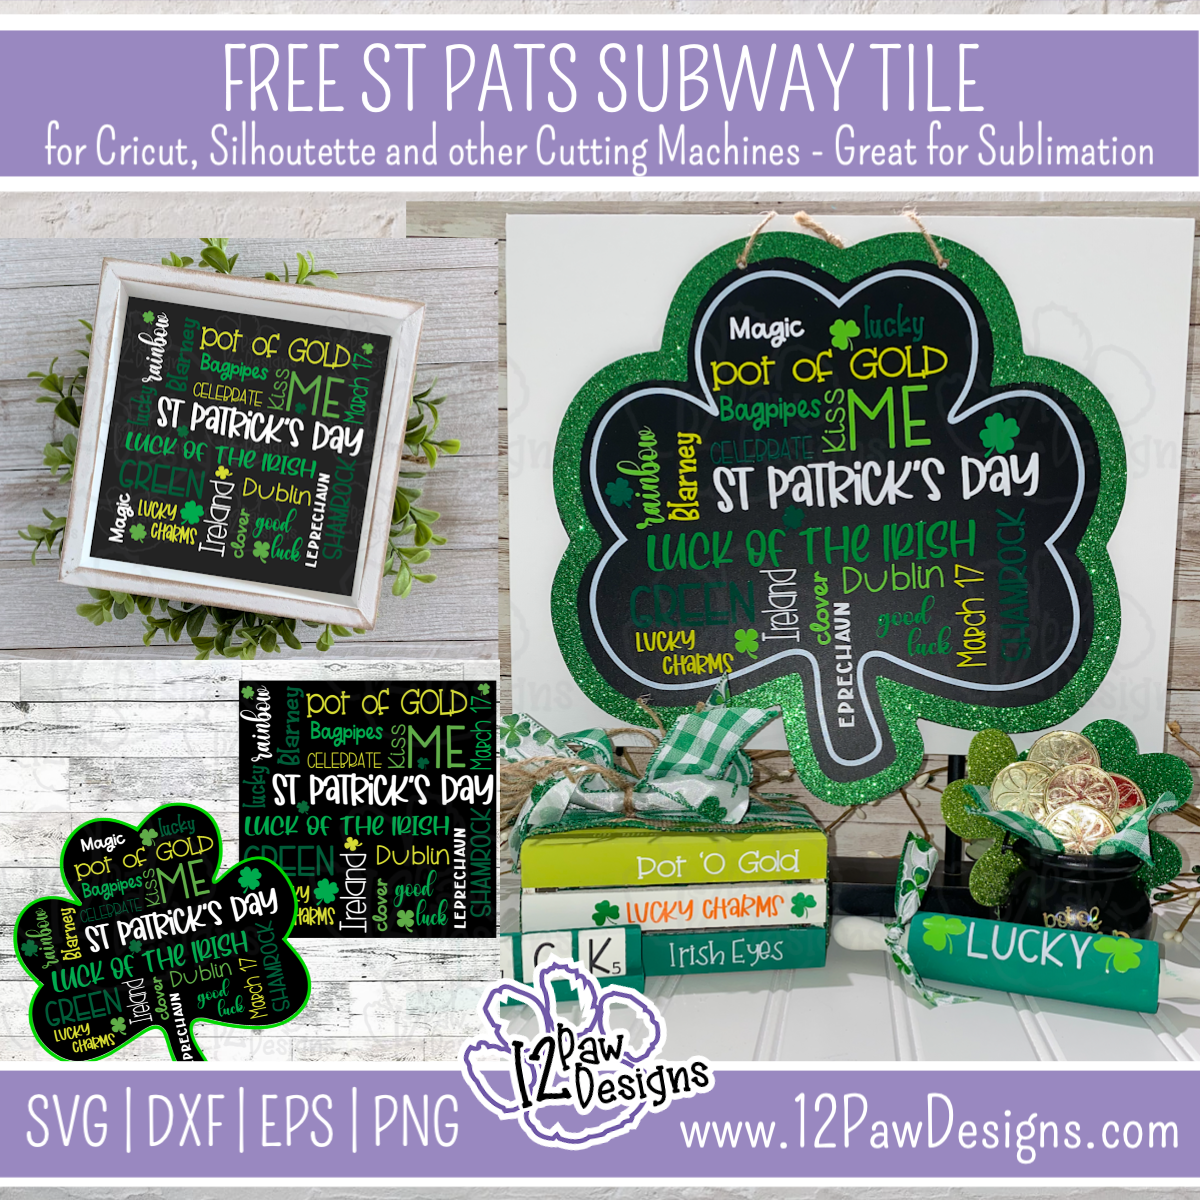
    OH MY LUCKY CHARMS….Subway Tile Signs for you! Here is another Sunday Funday Freebie!!! There are 2 options to chose from! If you have or find a Dollar Tree Shamrock chalk board there is the Shamrock version. I have also designed and made a version to go on a square sign!! Below you will find a video tutorial on how I create registration marks in my cutting software to help layer the vinyl for the sign. I used 5 colors of vinyl in making the signs. I have also grouped the colors for you. So when you load it into your cutting software you just need to add the registration marks and cut!!!

    Supply List

    Cutting Machine and software
    Vinyl– Todays vinyl is from https://www.143vinyl.com/ it is the Starcraft brand and I used White, Pastel Green, Lime Green, Light Green and Green
    Weeding tool, scissors, cutting knife and transfer tape
    Dollar tree – Shamrock chalk board

    Here are some more images of the files for you

    To get your FREE file please go to my Freebie Library, sign in (don’t worry if you are not a member yet, sign up and the password will be emailed to you!!!) and you will see 15. St Patricks Day Subway Tile – Shamrock and 16. St Patricks Day Subway Tile – Square. The zip will will have at least 4 file options SVG, PNG, DXF (If you have the free version of Silhouette Studio you will need this file) and EPS.  For these files today there are 2 PNG files for those of you that do print and cut or sublimation.

    I hope you enjoy the FREE St Patricks Day Subway tile Files. Remember a ? Pintrest pin and following would be so appreciated!

    Also, please check out my shop. I am always adding new designs. You might also find ready made tumblers in there in the future!!!
    https://12pawdesigns.com/shop/

    As a special thank you use code BDAY20 to take 20% off anything in the shop right now! It is my birthday month and I want to share it with you!!!

    If you have any questions or run into an issue please let me know!!!

    Lorri?
    Lorri@12PawDesigns.com

    Let’s Conntect!

    Want to connect more with 12 Paw Designs???:
    • Website: https://12pawdesigns.com
    • FB Page: https://www.facebook.com/12pawdesigns/
    • Instagram: https://www.instagram.com/12pawdesigns/
    • Pinterest: https://www.pinterest.com/12PawDesigns

    DO NOT resell any of the files as digital download or any other form.
    DO NOT claim the files as your own.
    DO NOT modify and resell the files in any form.